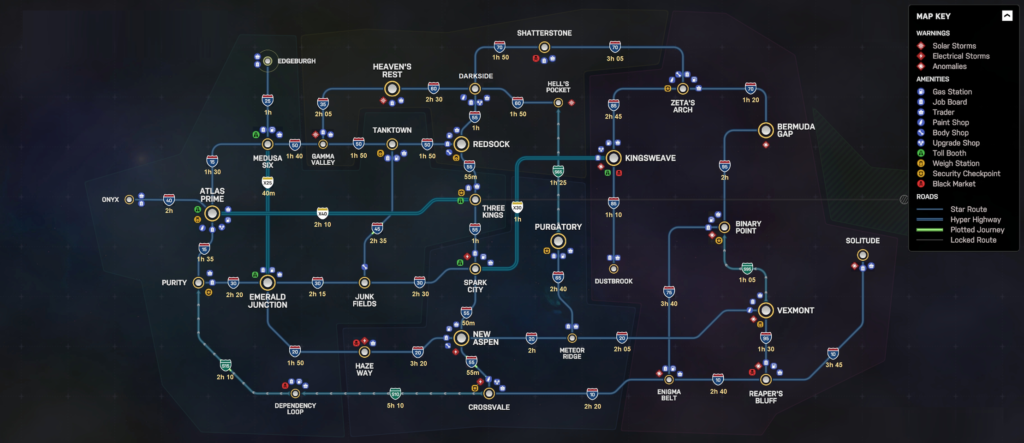
In this Star Trucker map guide, I use the labelled full world map to understand each sector before starting a route. It helps me check roads, jump times, warning zones, amenities, and black market locations in one place, so I can plan deliveries more efficiently and travel across space with fewer surprises.


Labelled Star Trucker Map
Warnings, amenities, roads, jump times, and black market locations are all marked on the Star Trucker map.
When I am checking available jobs, I can still use the map without undocking from the station. After docking, I close the job list and head to the airlock. From there, I can open the job list again or switch to the map, which lets me compare routes and plan my next delivery more easily.
The time shown on the job board is not always reliable. It does not only count gate travel time; it also includes normal driving time, based on following speed limits and staying on the roads. When I plan the route directly on the map, that travel time is shown separately. If I drive more aggressively and do not stick to the safest route, I can usually cut that estimated driving time roughly in half.