The Incident at Galley House is a deduction game in which I reconstruct scenes by entering a time, a location code, and every person who was present. This complete walkthrough takes me through the original Galley House case, the new scenario, the final solution, the two hardest hidden deductions, and all achievements.
Complete Walkthrough and Achievements Guide
I have arranged the walkthrough in the order that the investigation naturally opens. The guide contains full story and puzzle spoilers, so I recommend using the relevant act only when I am stuck.
Table of Contents
How Scene Codes Work
Every valid scene needs three pieces of information: its time slot, the two-letter location code, and all participants. A correct entry follows the format TIME-ROOM-PERSON, such as 01-QU-1-11.
- A person and a room can normally appear in only one scene during the same time slot.
- A code may fail because one additional participant is missing, even when the time and room are correct.
- The animal-labelled photographs are matched through physical clues, clothing, injuries, objects, and dialogue.
- When I get stuck, I review physical evidence, unresolved scene markers, character movements, and rooms that remain unused in a time slot.
- Process of elimination is part of the intended deduction system; the case can be solved without blind guessing.
Initial Machine Setup
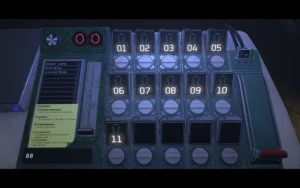
After entering Galley House, I collect the To-Do List and Manual Page 1, turn the generator wheel, obtain my Access Card, and place it in the machine. During calibration, I add the first room codes from the manual: QU, EN, and LI. I also add ST because the Study is immediately useful.
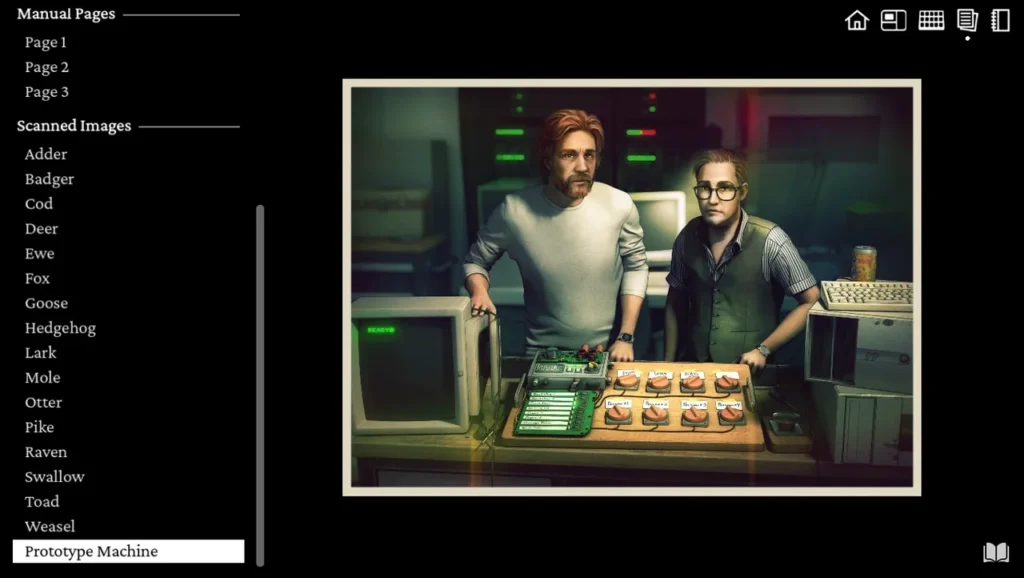
Manual Page 1 gives me three starting scenes: 01-QU-1-11, 02-EN-1-6-7-10, and 03-LI-1-4-5-6-7-8-9. These scenes provide the Invitation, scanned photographs, the Scanner Note, and the Prototype Machine photograph.
Original Galley House Scenario Walkthrough
Act 1: Bootup to the First Death
I begin by identifying the first guests. Person 1 is John Hobbes, person 6 is Eddie Galley, person 7 is Vic, person 5 is Martha Galley, and person 8 is Damian. John is the Lark photograph because he has muddy shoes and an invitation.
Martha takes John and Damian to the Study, giving 04-ST-1-5-8. Eddie follows person 9 to the Billiard Room, giving 04-BI-6-9. This identifies person 9 as Helen Dauer and person 4 as Tony Dauer.
Martha then takes John to the Dining Room in 05-DI-1-5. She sends him to meet the butler in the Study, and the employee from the opening scene must be person 11. I enter 06-ST-1-11 to identify Harry Thornton and obtain Manual Page 2.
Thornton rushes to the Kitchen, so I use 07-KI-11. Manual Page 2 also reveals a much later scene with John at the Entrance: 26-EN-1.
Act 2 Part 1: Tracking Thornton, Evelyn, and the Guests
Thornton gives me a reliable chain of movements. He was alone in the Kitchen when John entered, so I unlock 02-KI-11. Because he was cutting vegetables, Thornton matches the Cod photograph.
The drunk guest from the Entrance is Evelyn Dauer, person 10. Her search for Thornton gives 03-KI-10-11. She matches Goose because of the cocoa mark and her intoxication. Damian is Mr. Maseko, and his Kitchen scene with Evelyn and Thornton is 05-KI-8-10-11.
Damian takes Evelyn to Eddie’s Room in 06-ED-8-10, and she later sleeps there alone in 07-ED-10. Eddie and Evelyn were drinking in the Billiard Room before the gathering, which gives 01-BI-6-10. Tony matches Otter because of the army recruitment clue, while Eddie matches Weasel because he burns his hand while preparing a drink.
Tony visits Evelyn in 08-ED-4-10, while John and Eddie speak in the Kitchen in 08-KI-1-6. The attic conversation identifies person 2 as Annie Beaumont and person 3 as Oswald Galley: 03-AT-2-3, followed by 02-AT-2-4 and 01-AT-2.
I complete the early gathering with 02-LI-5-8-9, then find Vic and Damian repairing the telephone in the Dining Room with 01-DI-7-8. Dinner is 07-DI-1-2-4-5-6-7-8-9. John later meets Oswald during his late meal in 09-DI-1-3 and Tony in 10-TO-1-4. Oswald’s temporary bedroom scene is 07-ST-3.
Helen matches Ewe because John spills red wine on her. Oswald matches Toad because of his old-fashioned appearance and moustache.
Act 2 Part 2: Bedrooms, Arguments, and the First Night
I fill the remaining evening movements through 08-DI-2-7-8-9, 09-VI-2-8, 06-LI-2-9, 05-LI-3-9, and 06-DI-5-6-7. Vic’s search for billiard chalk leads to 05-BI-6-7, and her talk with Annie is 04-AT-2-7.
The pocket-watch subplot is solved with 05-AT-2-4, 01-HE-4-9, and 04-HE-4. With Tony accounted for, the unidentified man who entered the Kitchen must be Oswald, giving 04-KI-3-10-11.
Annie meets Oswald in the Dining Room in 10-DI-2-3, then goes to his room in 11-OS-2-3. Martha and Oswald argue upstairs in 08-MA-3-5; Vic comforts Martha in 09-MA-5-7. Martha matches Hedgehog because she removes her wedding ring.
The piano draws John, Vic, and Damian into the Living Room in 11-LI-1-7-8. Damian discovers Evelyn’s body in 10-ED-8. Helen confronts Eddie in 11-BI-6-9, and the scream brings the surviving household together in 12-BI-1-2-3-4-5-7-8-9.
The night scenes are 13-AT-2, 13-ST-1, 13-OS-3, 13-MA-5, and 13-VI-7-8. Tony and Eddie require the wardrobe deduction: Eddie hides in Tony’s Room in 12-TO-6, then waits for Tony in 13-TO-4-6.
The next research note directly provides 15-VI-1-2-4-5-7. I can also reconstruct Vic’s forgotten conversation with Helen in 10-LI-7-9. Vic matches Raven because she is pregnant, and Damian matches Pike because of his muscular build.
Act 3: The Second Day and the Death Chain
The morning begins with 14-AT-2-4 and 14-VI-7, followed by Martha and Vic in 16-DI-5-7. Eddie and Oswald argue in the Dining Room in 15-DI-3-6, then the search moves to 16-KI-1-2-3-4-6 and 17-KI-2-3-4.
Oswald’s earlier conversation with John and Martha is 14-DI-1-3-5. Eddie is the otherwise unaccounted-for piano player in 14-LI-6. John follows Martha to her bedroom in 17-MA-1-5, which opens the old Oswald and Martha scenes 01-LI-3-5 and 02-OS-3.
Eddie and Vic are the two people heard above the Kitchen, so I use 17-DI-6-7. Annie reaches Vic in 18-VI-2-7, identifying Annie as Badger through her handwritten list of names.
Oswald remains trapped in the Kitchen in 18-KI-3. John and Tony meet in the Attic in 18-AT-1-4, followed by John and Annie in 19-AT-1-2. Annie sends John to the telephone in 20-DI-1.
At this point, I can see the central pattern: every thunderclap marks a curse death, and the original character IDs count down in death order. The later Living Room scenes are therefore 20-LI-2-5, 21-LI-1-2-4, and 22-LI-1.
John and Annie reach the Chapel in 23-CH-1-2. John then answers the telephone in 24-DI-1. The next generator failure provides Manual Page 3 and the List of Names.
Act 4: Hidden Victims and the End of the Original Case
Annie spoke with Oswald in the Chapel in 22-CH-2-3, and Oswald had been alone there in 21-CH-3. Tony freed him from the Kitchen in 20-KI-3-4 after Eddie died in 19-DI-4-6. Martha spoke with Oswald in 19-KI-3-5 and with Eddie in 18-MA-5-6.
Eddie’s earlier confession opens 10-MA-5-6 and proves he was present for Evelyn’s death in 09-ED-6-10. Tony’s missing bedroom scenes are 11-TO-4-5 and 09-TO-4-9.
Inciting Incident: How to Find Victim 12
The Study contains a body nobody remembers, and the first thunderclap occurs at time 01. Since the known victims count down from 11, the earlier victim must be ID 12. I manually create profile 12 and enter 01-ST-12. This reveals Rupert Galley, who matches Fox because of the piano key, cane, and old leg injury.
Not Over Yet: How to Find Katherine
John’s death is caused by his fall rather than the curse, yet a distant thunderclap occurs immediately beforehand. Katherine, the mother of Vic and Annie, still remembers Annie during the phone call and lives in Wintercote. I create profile K and enter 25-WI-K. Katherine matches Deer because of the broken teacup and her limited mobility.
John’s final scenes are 25-AT-1 and 26-EN-1. Completing the original case awards the Admin Card and starts the new scenario.
What Happened at Galley House?
The curse kills anyone who personally remembers the previous victim. Each death is accompanied by a thunderclap, and the victim is erased from everyone else’s memory even though physical evidence remains. Rupert remembers an earlier victim and dies first; Thornton remembers Rupert; Evelyn remembers Thornton; Helen remembers Evelyn; Damian remembers Helen; and the chain continues through the household.
John survives the supernatural chain but is devastated by memory loss, Annie’s death, and the belief that he may have caused it. He jumps from the Attic. Katherine becomes the final curse victim after John reminds her of Annie. The neighbors she sent to Galley House later discover the bodies without remembering why they came.
New Scenario Walkthrough
Act 5: The Investigation Team
I replace my Access Card with the Admin Card. The newly discovered body is Lawrence Dunn, ID 67, whose role is Machine Supervisor. My own profile is Reya Beckon, ID 70, the Junior Engineer.
A thunderclap sounded when I entered the house, and Lawrence’s note points to time 31. The piano and fireplace place the event in the Living Room, while Reya and Lawrence were both present. I enter 31-LI-67-70 and receive the List of IDs.
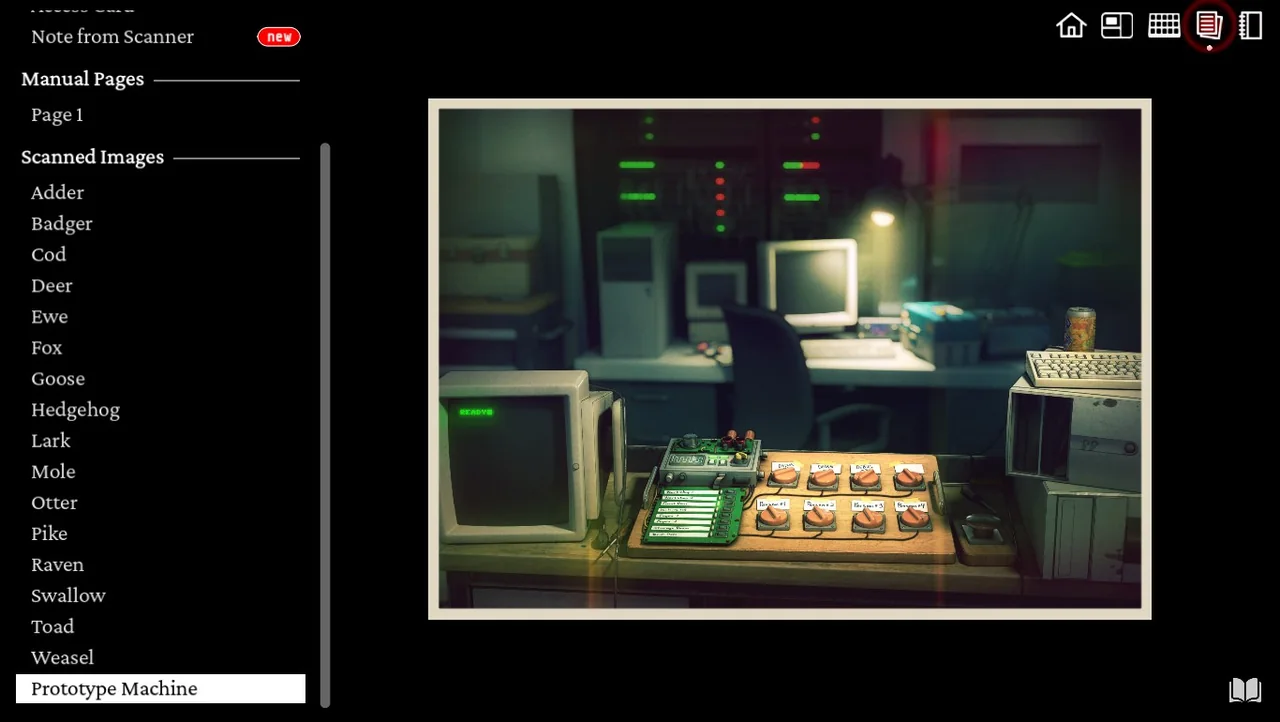
The original Prototype Machine photograph initially shows the machine without the forgotten staff members who were later erased from memory.
The new timeline contains deaths at 27, 28, 29, 30, and 31. Reya remains alive, which is why 32-LI-70 does not produce a normal memory but unlocks the Still Alive achievement.
Meg is ID 66 and the Technical Engineer. Lawrence says she threw the bag down the dumbwaiter at time 29, giving 29-DI-66-67. She later checks on Reya in 30-LI-66-70 and goes downstairs for the IDs in 31-KI-66.
Pippa Smith is ID 74 and the Researcher. Lawrence meets her in the Study in 30-ST-67-74, while she helps Reya in 29-LI-70-74. Mason Gibbs is ID 73 and the Geography Teacher. Jacqueline is ID 75 and the Lawyer. Sam Moore is ID 65 and the Directing Manager.
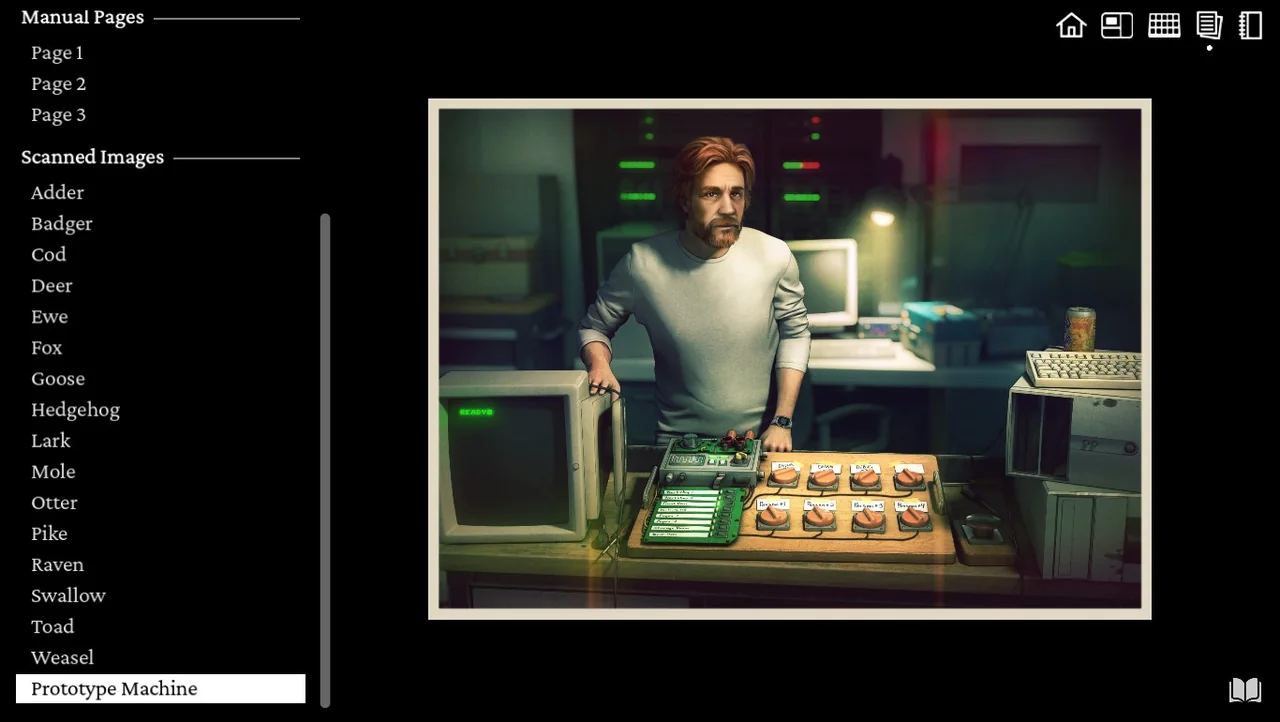
The changed photograph reveals Sam Moore, the redheaded and bearded man associated with the prototype machine.
Meg meets Sam in the Billiard Room in 28-BI-65-66 and encounters Jacqueline in the Attic in 27-AT-66-75. Mason and Pippa wait in the Dining Room in 28-DI-73-74. Lawrence works with Reya in 28-LI-67-70, while Mason later enters the Billiard Room in 29-BI-73.
Sam speaks with Mason in 27-DI-65-73. Pippa brings Lawrence and Reya through the Entrance in 27-EN-67-70-74.
Act 6 Finale
After another generator reset, ID 64 appears: Edwin Dolskey. His photograph is labelled as someone no longer at the company, and the prototype image changes again.
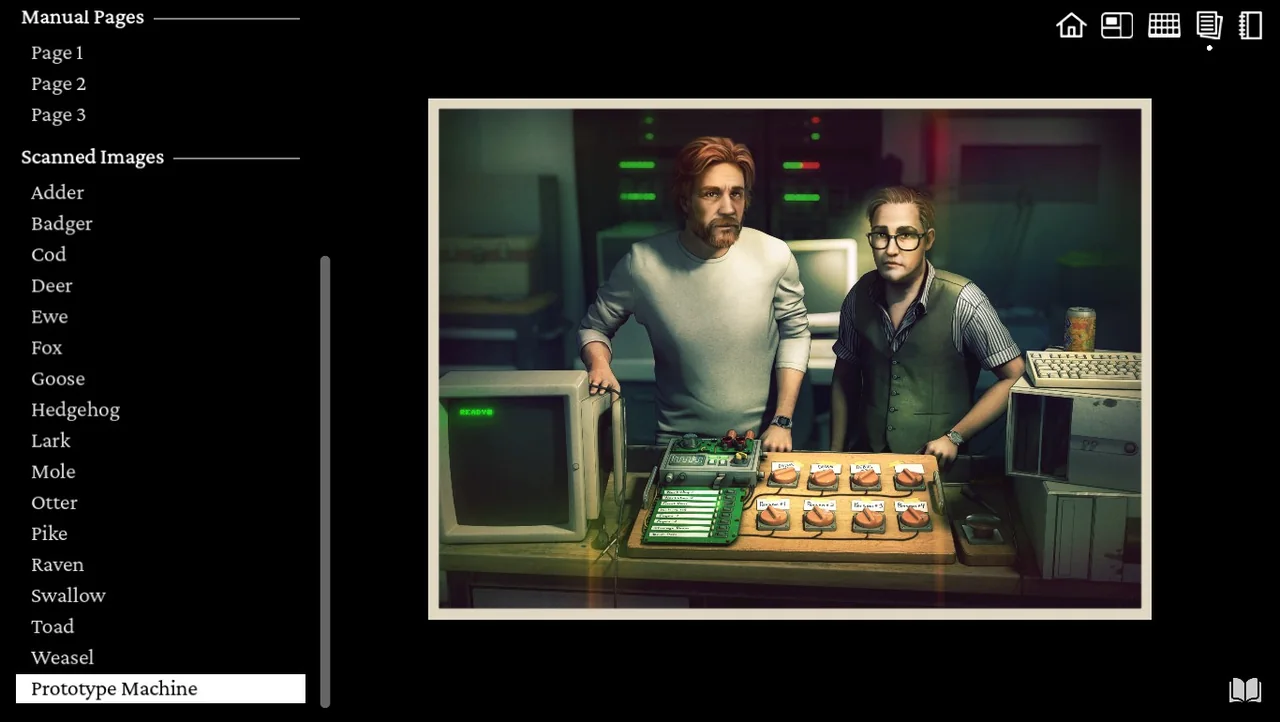
Edwin’s earlier Study scene is 28-ST-64. In the final timeline, he walks to the hill and dies alone at the Chapel, giving 32-CH-64.
The scanner then produces a group photograph marked 00. The painting identifies the Living Room, and the people shown are John, Oswald, Martha, Eddie, Vic, Damian, and Evelyn. I finish the reconstruction with 00-LI-1-3-5-6-7-8-10.
After the credits, I open the lighter and flick it repeatedly until it sparks to complete the final interaction.
All Achievements
The Incident at Galley House has story, deduction, and miscellaneous achievements. Most story achievements unlock naturally, while several require unusual code entries.
Story and Completion Achievements
Seance
I unlock Seance by viewing my first valid reconstructed scene.
Machine Supervisor
I restore the power after the first generator failure and complete the first major section of the investigation.
Researcher
I restore the generator for the second time after completing the first night and the scenes around time 13.
Technical Engineer
I complete the next major act and restore the generator again after uncovering the original death chain.
House Tour
I view at least one scene in every required room of Galley House. The Chapel is not required for this achievement.
Full House
I enter every location code into the machine, including the bedroom, Chapel, and Wintercote codes.
Inciting Incident
I manually create victim 12 and view 01-ST-12.
Not Over Yet
I create Katherine as profile K, add Wintercote as WI, and view 25-WI-K.
A Shocking Revelation
I view every required scene from the original Galley House scenario and complete the original case.
Hallucination
I complete the new scenario and reach the credits.
Spectronoeticist
I view every scene in both scenarios. If it does not unlock at the ending, I reload the completed save and check for any optional scene I missed.
Miscellaneous and Secret Achievements
Persistence
I enter the same incorrect code twice. Any deliberately invalid combination works.
Death Note
I place the skull reminder marker on any time slot in which a death occurs.
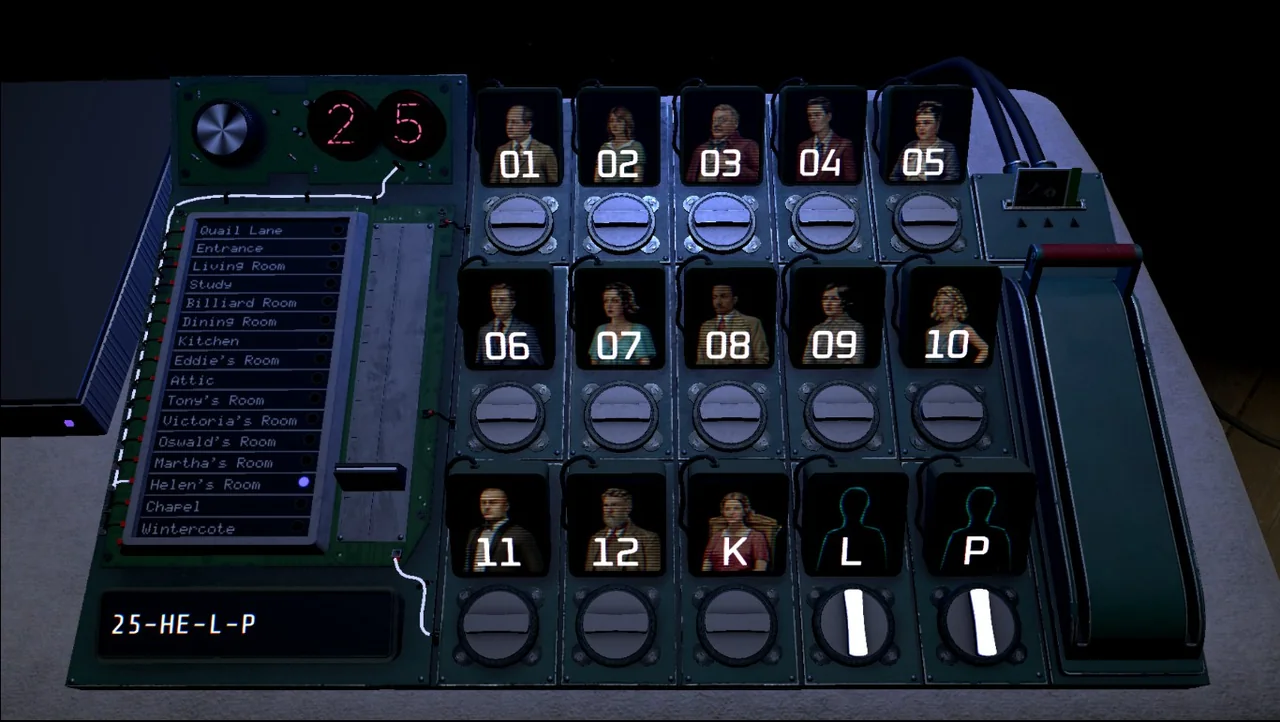
TYPE HE-L-P
I select Helen’s Room, manually create profiles L and P, and enter the code as HE-L-P. The time value is not important for the wordplay.
Still Alive
During the new scenario, I try 32-LI-70. Reya is the only person in the attempted scene and is still alive, so the machine cannot reconstruct it normally.
To finish The Incident at Galley House, I reconstruct the original timeline, identify Rupert and Katherine through manual calibration, switch to the Admin Card for the new scenario, reveal Edwin Dolskey, enter the 00 group-photo code, and complete the lighter interaction after the credits.