To build Wing Divers in EDF 6 and ensure their survival, you can use the tips on weapons, status effects, and more in this guide.
EARTH DEFENSE FORCE 6 Wing Diver Guide
This guide will help you survive better and help your team as a wing diver in EDF 6 with tips, tricks and advice.
Energy Management
- Preloading Shots: Try to preload your shots whenever you can. This might make a beeping sound, but it helps you fly longer because you use less energy in fights.
- Emergency Charge: When your energy is low, quickly tap the jump button to trigger an emergency charge if it’s safe. It’s faster than waiting for a full charge.
- Being Vulnerable: While emergency charging, you’re vulnerable. If enemies get close, drop from a building or ledge to buy extra time for energy recovery. Alternatively, use a shield if the danger is coming from one direction.
- Weapon Charging: Some Wing Diver weapons are strong enough that you don’t need to fully charge them to defeat a target, especially small enemies. For example, a 25% charge on your plasma cannon is enough to take down a single spider.
- Skip Dashing: When low on energy and you can’t fly or fight, use skip dashing (jump + dash on the ground). This keeps you moving and slowly reloads your energy tank, helping you avoid getting overwhelmed by enemies.
Aggro System and Strategies
Aggro Levels:
- Security Mode: Enemies are patrolling and don’t see you.
- Battle Mode Unaware: Enemies are fighting but don’t know you’re there unless you get close.
- Battle Mode Aware: Enemies see you and start moving towards you.
- Targeting: Enemies will always target the closest visible ally or the one that fired at them.
Aggro Strategies:
- Zoom and Boom: Fly over enemy groups to get their attention. After they’re packed together, attack or let your Air Raider attack.
- Wait and Boom: Stay on a ship or tower where enemies can’t reach you. Wait for them to gather below and then attack.
- Decoying: Fly over enemies to draw their attention if you don’t have the energy to attack. This helps protect your teammates.
- Infantry Ambushing: Hide in buildings and wait for enemies to move to your last known position, then ambush them from behind.
Status Effects and Enemy Classification
Ragdoll vs. Flinch:
- Ragdoll: Throws enemies around, making them easier to handle. Not all enemies can be ragdolled, but all can be flinched (briefly interrupted by damage).
- Flinch: Slows enemies down even if they can’t be ragdolled.
Armored vs. Unarmored:
- Armored: Takes less damage when hit on armor (e.g., some droids, drones).
- Unarmored: Takes full damage with no reduction (e.g., ants, bees).
Enemy Classification:
- Ants, Bees: Cannot be ragdolled, unarmored.
- Queen Bees: Can be ragdolled briefly, unarmored.
- Pillbugs, Spiders: Can be ragdolled, unarmored.
- Small/Medium Androids: Can be ragdolled, armored.
- Giant Androids: Cannot be ragdolled, armored.
Positioning and Terrain
- Shield Cornering: Hide behind an ‘L’ or ‘U’ shaped corner or wall with a shield to regenerate energy. Be careful of enemies using area attacks or weapons that go through obstacles.
- Structures Hitboxes: Alien structures (ships, bases) have hitboxes that can vary. Don’t rely solely on these for cover; use a shield as extra protection.


- Height Importance: High ground gives you an advantage. It helps you stay safe from enemies who can’t reach you and makes it harder for them to chase you.
- Cover Spots: Use rooftops, ledges, or tall structures to stay safe and regenerate energy. Avoid staying in valleys or low ground.
Dealing with Blocking and Situational Awareness
Blocking: Some enemies block hits. The first hit usually gets through, especially from the sides or behind. Use powerful single-hit weapons or cripple them first if using multi-hit weapons.
Situational Awareness: Always check your radar. Avoid getting surrounded by watching for map corners and incoming reinforcements. Use shields to protect yourself when necessary.
Common Mistakes
- Overcommitting: Don’t use all your energy attacking. Stay safe and manage your energy carefully.
- Poor Weapon Selection: Choose weapons that fit your team’s strategy. Avoid close-range weapons if your team uses long-range attacks.
- Bad Rescues: Rescue teammates wisely. Don’t revive them in dangerous situations without a plan for escape.
Dodging Patterns
Bees:
- Move left or right to avoid their attacks. Don’t go back where you came from because bees might attack from different directions.
- If you need to dodge forward or backward, use a shield to stay at the same height and recharge energy.
T3 Drones:
- Use your shield and move backward if the drone is facing you. If you don’t have a shield, move to the opposite side of where the drone is turning. For example, if it’s turning clockwise, move left; if counterclockwise, move right. This makes it harder for the drone’s lasers to hit you.
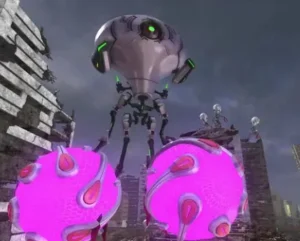
Tadpoles:
- Tadpoles attacking from multiple directions are tricky. Try to get them coming from just one direction using your shield, running away, or leading them away without attacking. Once they’re coming from one direction, it’s easier to manage them. They land when they hit the ground, so flying low or hiding between buildings can help. If you stay in the air and keep moving in one direction, you’ll be safe since they only shoot when aligned with you. Use a low-energy weapon to pick them off one by one.
Tripod Robots and Chaingun/Blaster Infantry:
- Keep moving left or right until they finish their attack. Then, quickly dive in with your preloaded weapon. Only engage if you’re sure they’re about to attack.
- For Tripod Robots, they bounce back a bit with each hit. Use a Dragoon Lance for close-up attacks or wait until you’re very close to use a Phalanx. Attack from a higher altitude if you can to adjust better. If Tripod Robots start attacking with their feet, stand still, dodge their attack, and then shoot when they rush at you.
Weight Divers
- Weight Divers use heavy equipment that gives them a big energy pool, fast energy recharge, and quick weapon charging, but sacrifices mobility.
- They can use powerful weapons that would normally drain energy quickly.
Tips for Weight Divers:
- Mirage: Good for shooting down bees or small enemies.
- Dragoon Lance: Effective for taking out enemies from a distance.
- Plasma Great Cannon: Great for taking out unarmored enemies, damaging armored enemies, and dealing with large groups.
- Geist: Good for controlling groups of enemies from the sides, but avoid friendly fire.
- Raijin: Ideal for picking off unarmored enemies from afar.
Using Big Cores:
- This build is very powerful but needs team support. Don’t try to handle everything on your own. Ask your team for cover or bunkers.
- Big cores can use powerful weapons, but you’ll need your team to help avoid being overwhelmed.
EDF 6 Wing Diver Weapons and Based Defenses
Gleipnir and Ghost Chaser:
- Great for stopping and slowing small enemies like ants or small androids. They can also make bees and tadpoles easier to handle.
Plasma Cannons:
- Use these for knocking enemies around on the ground and dealing with large areas of enemies.
Rapier:
- Useful for bouncing off enemies like pillbugs when you’re on the ground, keeping you safer in emergencies.
Pulse Machine Guns:
- Perfect for blocking tunnels in cave missions or stopping incoming waves of monsters, especially effective against ants.
Note: Sometimes it’s worth dedicating a weapon slot to controlling enemies, especially if other team members focus on eliminating them.
Radar Aiming and Common Mistakes
Radar Aiming:
- Use your radar to aim when the situation is chaotic or visibility is low. For example, when fighting ants, you can use radar to aim and shoot while jumping back.
Common Mistakes:
- Overcommitting: Using all your energy in one attack and then being unable to escape is dangerous. Keep some energy in reserve or use low-energy weapons.
- Poor Weapon Selection: If your team has certain types of weapons, pick a build that complements them. Avoid choosing weapons that don’t fit with your team’s strategy.
- Misusing Close-Range Weapons: In harder missions, rushing into a group with close-range weapons can get you killed. Save these weapons for isolated enemies.
- Rescue Mistakes: Be careful when rescuing teammates. If you can’t protect them or if there’s no cover, it might be better to wait. Wing Divers and Fencers are more useful to revive because of their mobility.
- Rescue Tips: You don’t have to land to revive someone. Dash over their body and interact to help them while flying. If enemies are nearby, use a shield to protect them during the rescue.
Kill List
Focus on These First:
- Red bees, green ants, T2 and T3 drones, laser and sniper infantry, blue krakens, queen bees, and tadpoles.
Annoying Enemies:
- T1 drones (if there are too many), sniper infantry, gold ants, unarmored infantry (they move fast), spider kings, flying squids, medium-sized androids, and others.
Manageable Enemies:
- Armored infantry, T1 drones, androids, and spiders.
Less Problematic:
- Normal spiders, big androids, and blue drones.
Tough Monsters:
- Giant monsters like sirens or erginius. Don’t tackle these alone if your team is struggling.