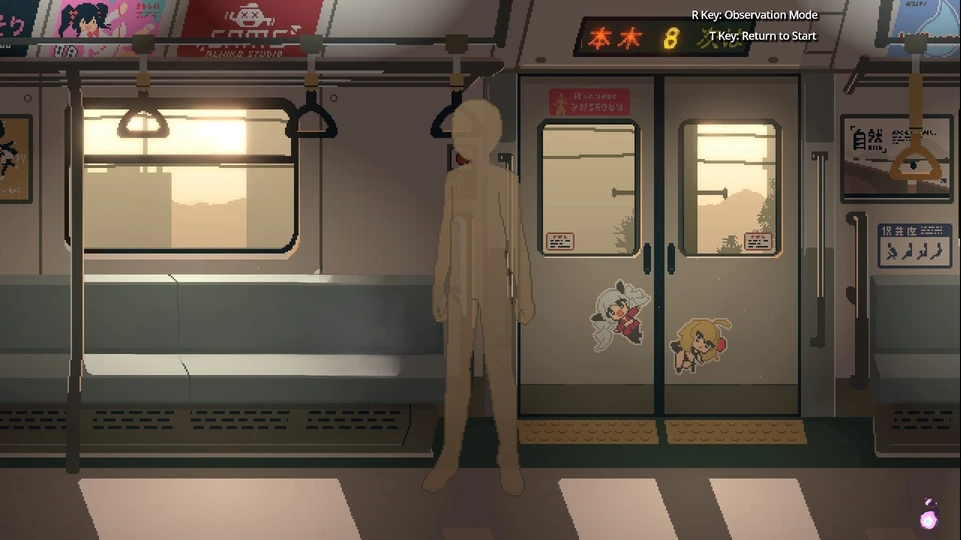
In this Train45 walkthrough, I explain how I find every anomaly car, solve terminal route puzzles, collect key items, unlock special event carriages, and reach the true ending. The game has 57 anomaly cars across six chapters, along with item routes, story routes, and final ending requirements.
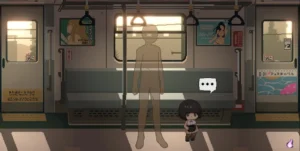
All Anomalies & Terminal Routes
In this guide, I’ll first cover the complete list of anomaly vehicles on Train 45, then examine terminal vehicle routes, item rewards, special event routes, story wagons, and the actual final condition. I’m not using visuals here, so each entry focuses on the location clue, route number, or action I need to remember.
Table of Contents
How Anomaly Cars Work
Cars marked with a box icon contain Lost Item Boxes, which become available around the second half of Chapter 4 and are tied to the Butler’s affection progress. There are 11 Lost Item Boxes in total. You can purchase Lost Item Location Hint -1- and Lost Item Location Hint -2- from the Butler to make them easier to find, but these hints are optional—the boxes can still appear and be collected without purchasing them.
Cars marked with numbered character icons are special event cars tied to the heroines’ Affection Levels. Each heroine has one special event for every Affection Level from 1 to 8. When a heroine’s Affection gauge is nearly full or has just reached the next level, the corresponding Affection event car is given higher priority and is more likely to appear as the next anomaly. However, this does not apply if the next destination is a Terminal Car.
All Anomaly Cars
01. White Liquid
- I find this anomaly at the upper-left advertising area near the middle door, where a thick white liquid appears.
02. Crows
- A large number of crows appear on the wires outside the train window. I can press Space anywhere to sense this anomaly.
03. Button
- The indicator light on the left side of the right door turns green.
04. Black Bra
- A black bra appears between the hanging straps above the left side of the middle door.
05. Window
- A tall ghostly figure appears reflected in the window between the middle door and the right door.
06. Upper Body Change
- The heroine’s upper outfit changes into a more exposed version.
07. Stickers
- Multiple repeated stickers appear on the glass of the middle door.
08. Flying Underwear
- I can see white underwear flying outside the window between the left door and the middle door.
09. Empty Car
- There is no visible anomaly in this car. I only need to walk directly to the far right side.
10. Reverse
- The train appears to move in the opposite direction. The easiest clue is that the shadows of the utility poles inside the car move toward the right. I can press Space anywhere to sense it.
11. Extended Car
- The area to the right of the middle door becomes unusually stretched.
12. Shadow
- The shadow of the utility pole inside the train changes into an unusual adult-shaped silhouette.
13. Gaze
- A red moving eye appears below the seat on the left side of the middle door.
14. Tunnel
- This car cannot be sensed normally. I need to move while the outside of the window is completely dark inside the tunnel. If the ghost outside the window sees me, I fail the encounter.
15. Flooding
- This car cannot be sensed normally. The train car floods, so I need to reach the far right quickly. I should also remember the four direction clues near the right door because they are used later for a puzzle.
16. Poster Clothing Change
- The lower half of the bikini girl poster on the left side of the middle door changes.
17. Acceleration
- The train becomes much faster, and the scenery outside the window moves more quickly. I can press Space anywhere to sense it.
18. Low Speed
- The train speed drops noticeably. I can press Space anywhere to sense it.
19. Watching
- Half of a female ghost’s face appears near the right door. If I have the Broken Key equipped, clearing this anomaly unlocks an extra interaction.
20. Hairstyle
- The heroine’s hairstyle changes. Mai changes from long hair to short hair, while Rena changes from short hair to long hair.
21. XXX Poster
- The XXX marks on the bunny girl poster to the right of the middle door gradually increase.
22. Shaking Poster
- The bikini girl poster on the left side of the middle door visibly moves with the train’s shaking.
23. Chibi Form
- The heroine turns into a small chibi-style version with a 2.5-head body proportion.
24. Flashlight
- This car cannot be sensed normally. The carriage becomes dark, and when I reach the far right, enemies attack from both sides. I need to use the flashlight while keeping a safe distance.
25. Expanded Advertisement
- The square advertisement to the right of the left door stretches and reveals a more explicit version of the poster.
26. Seat Eyeball
- An eyeball sometimes appears on the seat to the left of the right door.
27. Fogged Glass
- A blurry human-shaped steam mark appears on the glass of the right door.
28. Exit Advertisement
- The red strip advertisement character on the left glass panel of the right door is replaced with a ghost-face bomb.
29. Tactile Paving
- Half of the raised bumps on the yellow tactile paving near the lower-left door area flicker in and out.
30. Doll
- This car cannot be sensed normally. I see a scarecrow on the seat, then a female ghost appears near the center. I need to lead her back to the scarecrow position to clear it.
31. Slingshot Bikini
- The bikini in the square poster on the left side of the left door changes into a slingshot bikini style.
32. Lower Body Exposure
- The heroine’s lower outfit changes into a more exposed version.
33. Giant Konial
- A giant Konial head appears outside the window between the middle door and the right door.
34. Upper Body Exposure Plus
- The heroine’s upper body appears in a more explicit state. After sensing it successfully, I can use Space for an extra clearing interaction.
35. Falling Ghost
- A faceless female ghost suddenly drops between the front door and the middle door. If I have the Broken Key equipped, clearing this anomaly unlocks an extra adult interaction.
36. Snow Woman
- This car cannot be sensed normally. I need to dodge the delayed icicles marked by red circles until the gauge ends. I should also remember the three numbers near the lower right door area because they are used later for a puzzle.
37. Hug
- This car cannot be sensed normally. A female ghost comes out of a dimensional crack and follows my movement. I need to guide her into the talisman two or three times without being caught.
38. Search Exposure
- The heroine appears in a different exposed pose. Mai and Rena have different versions of this anomaly.
39. Disguise
- A figure lies across the seat near the left side of the right door and disguises herself as part of the seat. If I have the Broken Key equipped, clearing this anomaly unlocks an extra adult interaction.
40. Adult Poster
- The square girl poster to the right of the left door changes into an adult-themed poster.
41. Bondage Poster
- The poster girl on the left side of the left door changes into a restrained adult-themed version.
42. Walking Object
- An adult-shaped object appears in the middle of the car and runs around.
43. Fashion
- The poster can change into several different variants rather than one fixed outfit. If the Broken Key is equipped, clearing the anomaly also unlocks an additional interaction.
44. Priority Seat
- The priority seat sign on the right side of the right door changes into an adult-themed icon.
45. Bunny Girl
- The clothing on the bunny girl poster to the right of the middle door changes into a bikini.
46. Rei and Kokyo
- The two collaboration mascot girls near the lower right door area swap outfits.
47. Diving
- An adult-themed detail appears in the festival poster below the middle door.
48. Arnikol
- The swinging character in the red poster above the window between the middle door and right door is replaced with a Konial head.
49. Search Exposure Plus
- Rena and Mai have different exposed versions of this anomaly. After sensing it, I can press Space for an extra clearing interaction.
50. Hidden Toy
- A small adult toy is hidden near the seat at the lower-left side of the right door.
51. Poster Backside Change
- The red poster above the window between the left door and middle door changes into a more explicit version.
52. Poster Underwear Detail
- The poster above the window between the middle door and rear door shows a visible underwear detail.
53. Tentacles 1
- Tentacles wrap around the handrail.
54. Tentacles 2
- Tentacles wrap around the top of the handrail above the right side of the middle door.
55. Tentacles 3
- Tentacles appear beside the seat in the lower-right corner near the right door.
56. Upper Poster Change
- The woman in the poster near the upper-right side of the left door changes into a more explicit version.
57. Half-Destroyed Car
- The entire train car becomes damaged and messy.
Terminal Cars, Items and Puzzle Routes
There are 19 terminal car collections. The first 8 terminal cars give the first 8 items in the item list. Items 9 to 19 can be bought from the butler shop, and item 20 is received through the story. For the item terminal cars, I need to buy the hints from the butler first; otherwise, I may not be able to enter them early by guessing.
A. Torn Fan
- Route: 18-19-20-21
- Destination: Broken AC Car
- Reward: Item 05, Rough Fan
B. Train Inspection Report -2-
- Route: 13-14-30-5
- Clues: Gaze, Tunnel, Doll, Window
- Destination: Rest Room
- Reward: Item 04, Empty Beer Can
C. Padlock
- Route: 1-2-13-8
- Clue: In Car 15, the flooding car, I can find the direction clue left 2, right 4, left 3, right 6.
- Destination: Security Car
- Reward: Item 06, Broken Key
D. Groper Warning
- Route: Choose any three from 6, 32, 34, 38, and 49
- Clue: These are heroine exposure-themed anomaly cars.
- Destination: Groper Warning Car
- Reward: Item 07, Lock with a Blocked Keyhole
E. Slow Zone Notice
- Route: 44-29-18
- Clues: Priority Seat, Tactile Paving, Low Speed
- Destination: Slow Car
- Reward: Item 08, Ancient Record Tablet
F. Broken Clock
- Route: 10-5-40
- Clue: The pocket watch shows 1:20:40, and the hint says it is 3 hours and 15 minutes fast. The corrected time becomes 10:05:40.
- Destination: Passing Car
- Reward: Item 01, Silent Alarm Clock
G. Validated Ticket
- Route: 50-23-47
- Clue: The punched positions on the flipped tickets reveal the route numbers.
- Destination: Ticket Check Car
- Reward: Item 03, Used Lipstick
H. Lover’s Letter
- Route: 9-16-29
- Clue: The letter points me toward snow, and the numbers are found in the Snow Woman car.
- Destination: Strong AC Car
- Reward: Item 02, Daruma Doll
Special Event Terminal Cars
For these terminal cars, I must bring the correct character. If I enter with the wrong character, the event will not trigger and I need to run the full route again. The character portrait on the right side is the hint.
I. Flyer – Hot Spring Car
- Requirement: Rena affection level 5 or higher
- How I get the clue: Unlock the Hot Spring conversation topic.
- Route: 15-1-27
- Required companion: Rena
- Destination: Hot Spring Car
- Extra note: I also get hint number 54 from the car door.
- Unlock: Rena special adult event, Side-Lying
J. Dog Collar
- Requirement: Rena affection level 6 or higher
- How I get the clue: Unlock the Cooking conversation topic.
- Route: 6-17-23-28
- Required companion: Rena
- Destination: Pet Car
- Unlock: Rena special adult event, Puppy Outfit
K. Train Inspection Report -3-
- Requirement: Mai affection level 5 or higher
- How I get the clue: Unlock the Favorite Animal conversation topic.
- Route: 7-22-24-32
- Required companion: Mai
- Destination: Malfunction Car
- Unlock: Mai special adult event, Cat Outfit
L. Flyer – Pachinko
- Requirement: Mai affection level 6 or higher
- How I get the clue: Unlock the Intuition conversation topic.
- Route: 46-45-31
- Required companion: Mai
- Destination: Collaboration Car
- Extra note: I get hint number 45 from the wall.
- Slot machine note: After successfully stopping all three reels on the rabbit symbol, interact with the ball dropped by the slot machine to trigger the event.
- Unlock: Mai special adult event, Bunny Girl
M. Black Bikini
- Requirement: Obtained after Mai affection level 7 special event
- Route: 30-28-10
- Required companion: Rena
- Destination: Changing Room
- Unlock: Rena special adult event, Swimsuit
N. Empty Milk Bottle
- How I get the clue: After Chapter 5, enter Car 12, Shadow, sense it successfully, and interact with the lost item box.
- Route: 4-5-8-12
- Required companion: Rena
- Destination: Nursing Room
- Unlock: Rena special adult event, Nursing Room event
- Note: The number on the back of the bottle is 5, not 2.
O. Door Repair Notice
- How I get the clue: After Chapter 5, enter Car 13, Gaze, sense it successfully, and interact with the lost item box.
- Route: 3-5-7
- Required companion: Mai
- Destination: Door Malfunction Car
- Unlock: Mai special adult event, Door Malfunction event
P. Rod and Rope
- How I get the clue: In Chapter 6, enter Car 57, Half-Destroyed Car, sense it successfully, and interact with the lost item box.
- Route: 33-36-41
- Clue: The rod has three sides, and the paper strip wraps around it. The numbers grouped with 33 lead to 33-36-41.
- Destination: Punishment Car
- Unlock: Pazuzu special adult event
Story Terminal Cars
Q. Path to the Storage
- How I get it: Story task after navigation unlocks in Chapter 4
- Route: 3-4-5
- Destination: Butler’s Lost Item Storage
R. Memo – Dark Room
- How I get it: Chapter 5 story
- Clues: Reverse movement, green light, being bound, and birds outside
- Route: 2-3-10-41
- Destination: Dark Room where Pazuzu is held
S. Konial’s Memo
- How I get it: In Chapter 6, I dispel anomalies several times until Kokonia reveals the final car location.
- Clues: Hot Spring gives 54, Roulette/Pachinko gives 45, and the poster near the butler gives 8/31.
- Route: 8-31-45-54
- Destination: Final Car / Ending route
Hard-to-Spot Anomalies
Some anomalies are easy to miss because they change only a small object, appear in the background, or depend on movement instead of a normal visual clue. When I cannot find the current anomaly, I check these cars carefully.
- Reverse
- Reverse does not rely on a normal object change. The train starts moving in the opposite direction. The easiest clue is the movement of the pole shadows inside the car.
- Speed Up
- Speed Up is based on the train’s movement. The scenery outside the windows moves faster than usual, so I check the window movement instead of looking for a changed poster or object.
- Low Speed
- Low Speed works the opposite way. The train becomes noticeably slower, so I focus on the outside scenery and the rhythm of the car movement.
- Flooding
- Flooding cannot be cleared like a normal anomaly. The car starts filling with water, and I need to move quickly to the far right side. I also pay attention to the four direction clues in this area because they are used later for puzzle progress.
- Torch
- Torch also does not work like a normal anomaly. The car becomes dark, and after reaching the far right side, I need to deal with the enemies by using the flashlight.
- Seat Eye
- Seat Eye is easy to miss because the eye only appears from time to time on the seat near the right door. I wait and watch the seat area carefully before moving on.
- Condensation
- Condensation is a subtle glass anomaly. A blurry silhouette appears on the right door glass, so I check the door window instead of only looking at posters or the character.
- Braille Block
- Braille Block is one of the smallest visual changes. The yellow tactile paving under the left door changes slightly, and part of the round bumps becomes faint.
- Doll
- Doll cannot be handled as a normal anomaly. The straw doll is visible on the seat, and after moving toward the center, the ghost appears. I need to lead the ghost back to the doll.
- Snow Woman
- Snow Woman is an action-based anomaly. I need to avoid the falling ice spikes and survive until the gauge ends. I also remember the three-number clue in this area because it is needed later.
- Embrace
- Embrace is another active anomaly. The ghost comes out of a spatial rift and chases me. I need to guide her so that she embraces the talisman instead of catching me.
- Tentacle – 1
- This anomaly is easy to overlook because the tentacles are attached to the handrail. I check the rail area carefully.
- Tentacle – 2
- This one is also rail-based. I look at the upper part of the handrail near the middle door.
- Tentacle – 3
- This tentacle anomaly appears near the seat area in the lower-right side of the right door. I check low areas of the car instead of only scanning the windows and posters.
True Ending Requirement
After I get Konial’s Memo, I can enter the final mechanism room using the final route. However, entering directly only leads to the normal ending, and it does not unlock the gallery mode from the main menu.
To trigger the true ending, I need to keep carrying the Copper Bracelet and raise Konial’s affection level to 2. After the third special training event with him, I receive Xiao Ke OMEGA.
Once I have Xiao Ke OMEGA, the final choice in the final car mechanism room changes. Instead of a blank option, I can choose “Take out Xiao Ke OMEGA.” Selecting this option triggers the true ending, where the story moves into the time reversal route