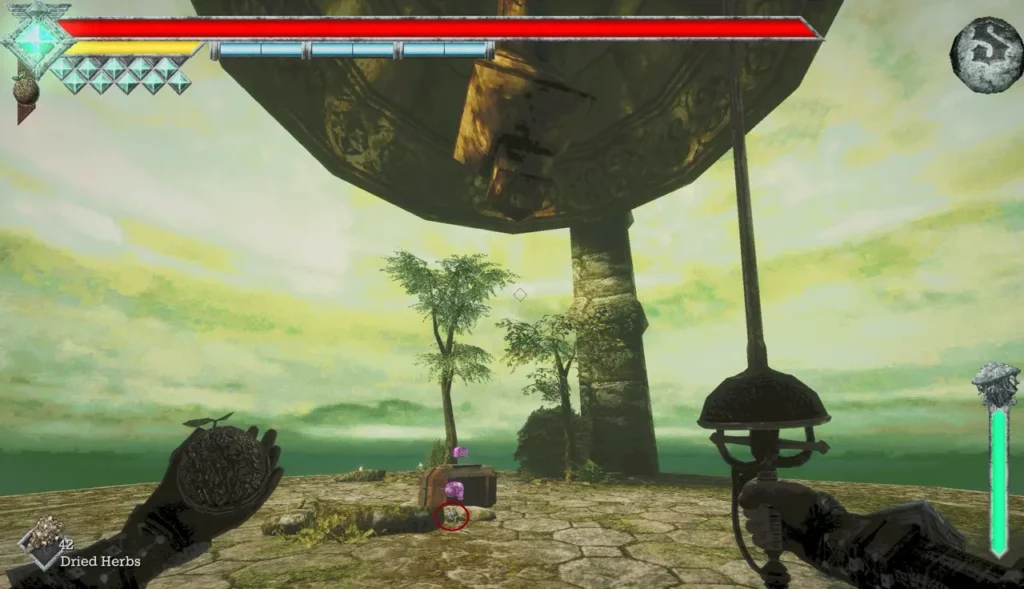
I use this Queen’s Domain skull locations guide to track down all 69 skulls, including those I can collect without flying and those that require the Flying Mushroom Fossil. I’ve kept the locations in a practical order and noted the items or movement abilities I need for each one.
All 69 Skull Locations
Below, I go through every skull location area by area, starting with routes that don’t require flying. I also cover the Caestus, Pandora Blade, Wind Dashes, and how I narrow down missing skulls near the end.
Table of Contents:
Items I Need Before Collecting Skulls
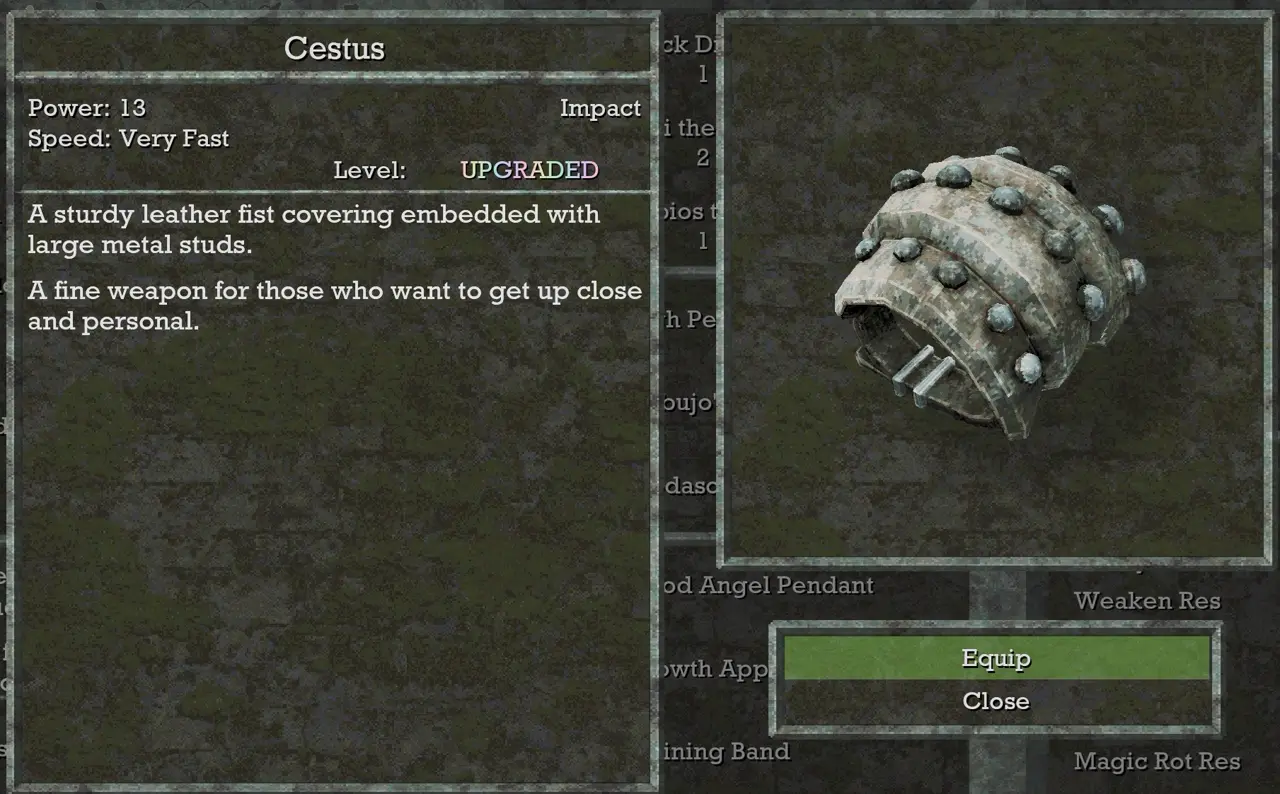
I use the Caestus and Pandora Blade for several of these routes. I do not need to level either weapon for the movement techniques in this guide.
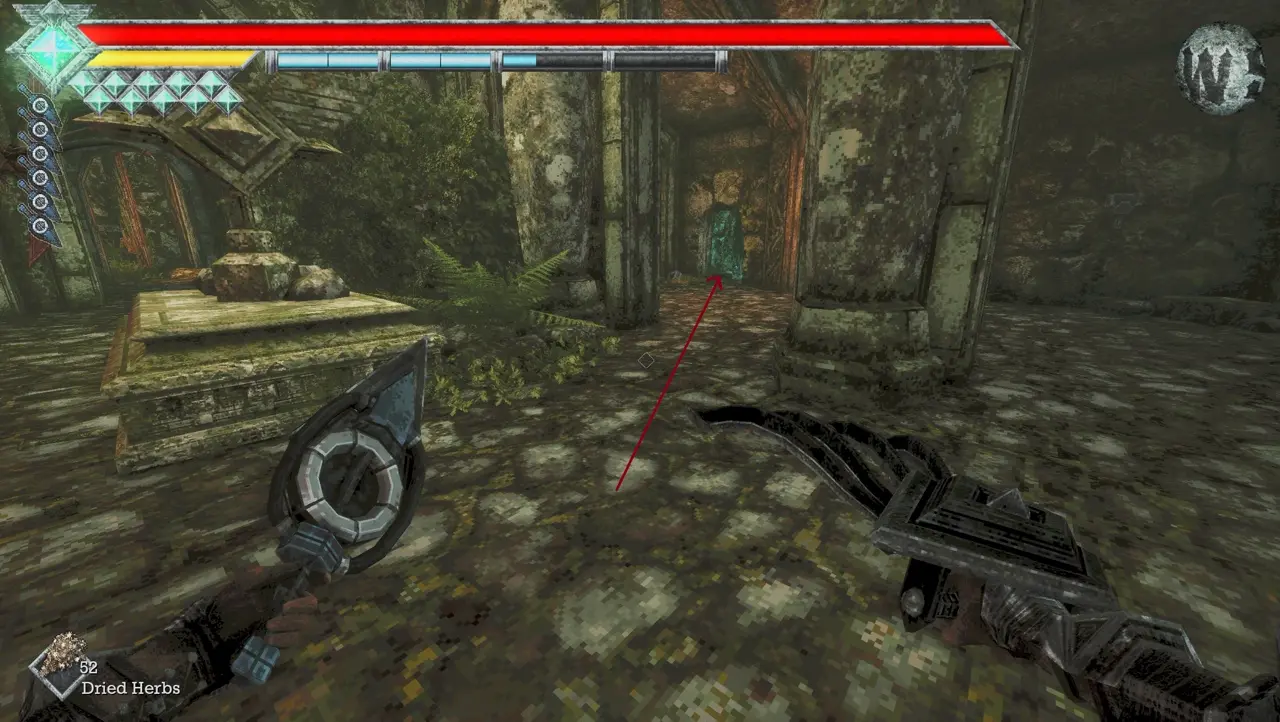
The Caestus helps me reach heights that a normal jump cannot. Its secondary attack launches me upward, and I can use it while airborne for additional time in the air. I buy it from the shop once it becomes available, since it is useful early on.
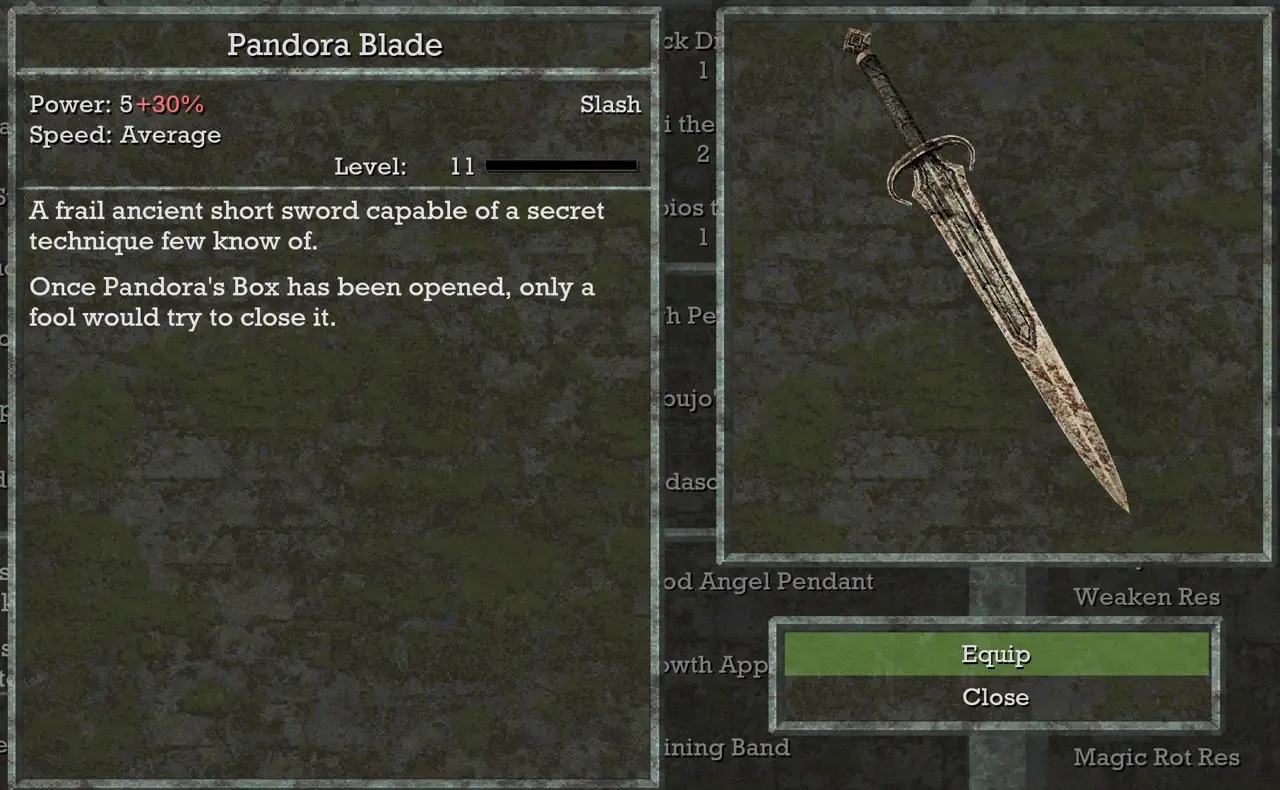
The Pandora Blade gives me extra forward movement in mid-air through its secondary attack, making some wider gaps possible to cross. I find it early in the same dungeon as the Wooden Club, hidden behind a wall.
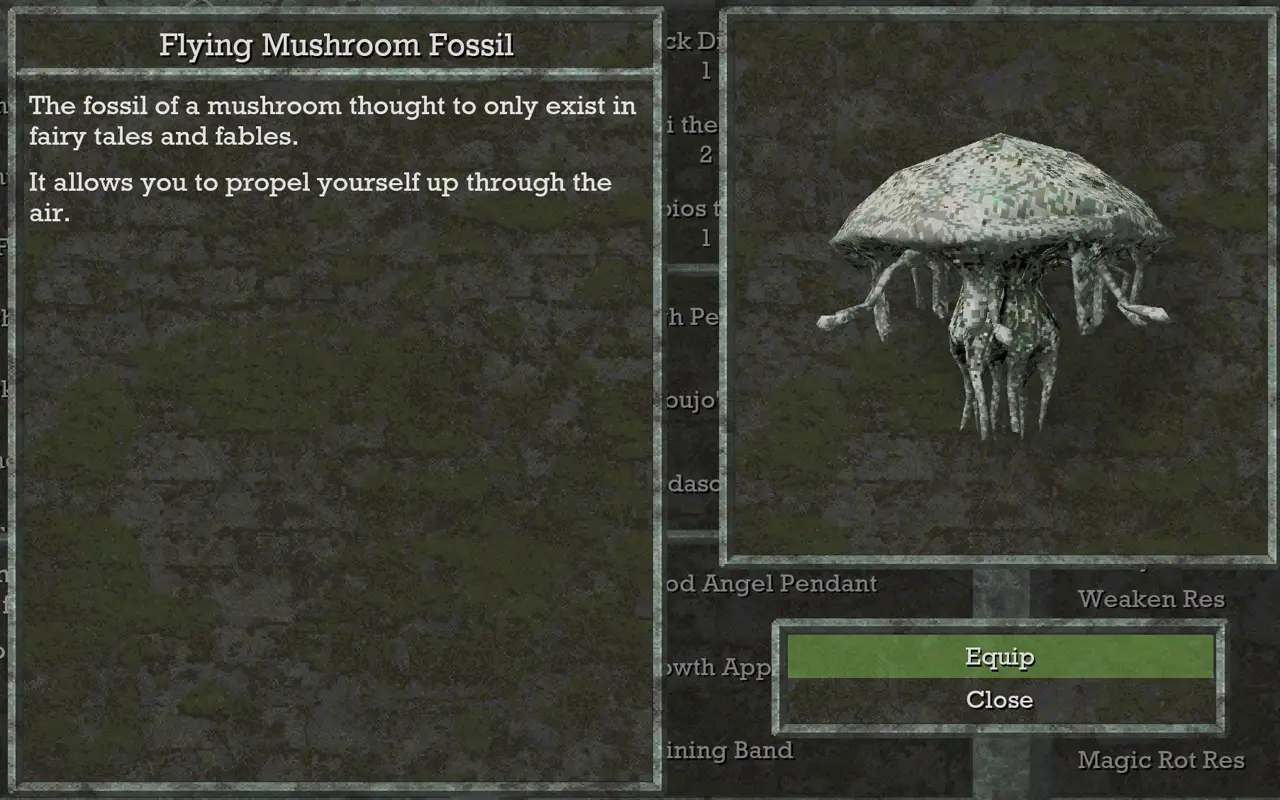
I also need access to the door where skulls are turned in. Turning in 30 skulls rewards me with the Flying Mushroom Fossil, an accessory that lets me fly for a few seconds when equipped.
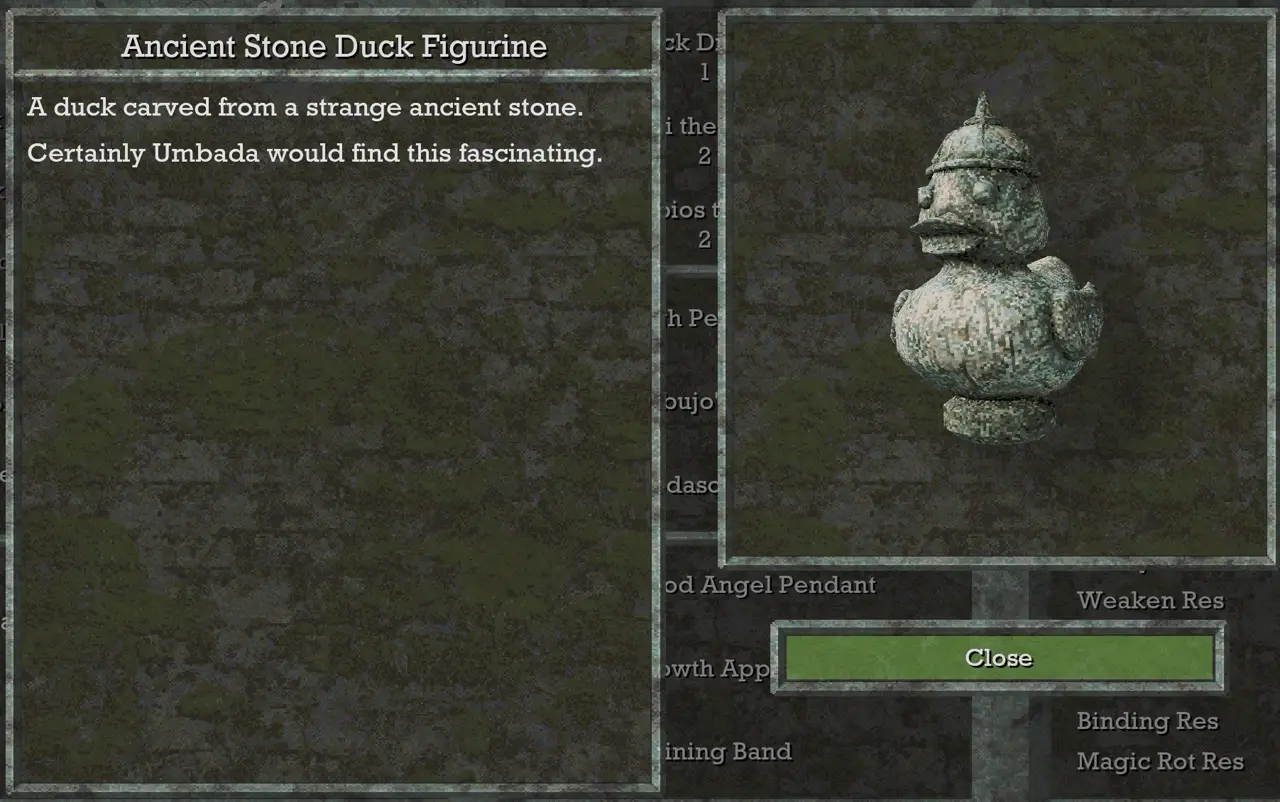
The Ancient Duck Figurine is another useful item. After acquiring it with 10 skulls, I can purchase an item that lets the Mask of Second Sight reveal skulls.
I begin with skulls I can reach without the Flying Mushroom Fossil, including the later routes that use five Wind Dashes. After that, I move on to the skulls that require flying.
Obmuer Temple (Without Flying)
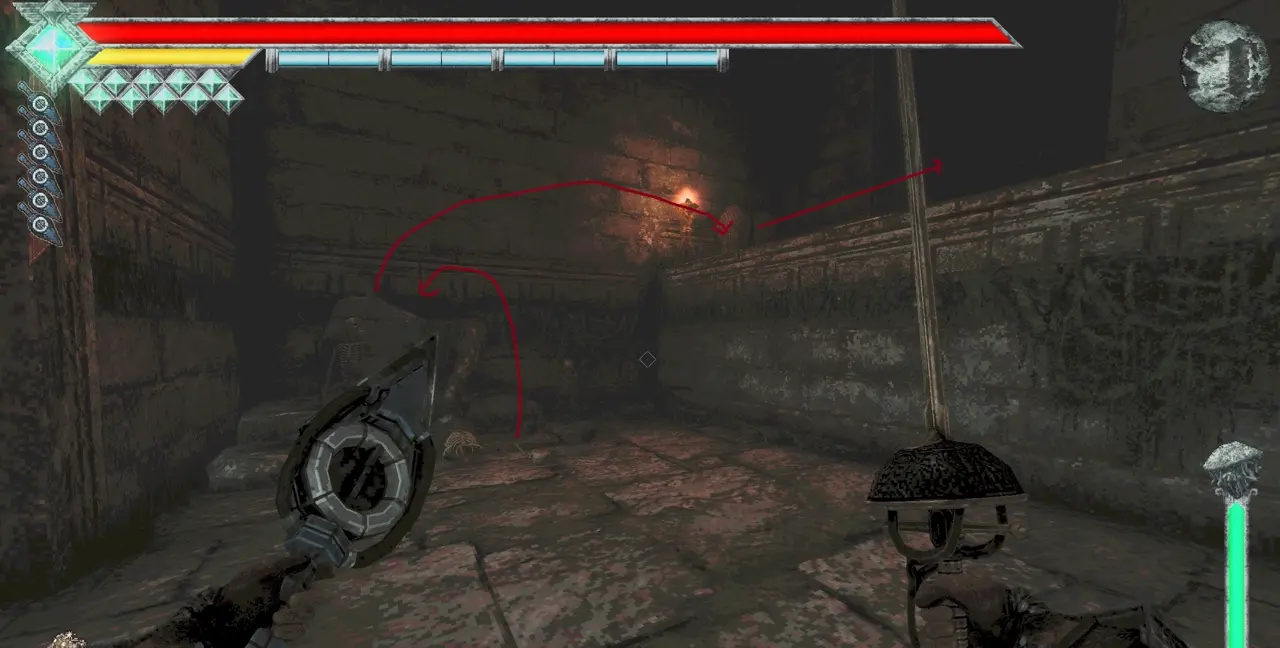
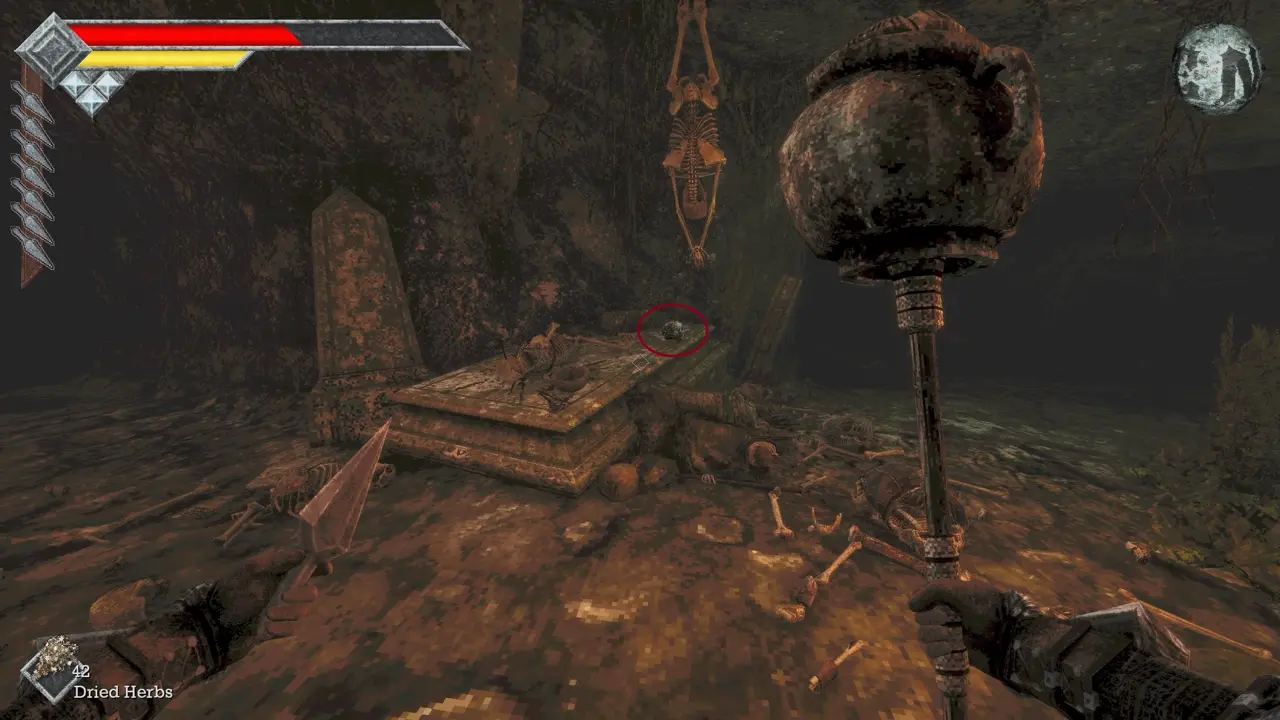
Skull #1: Secret Tunnel Near Piercing Needles
Requirements: Caestus.
I enter the tunnel hidden behind a secret wall near the Piercing Needles. The skull is inside this passage.
Skull #2: Ledge Above the Red Gem Fishman Statue
Requirements: Caestus and 2 Wind Dashes.
I look above the room containing the Fishman statue with the Red Gem. The skull rests on the upper ledge, which I can reach early with the Caestus and two Wind Dashes.
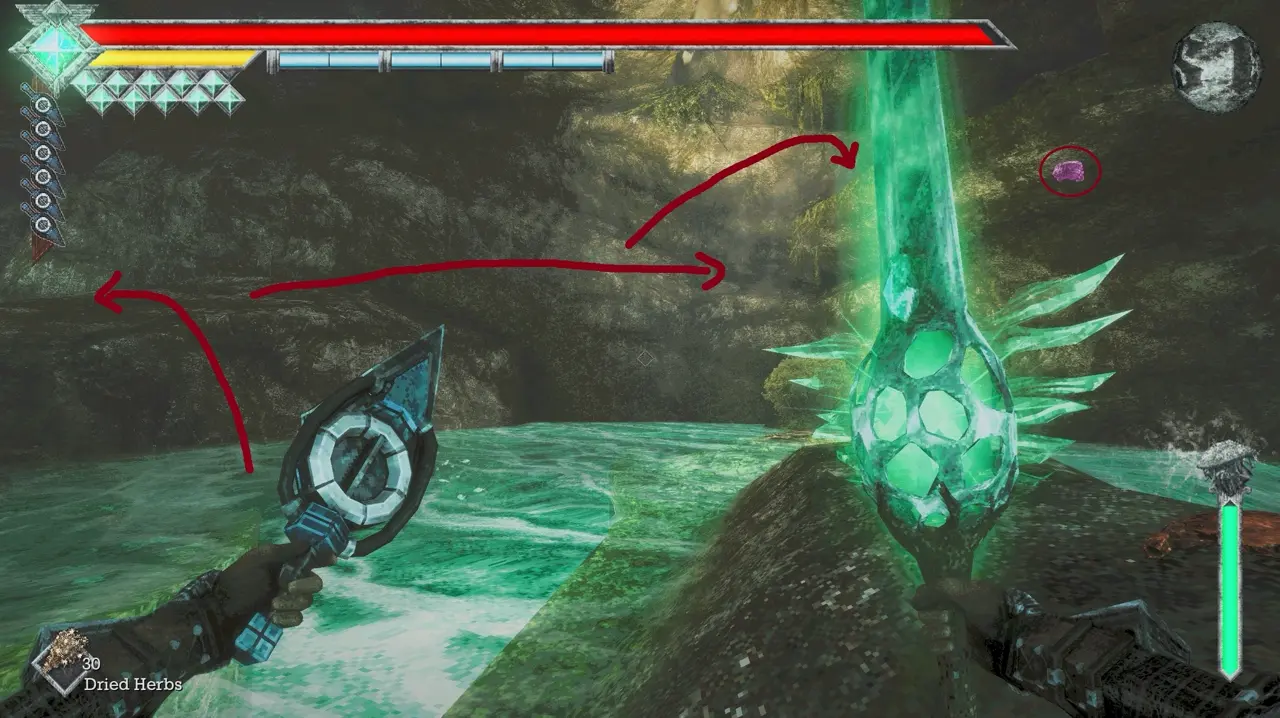
Skull #3: Beneath the Elevator After the Boss
Requirements: None.
After defeating the dungeon boss, I reach the elevator, send it upward, and collect the skull hidden underneath.
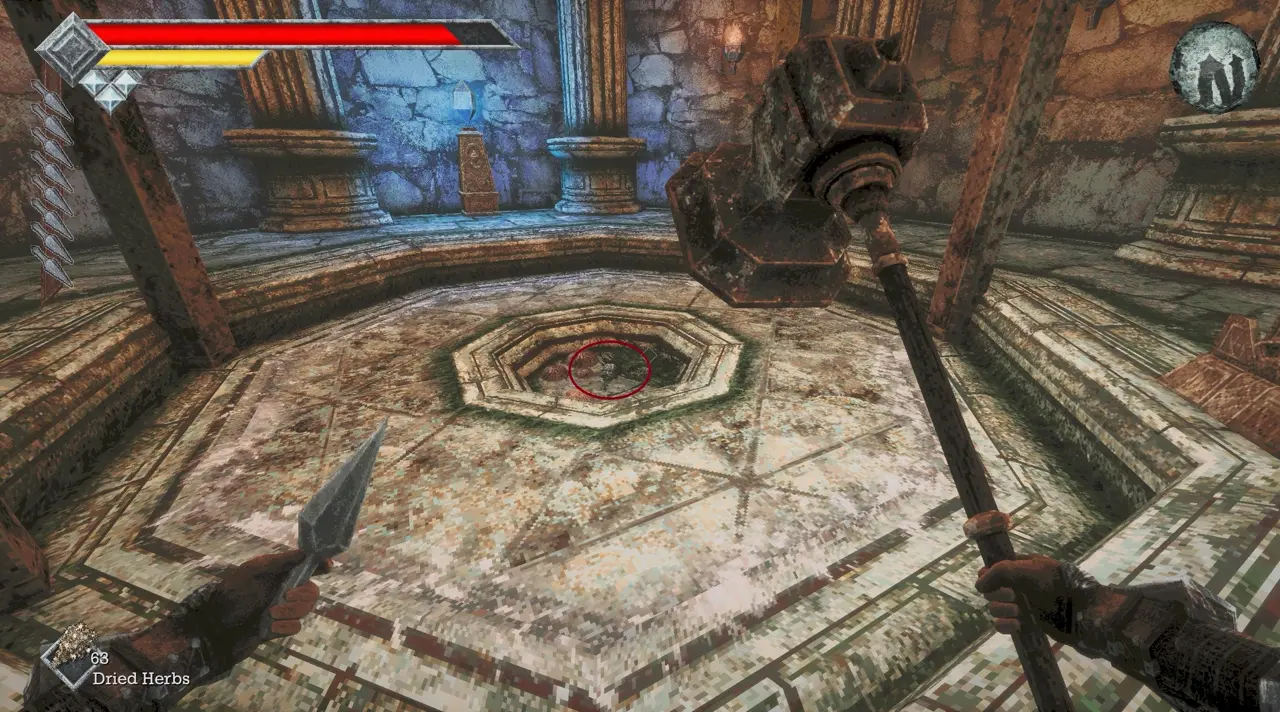
Skull #4: Cliff Below the Azure Torch Gargoyle
Requirements: Caestus.
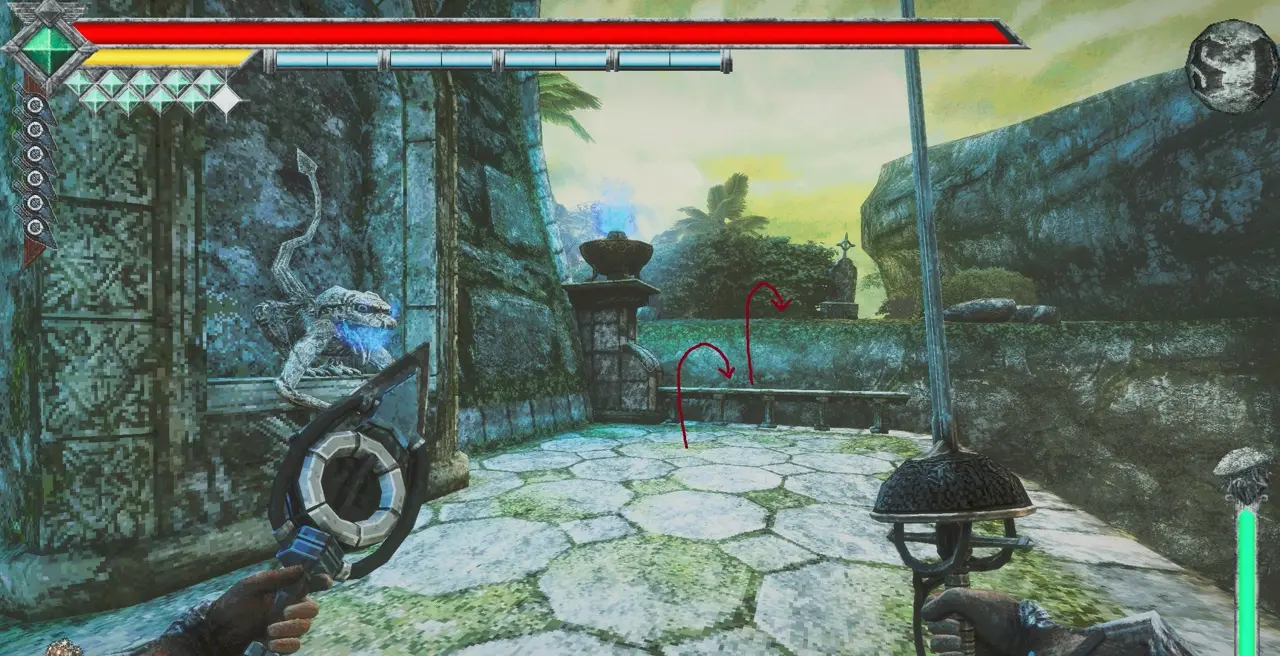
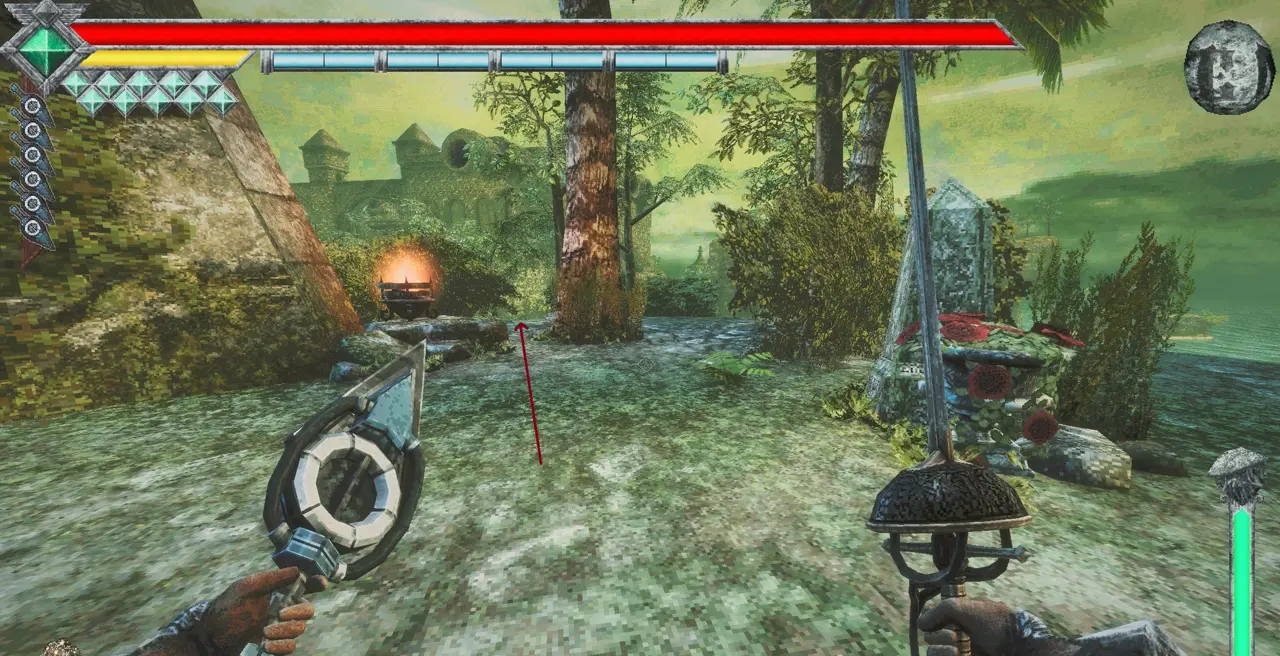
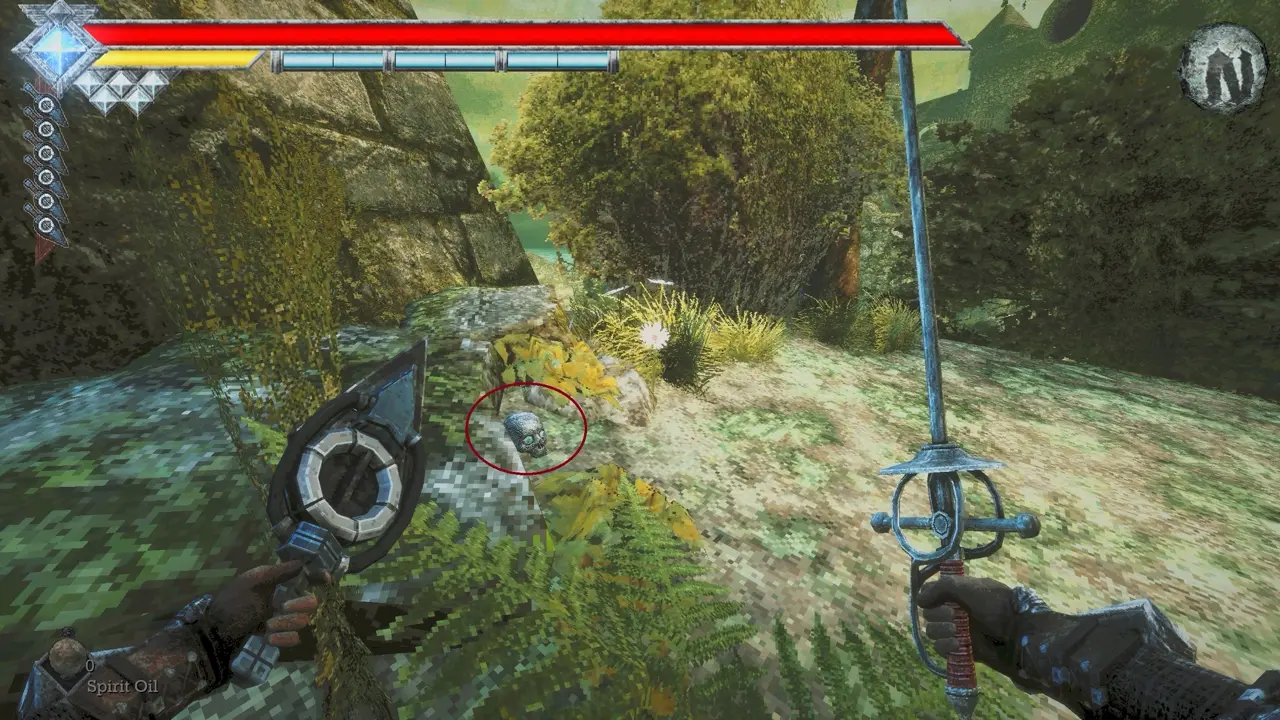
From the Obmuer Temple warp station, I head toward the gargoyle statue that I light with the Azure Torch. I use the Caestus to get onto the nearby ledge, turn left, and drop down to the cliff holding the skull. I stay careful here because the enemies in the upper area can be tough early on.
Tower of Knowledge (Without Flying)
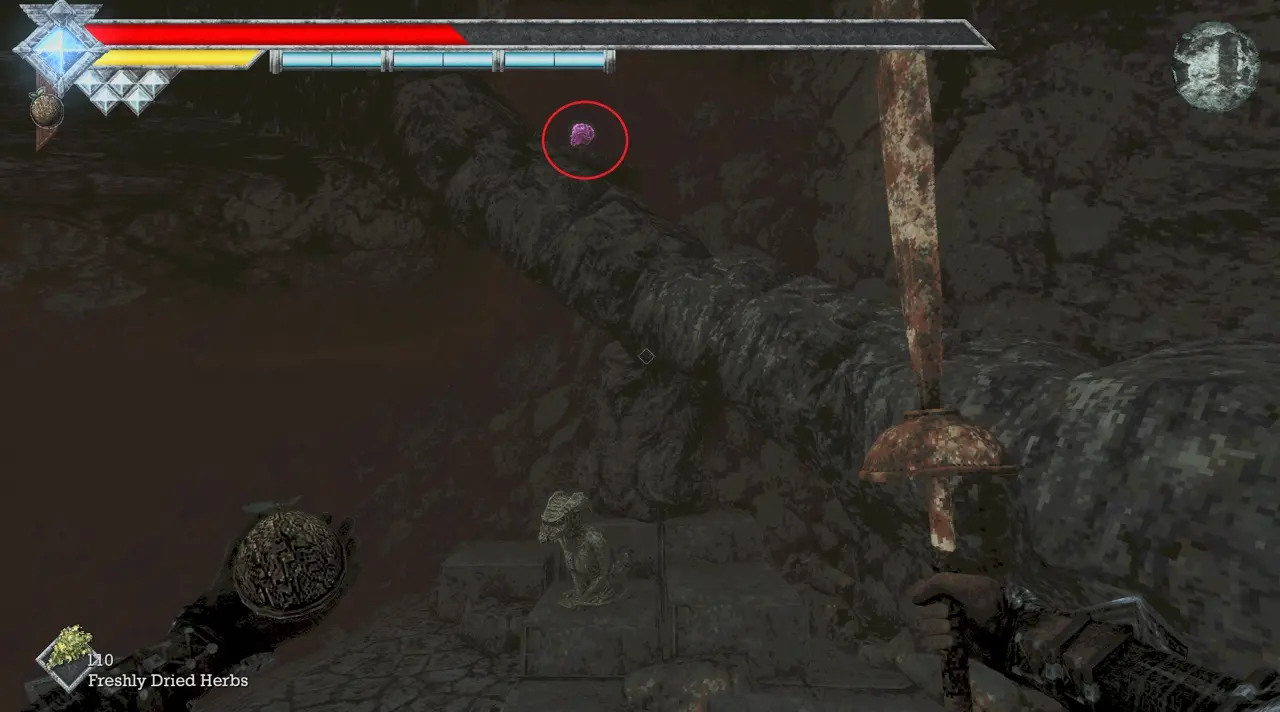
Skull #5: Basement Ledge Above the Gargoyle Arbelist
Requirements: Caestus.
In the basement, I check the ledge directly above the place where I first fight a Gargoyle Arbelist.
Skull #6: Below the Warp Station
Requirements: None.
Near the Docile Gargoyle encounter, I look down from the warp station and drop onto the lower area to pick up the skull.
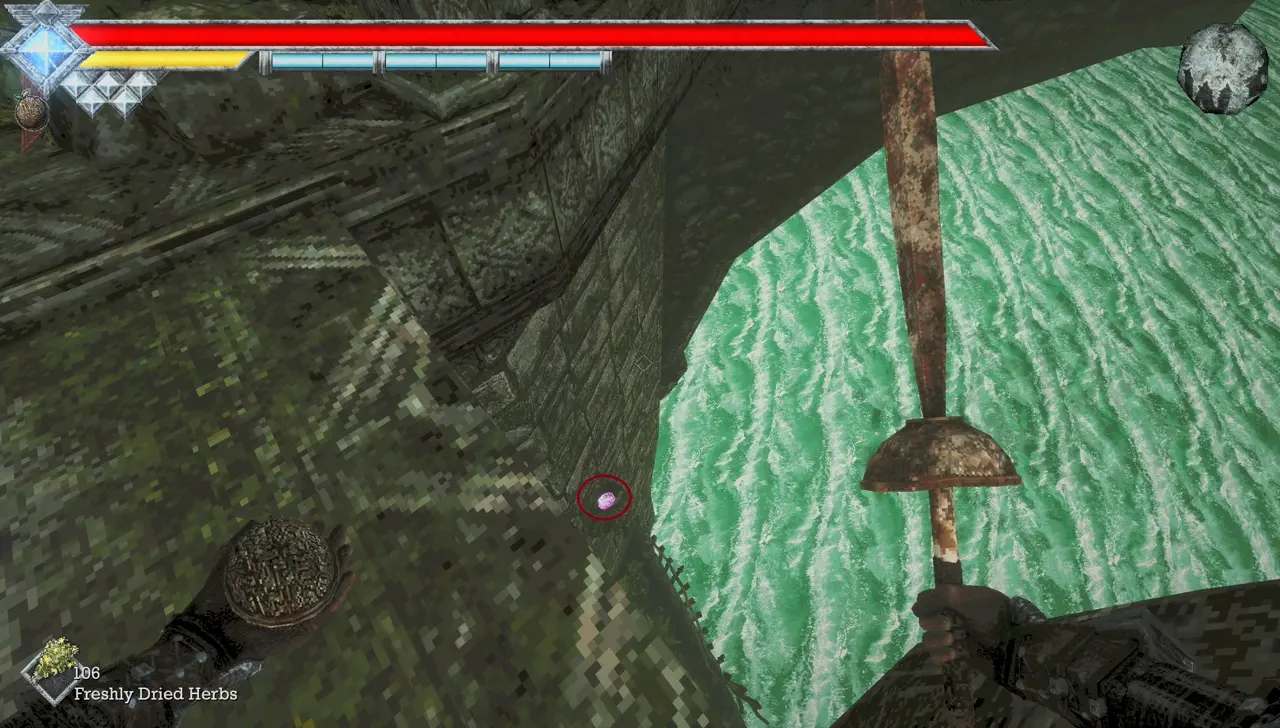
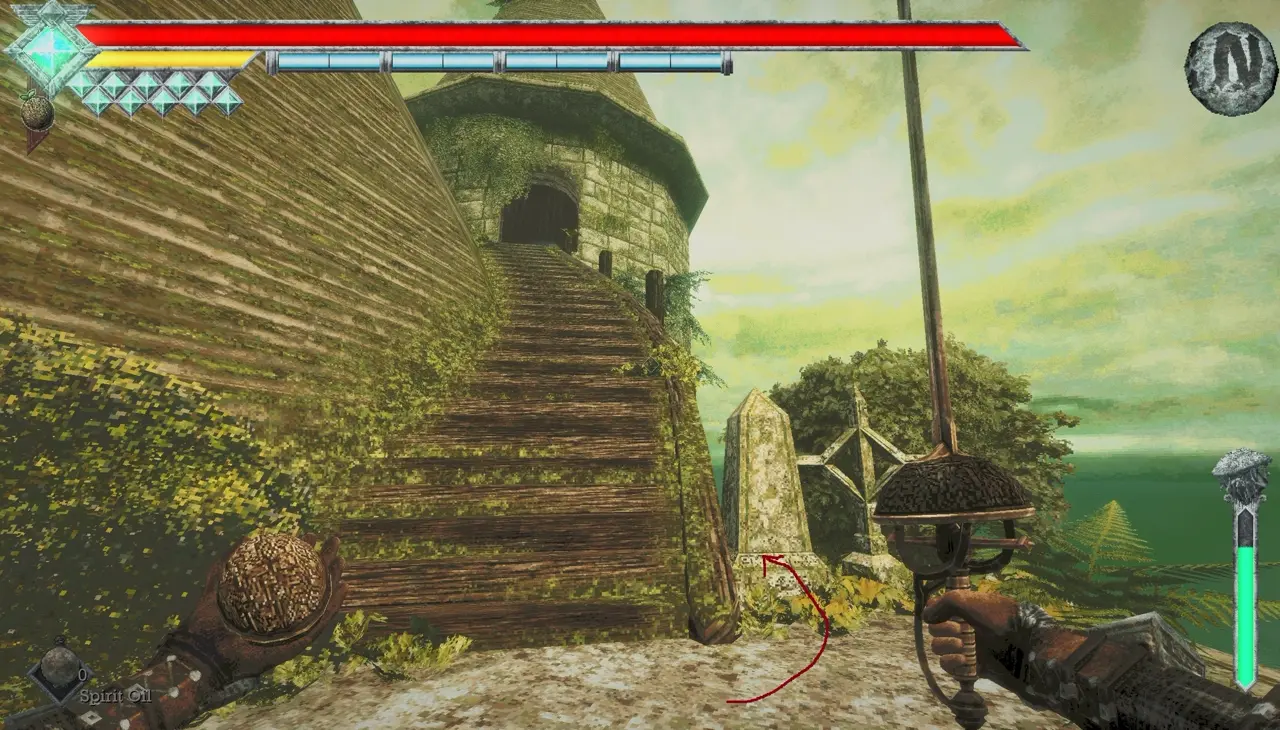
Skull #7: Under the Ramp Leading to the Skull Rod
Requirements: None.
On the roof, I check beneath the final ramp that leads toward the Skull Rod.
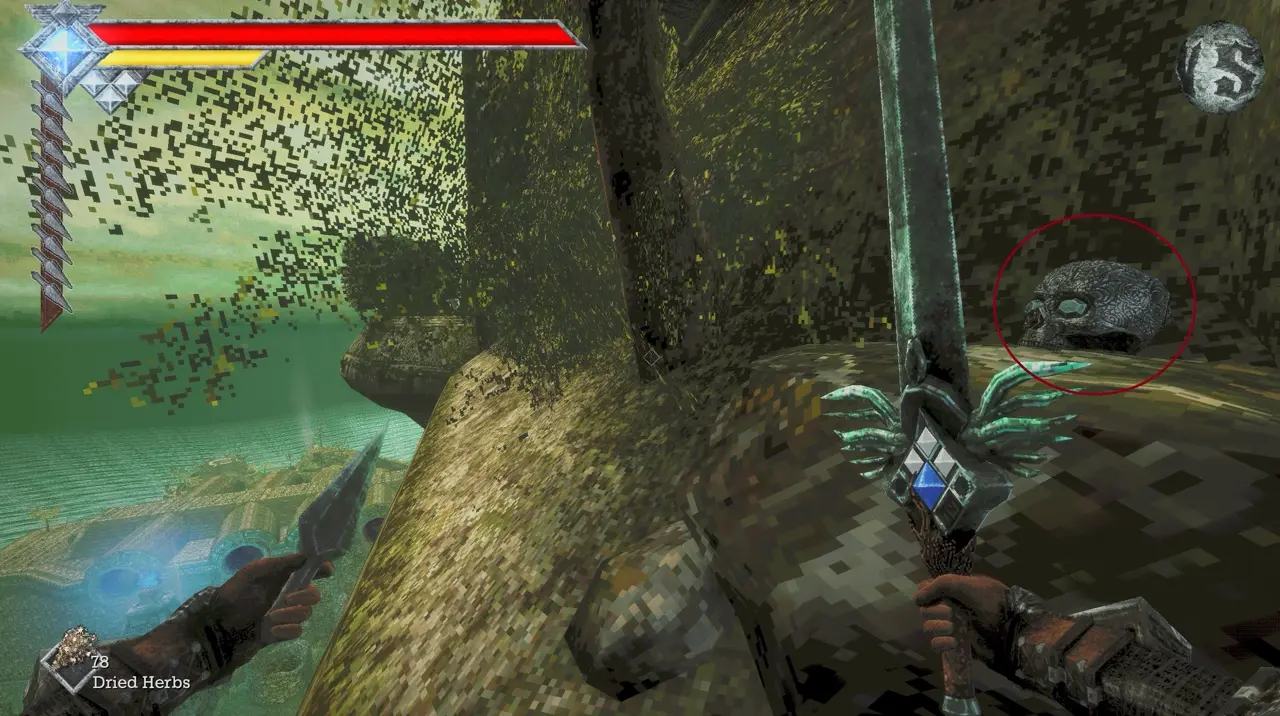
Skull #8: Ledge Above the Bridge Archway
Requirements: None.
I locate the bridge linking the Tower of Knowledge and Deimpo Mausoleum. From the roof, I drop toward the archway and Wind Dash to the ledge directly above it.
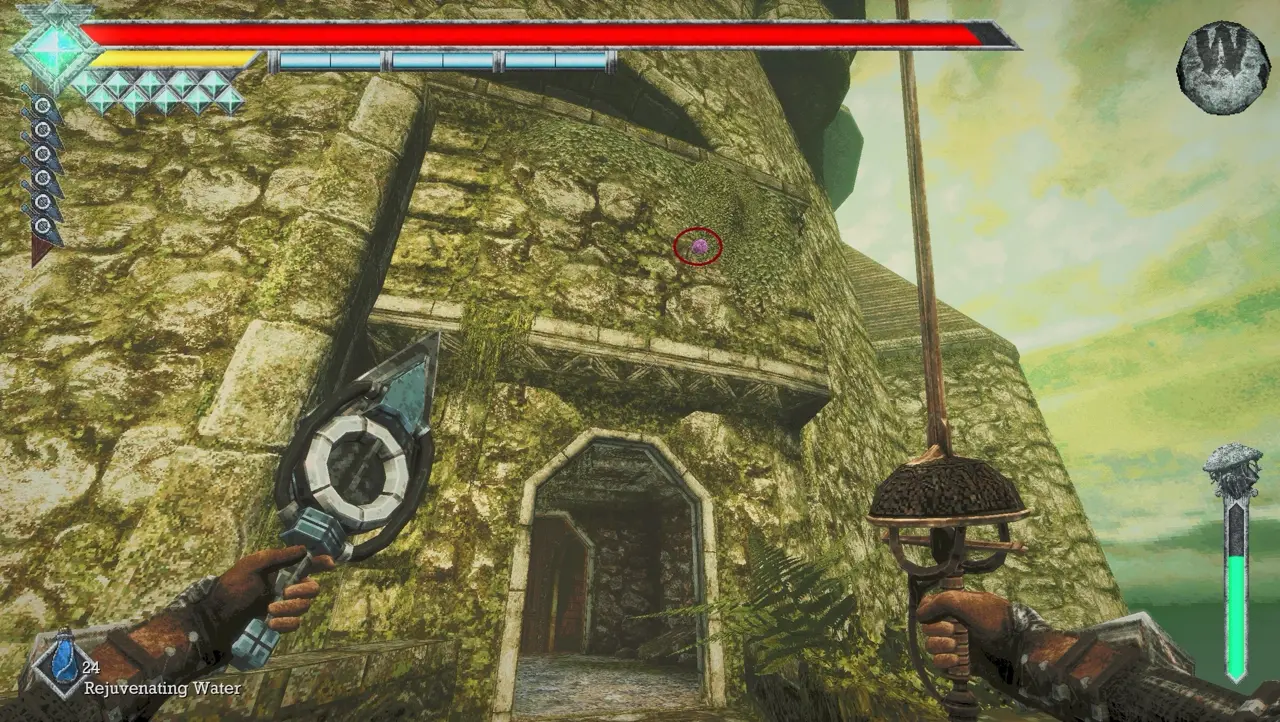
Isle of Neasied (Without Flying)
Skull #9: Window at the Deimpo Mausoleum Entrance
Requirements: None.
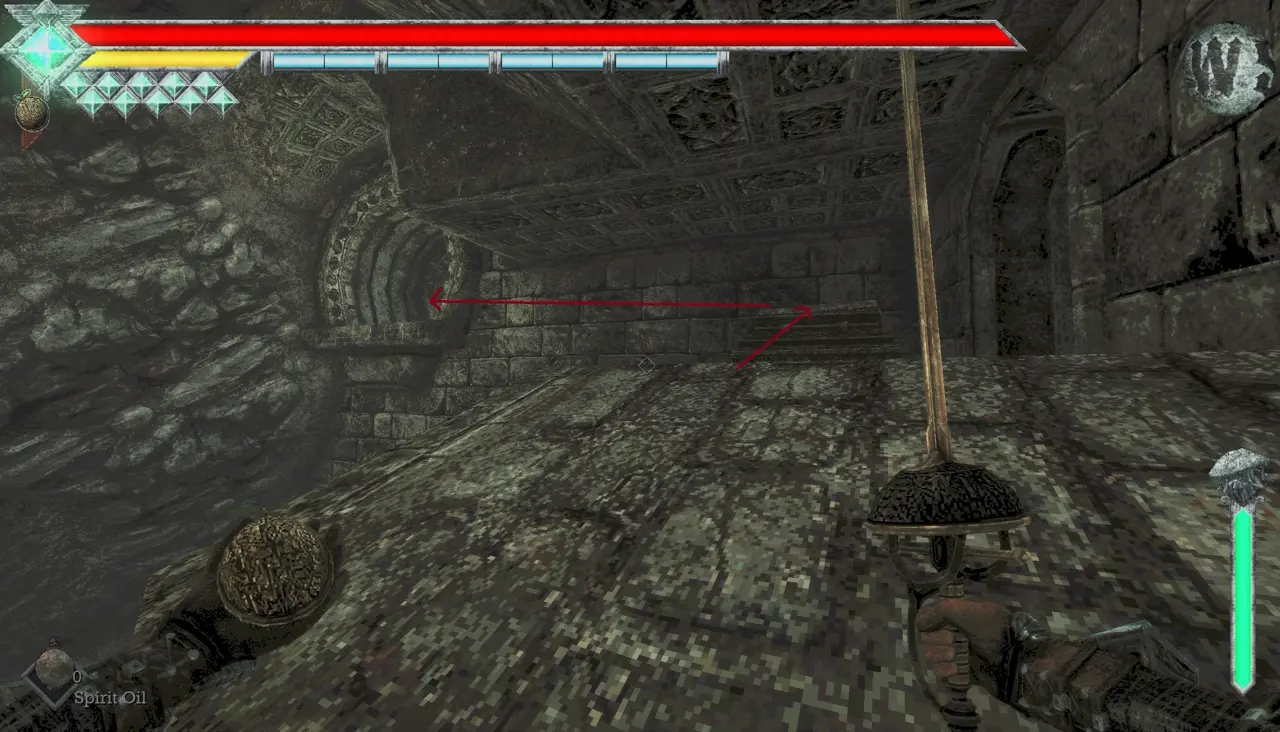
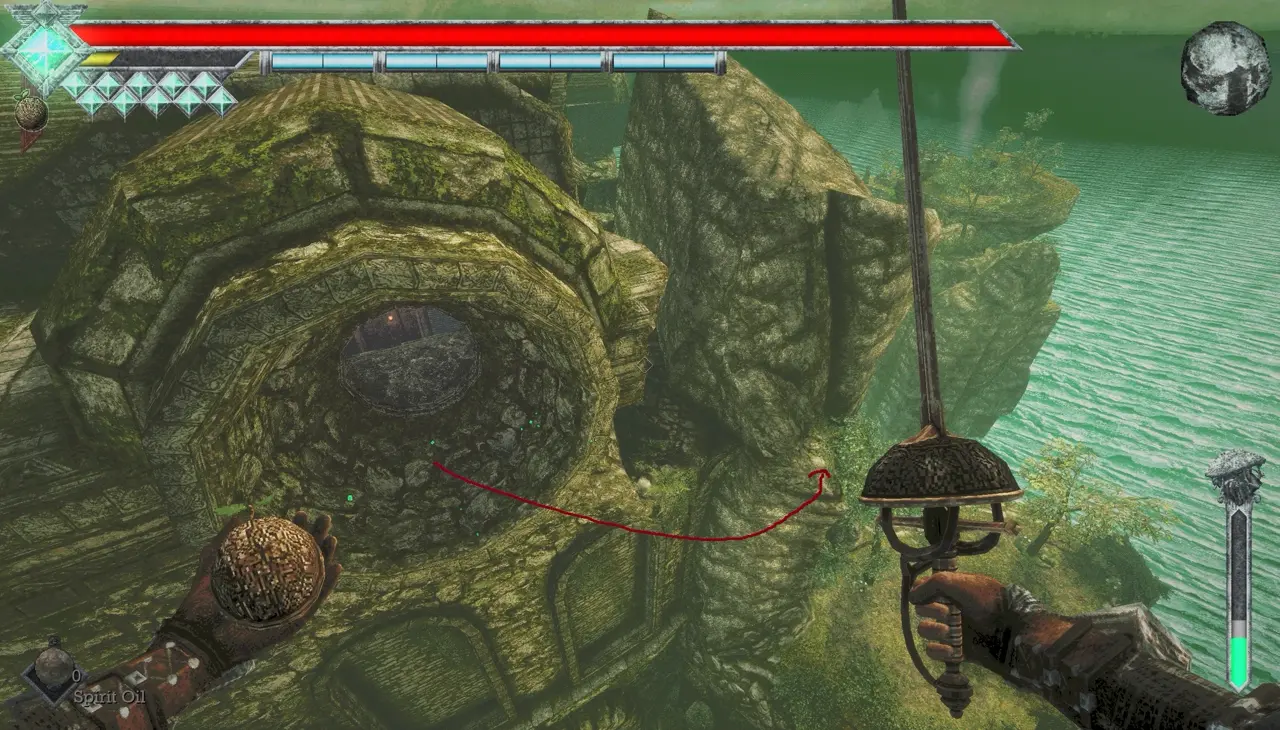
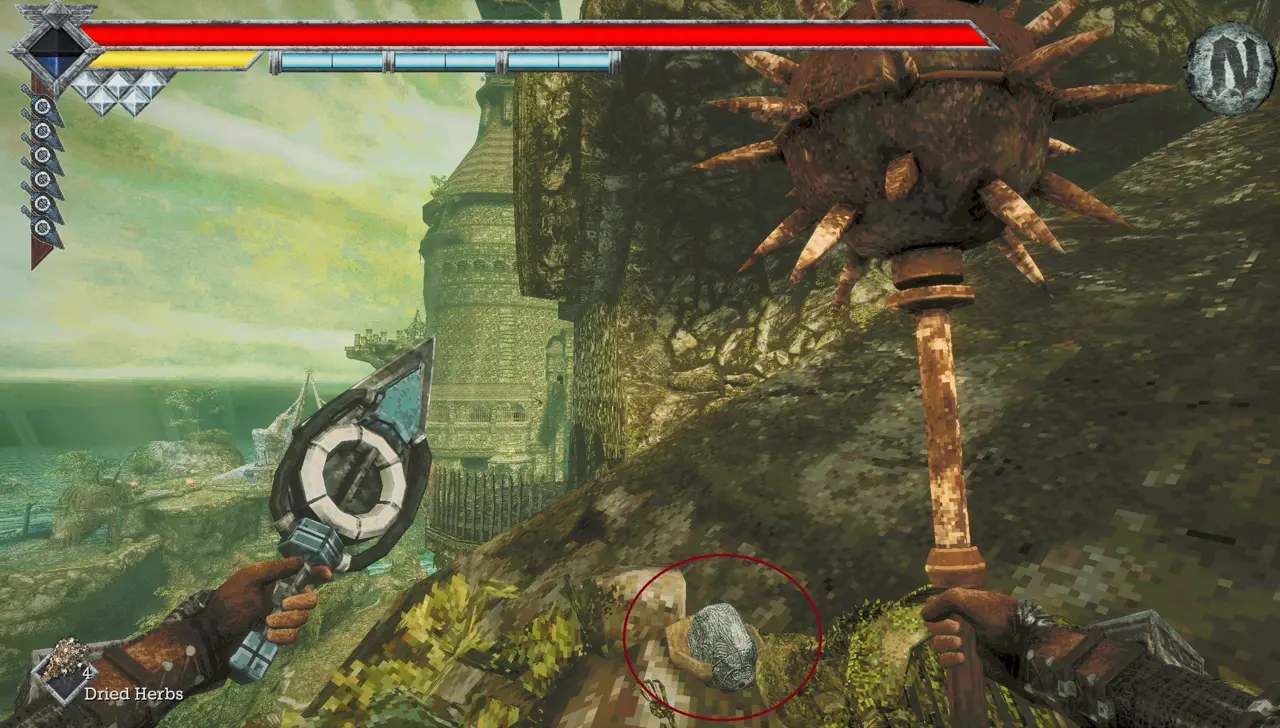
When I arrive at the entrance to Deimpo Mausoleum, I look just outside the window that leads up to the rooftop.
Skull #10: Broken Pillar on the Mausoleum Roof
Requirements: None.
On the Deimpo Mausoleum rooftop, I find the skull on a broken pillar and jump down to it.
Skull #11: Arch Between the Tower and Mausoleum
Requirements: None.
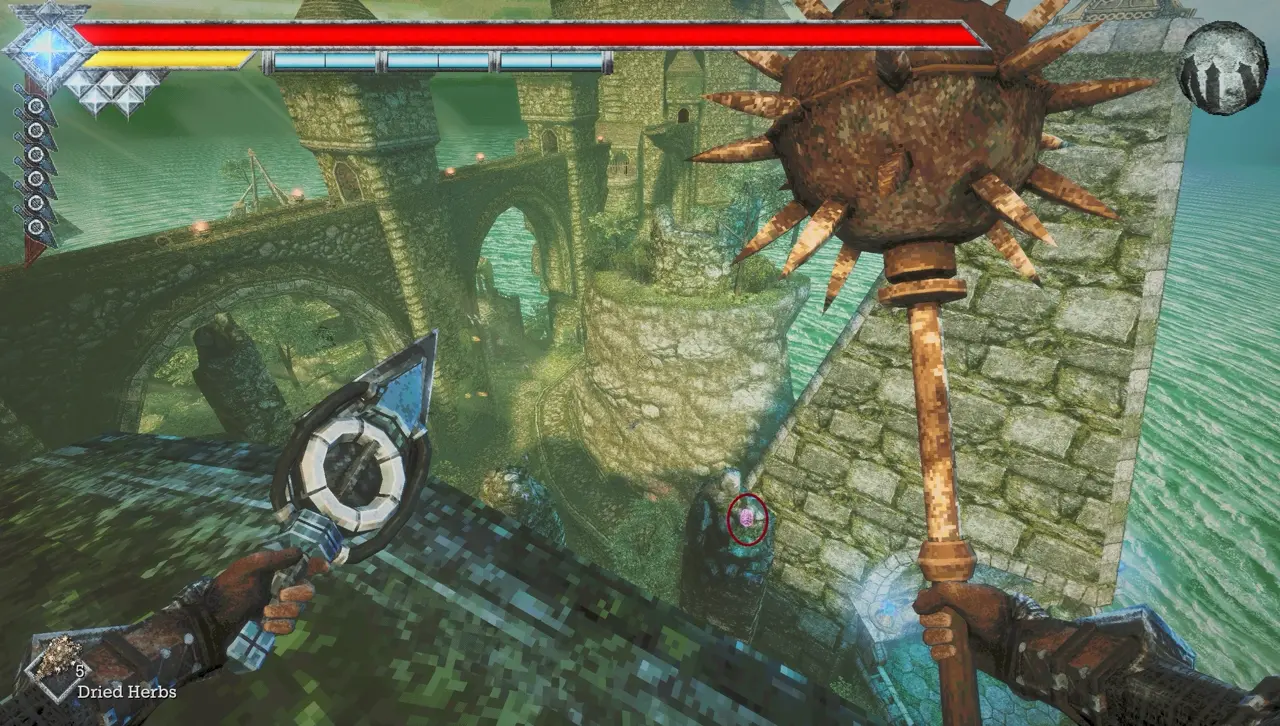
I head onto the roof and aim for the connecting arches. The skull is on the arch that is second closest to Deimpo Mausoleum, so I use a Wind Dash to reach it.
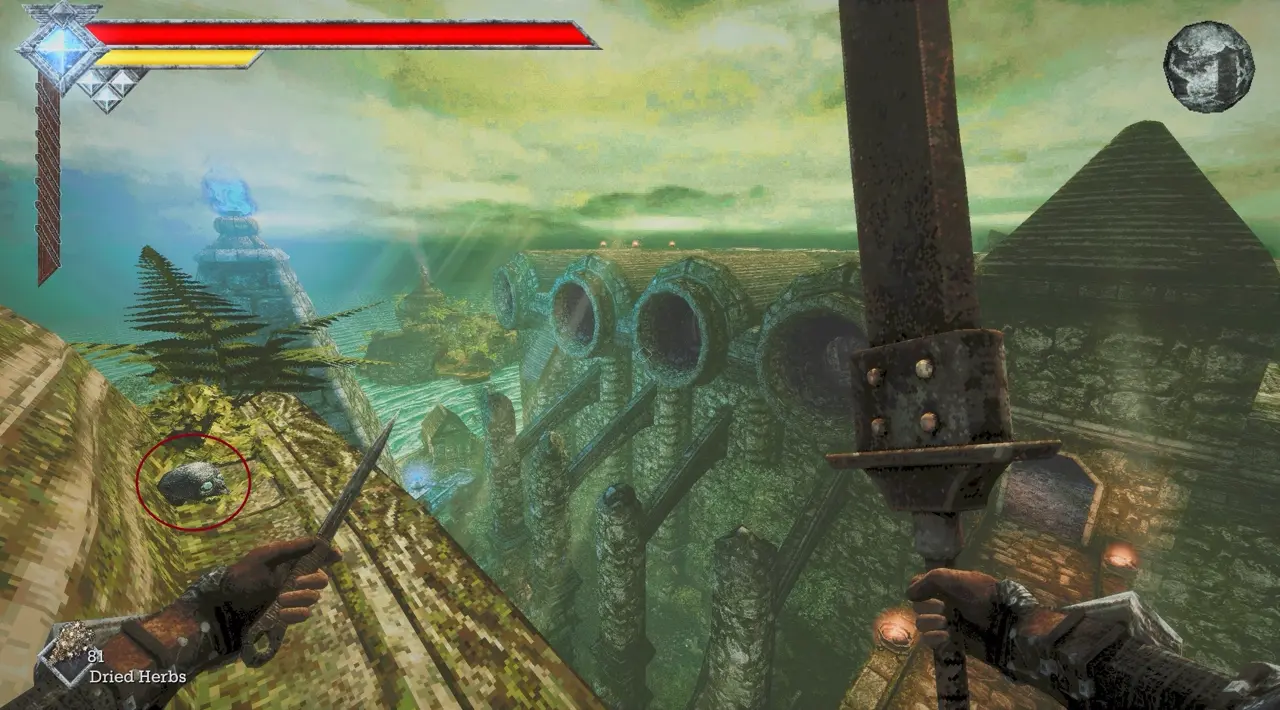
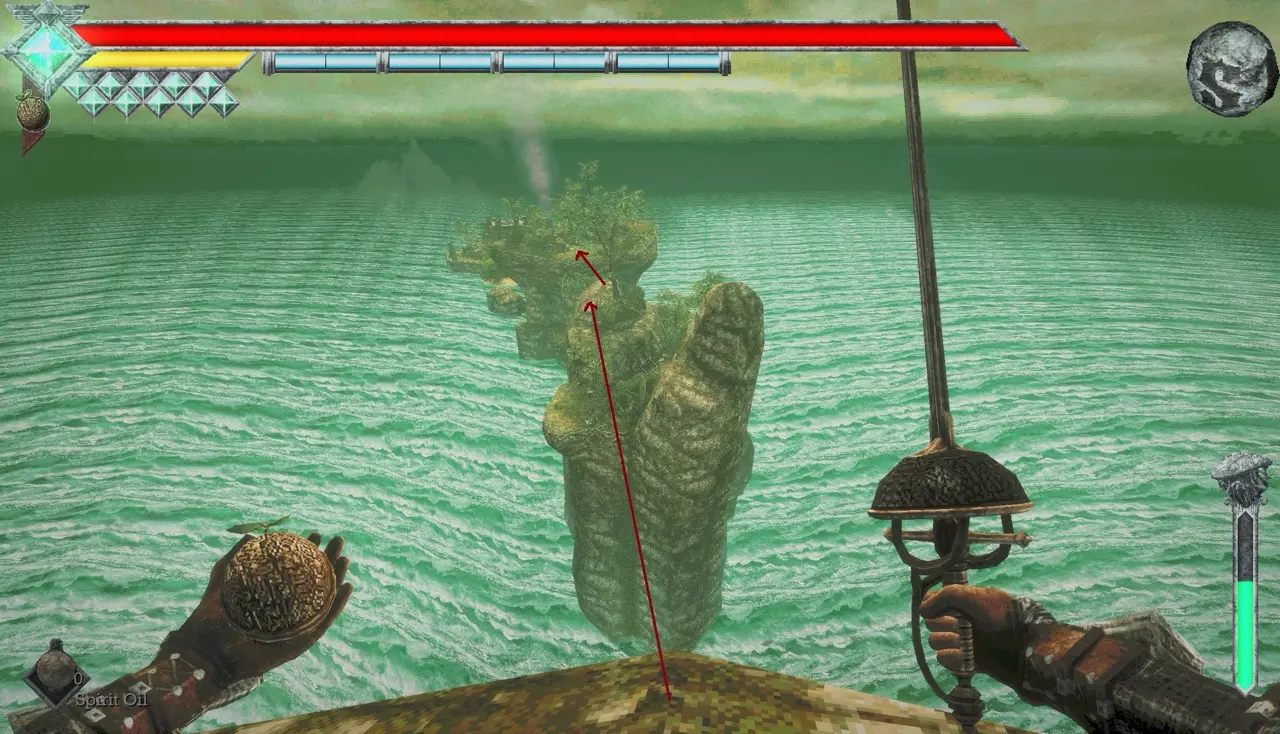
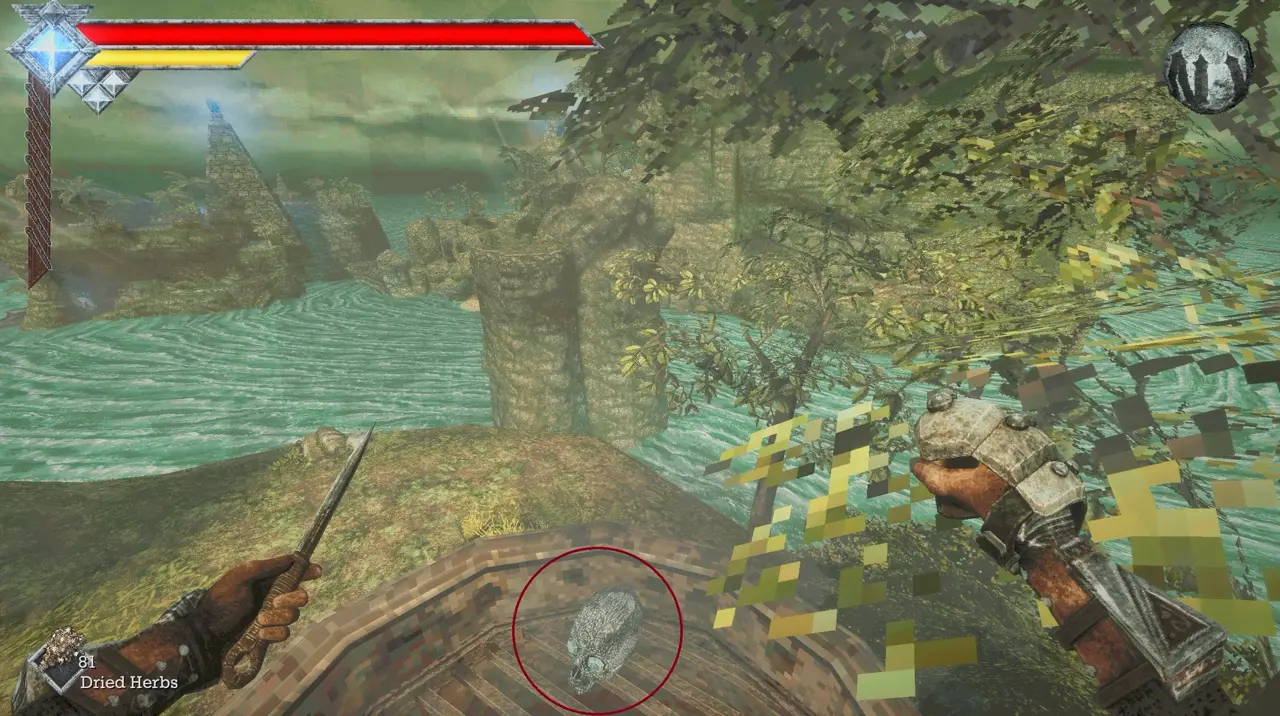
Skull #12: Chimney on the Second Island Toward Wodaso Lens
Requirements: Caestus and Pandora Blade, or 4 Wind Dashes.
From the rooftop, I follow the island chain in the direction of the Wodaso Lens. The skull is on a chimney on the second island. To reach it early, I start from the higher rock, gain height with the Caestus, use three Wind Dashes, and carry myself forward with the Pandora Blade. If that jump is too difficult, I return once I have four dashes.
Deimpo Mausoleum (Without Flying)
Skull #13: Hidden Wall in the Entrance Shaft
Requirements: None.
As I descend the first shaft inside the mausoleum, I check for a hidden wall. Behind it, the skull sits in a corner beside an egg.
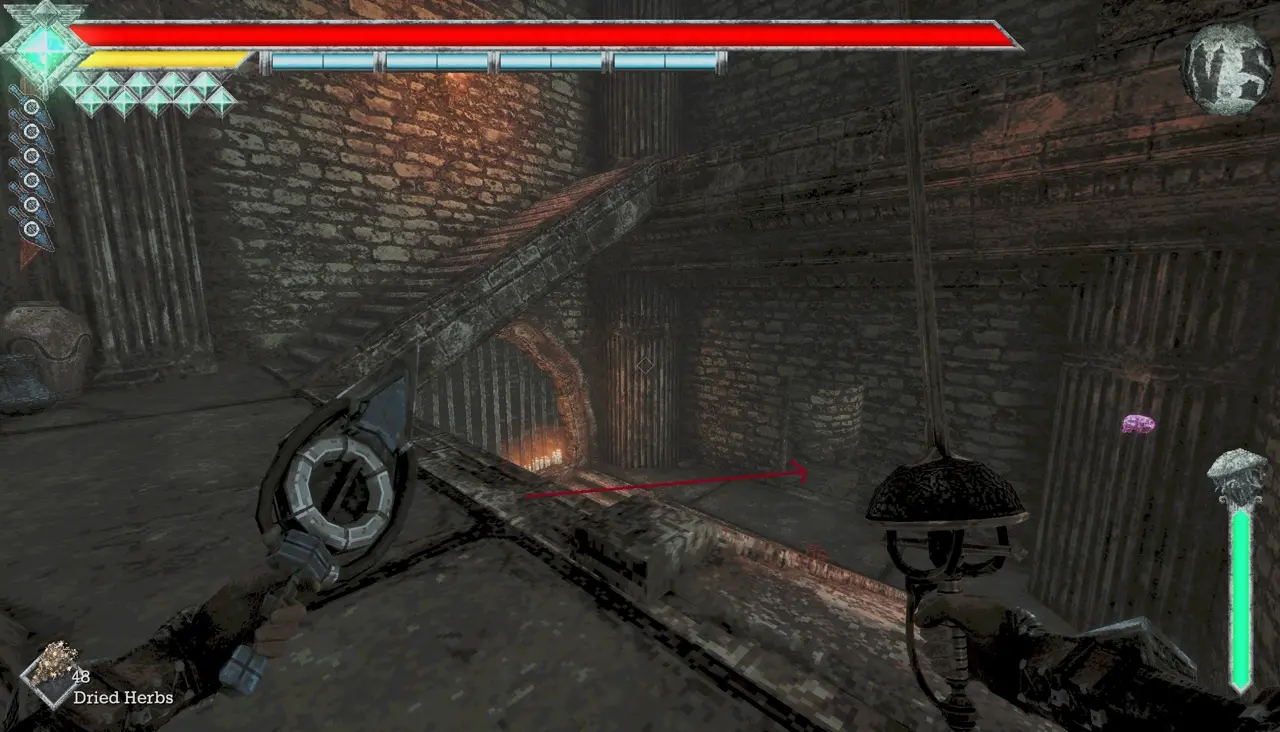
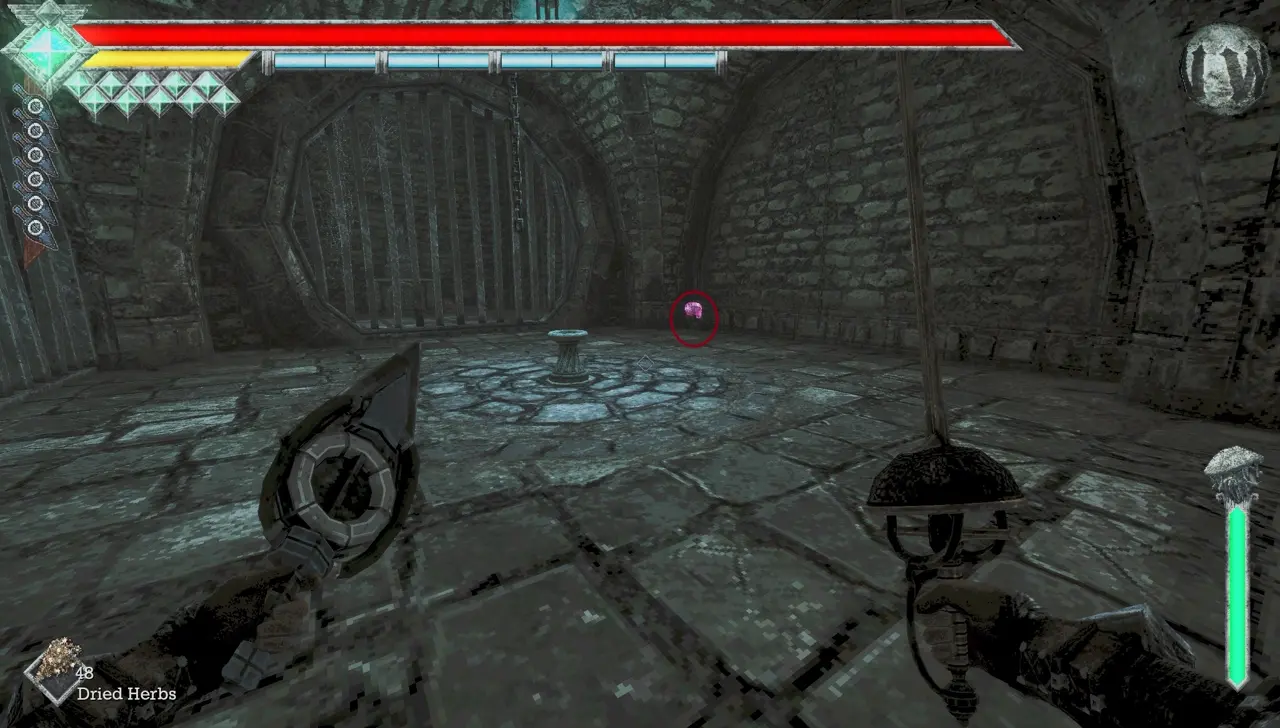
Skull #14: Secret Coffin Room Near the Fourth Wind Crystal
Requirements: None.
In the large room containing the fourth Wind Crystal, I head all the way to the bottom and find the bat statue holding a gem. A hidden wall beside it opens into a room marked with the symbols of the four gods. The skull is on a coffin there.
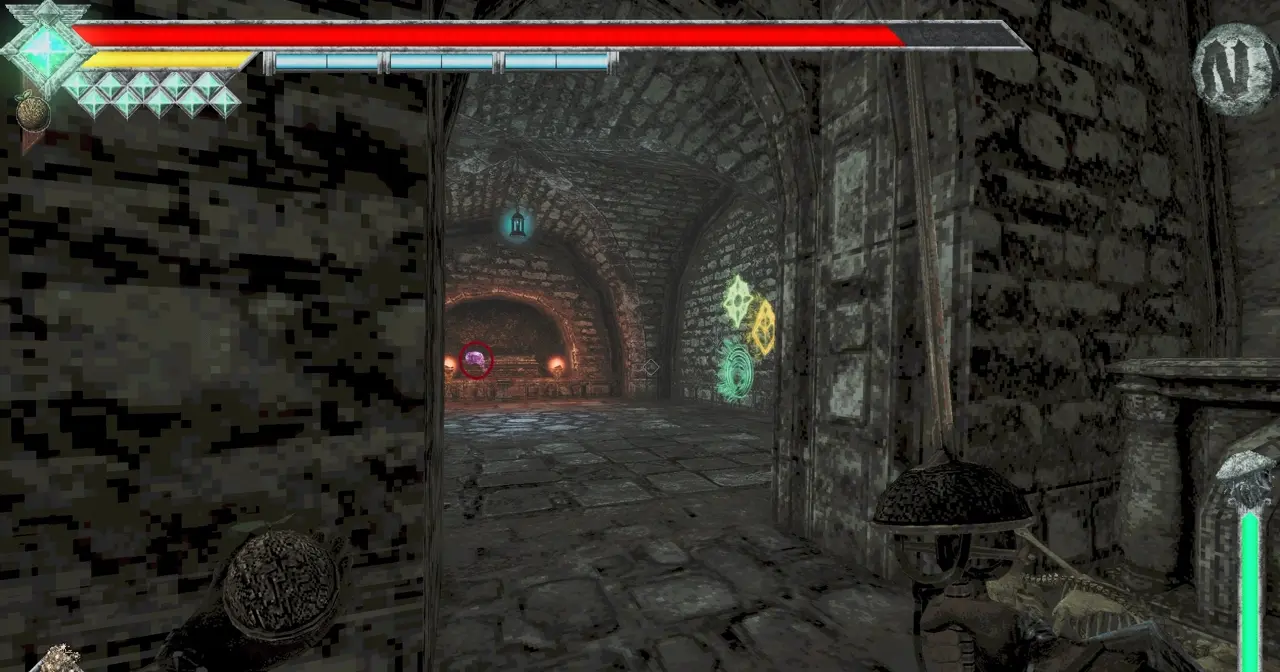
Skull #15: Shelf Behind the Chef
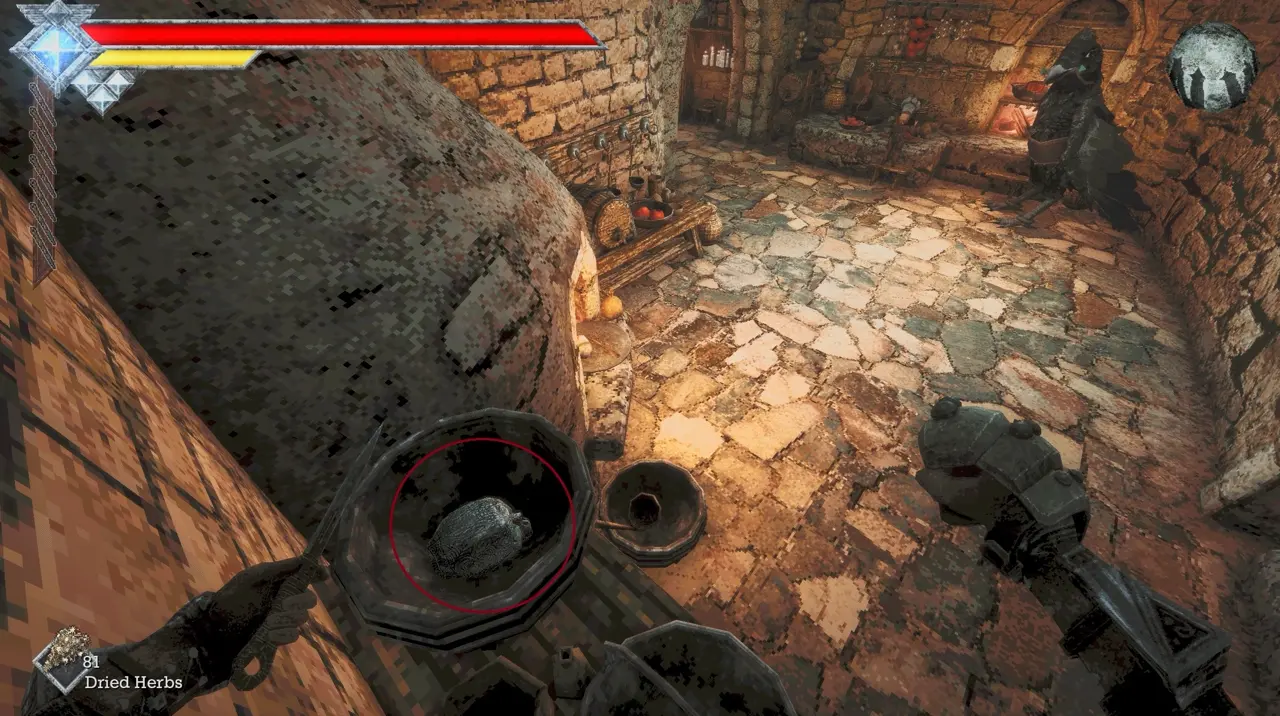
Requirements: Caestus.
I use the Caestus to reach the top of the shelf directly behind the chef.
Skull #16: Coffin in the Boss Room
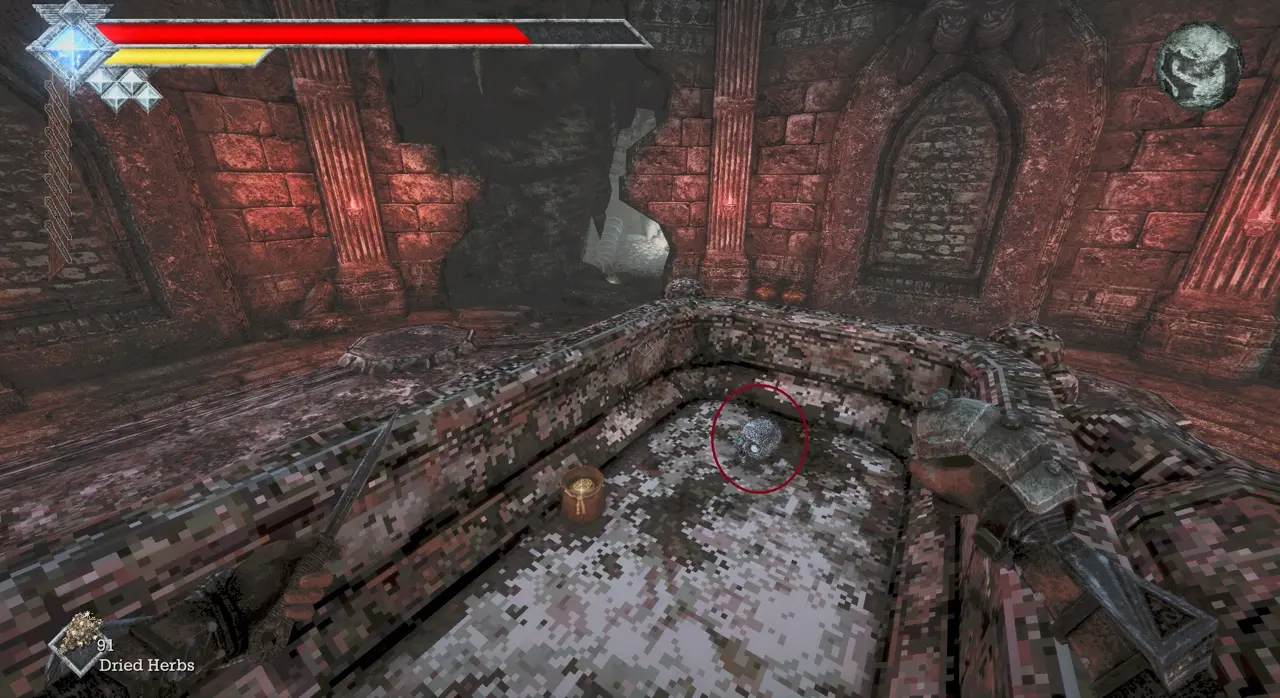
Requirements: Caestus.
Inside the boss room, I check the coffin in the middle. I use the Caestus to reach the skull more easily.
Unknown Area (Without Flying)
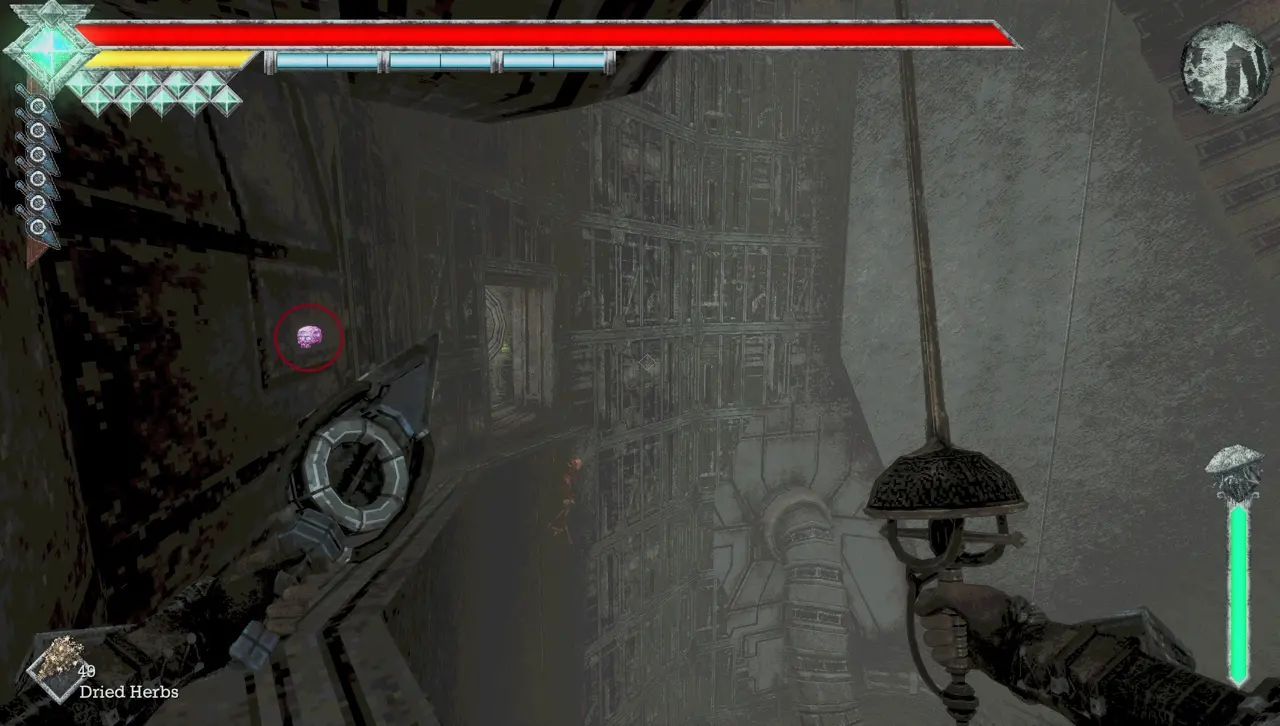
Skull #17: Hidden Wall Beside the Skeleton
Requirements: None.
At the second large shaft drop, which is also the final one, I find a ledge with a skeleton. I check the wall in front of the skeleton and pass through the hidden opening to reach the skull.
Ancient World (Without Flying)
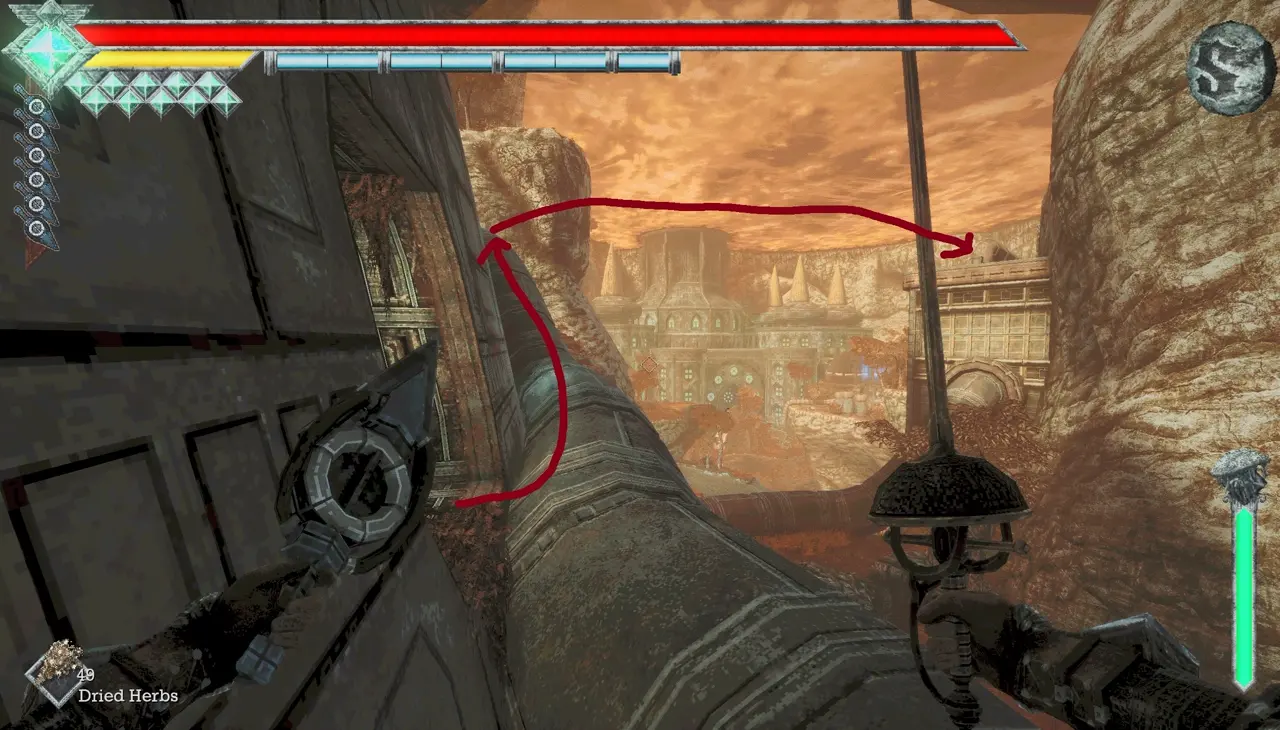
Skull #18: Roof Near the Power Station and Warp Station
Requirements: None.
At the power station closest to the warp station, I exit through the opening in the power room. I jump onto the roof of a nearby building and air dash toward the skull.
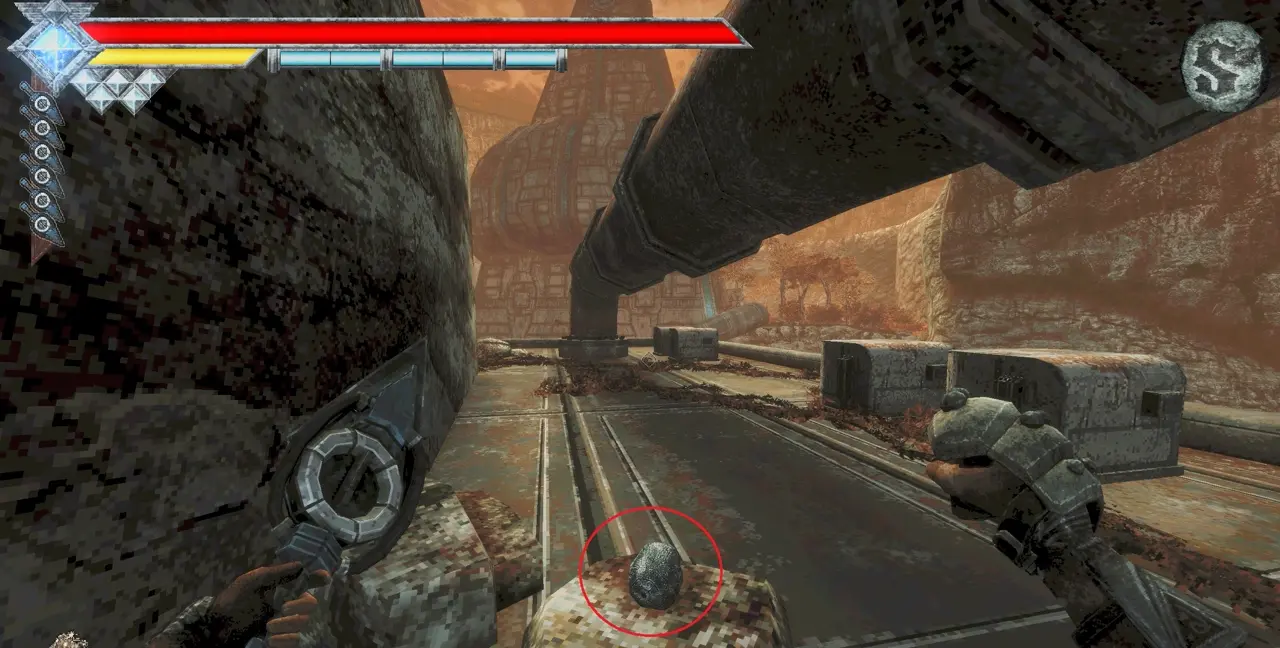
Skull #19: Small Cliff Behind the Pipe
Requirements: Caestus.
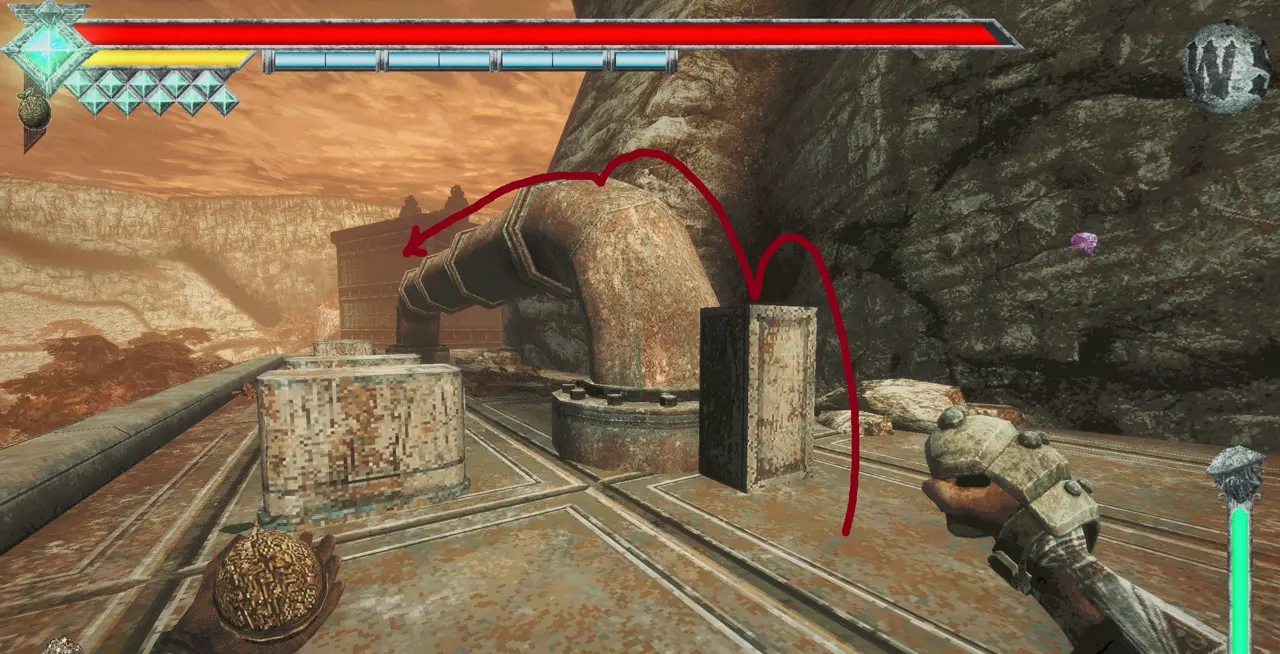
Near Skull #18, I climb onto the pipe and jump backward toward a hard-to-see ledge. The skull is on a panel on the small cliff.
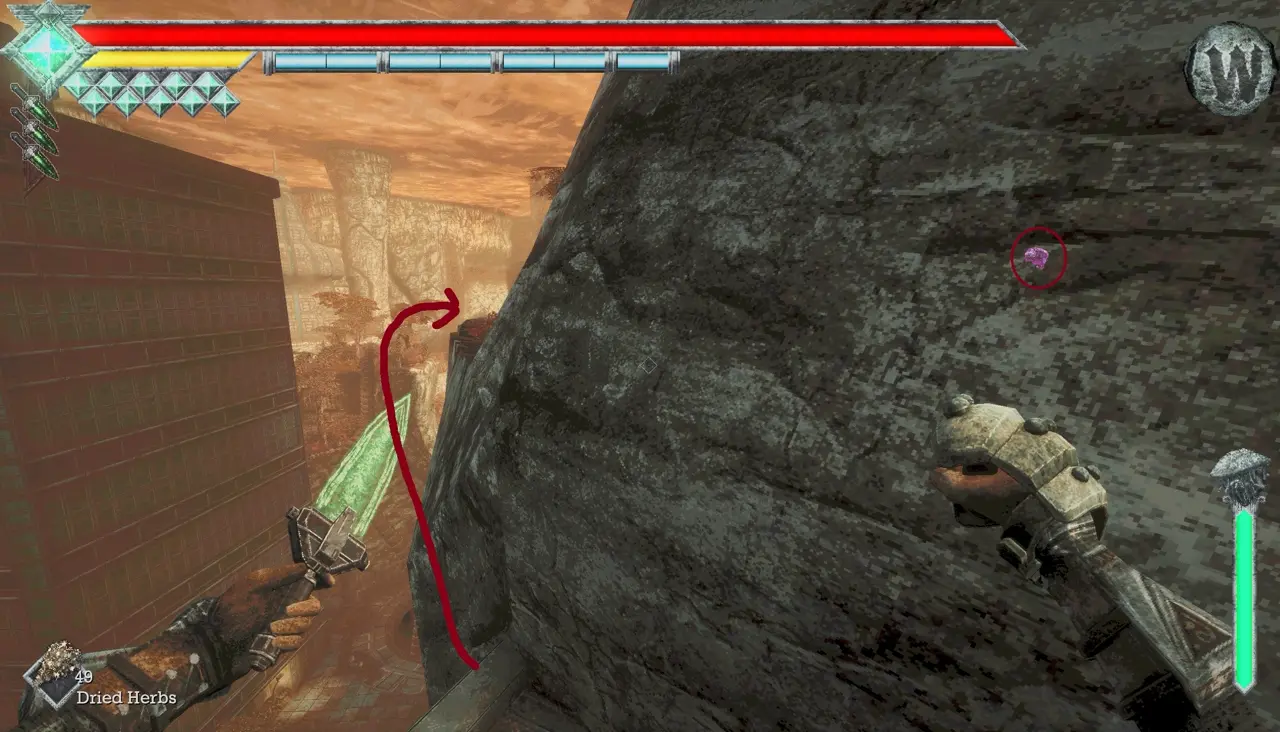
Skull #20: Cliff Near the Golden Raging Star Lizard
Requirements: Caestus.
I search the cliff near the golden Raging Star Lizard encounter. I gain enough height with the Caestus and use Wind Dashes to reach the top.
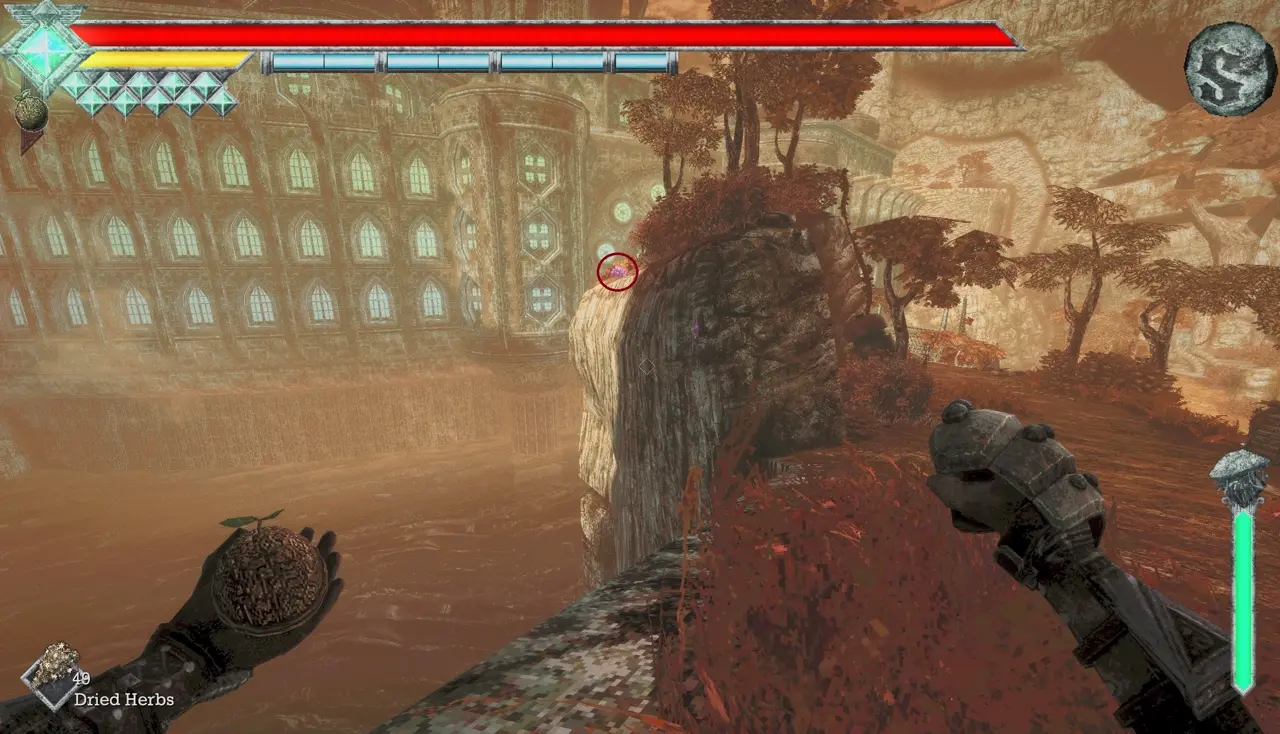
Skull #21: Roof of the Boss Power Station
Requirements: Caestus.
At the power station where I fight the boss, I go through the opening in the power room and make my way up to the roof for the skull.
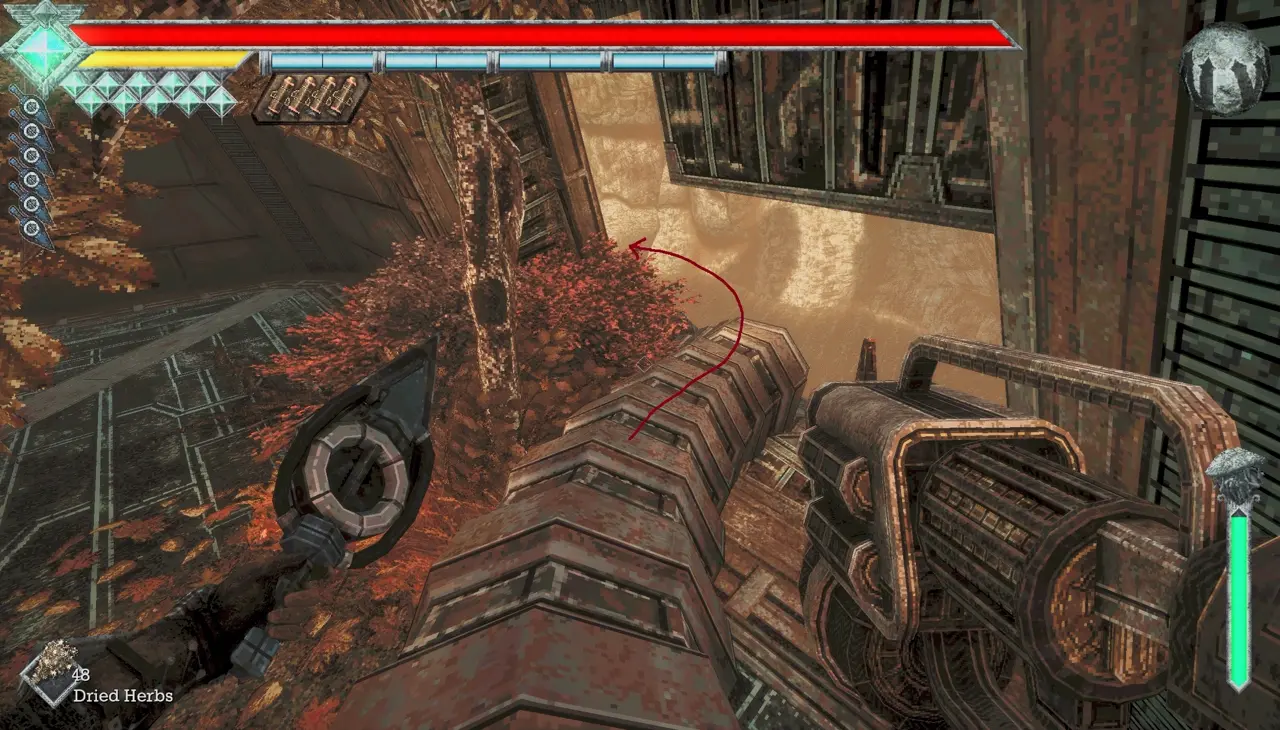
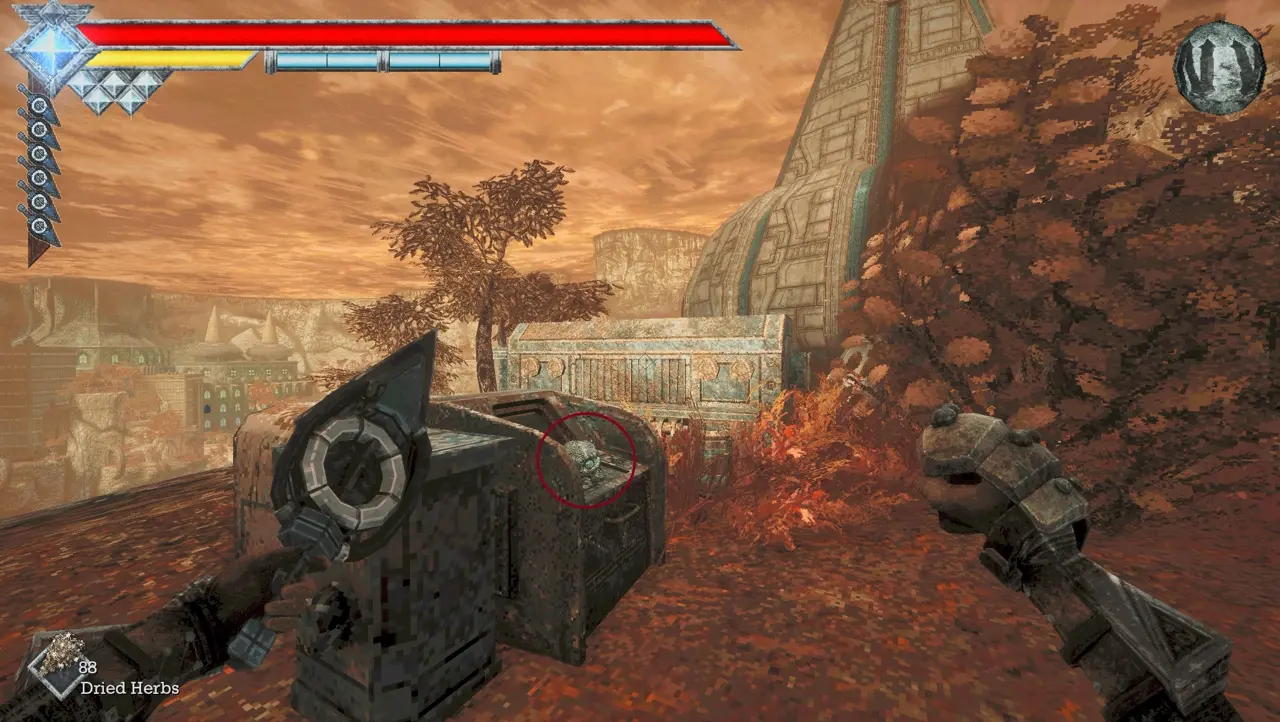
Skull #22: Above the Starting Area
Requirements: None.
I return to the ledge where I find the High Tech Module. From there, I jump and Wind Dash toward the spot directly above the starting area.
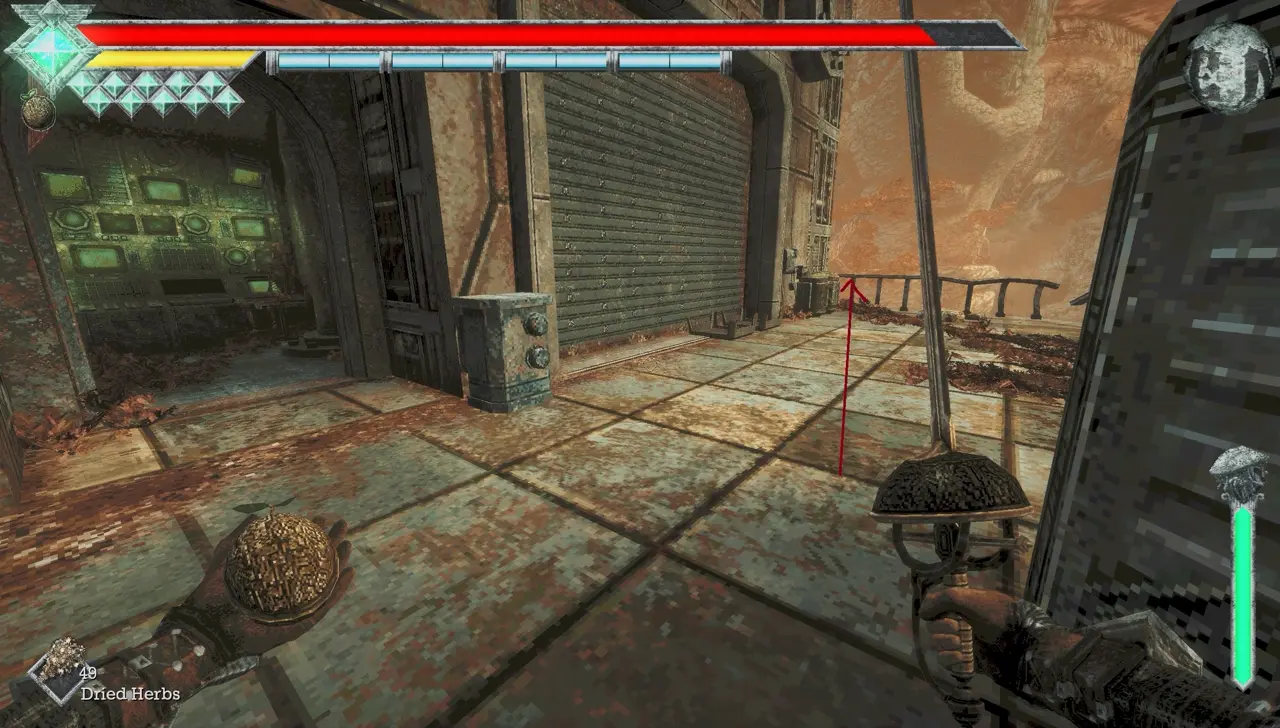
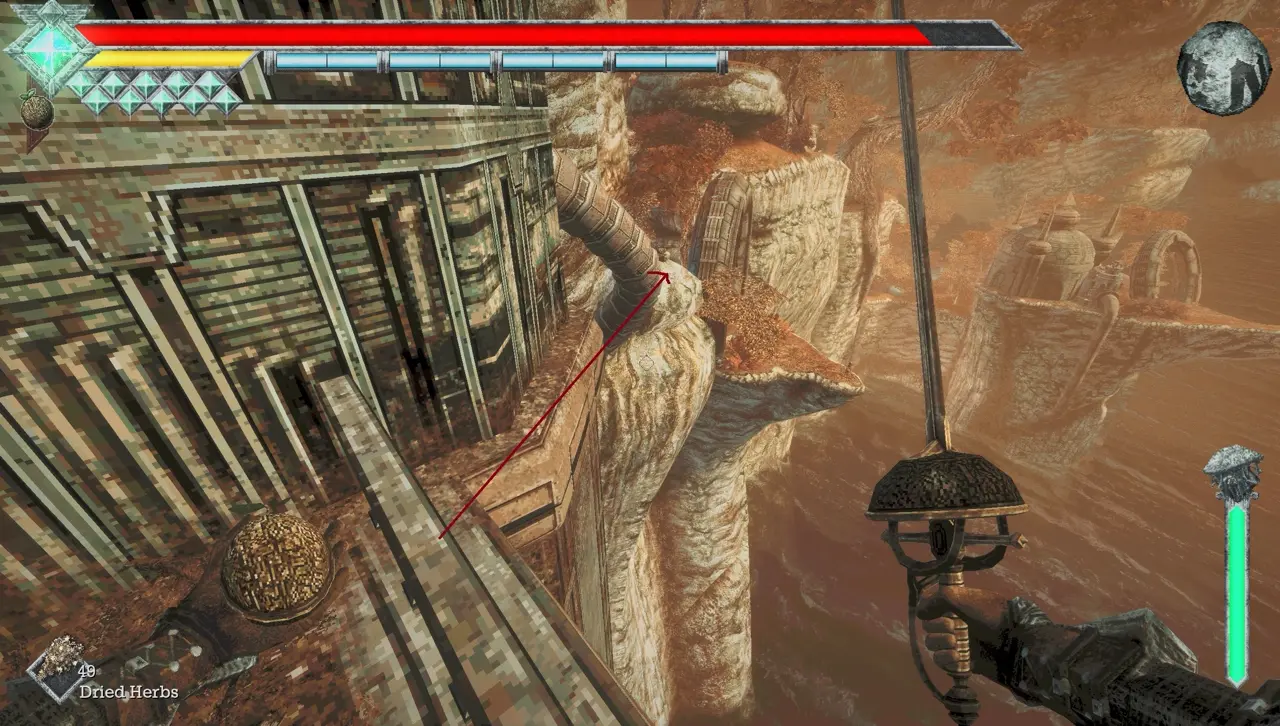
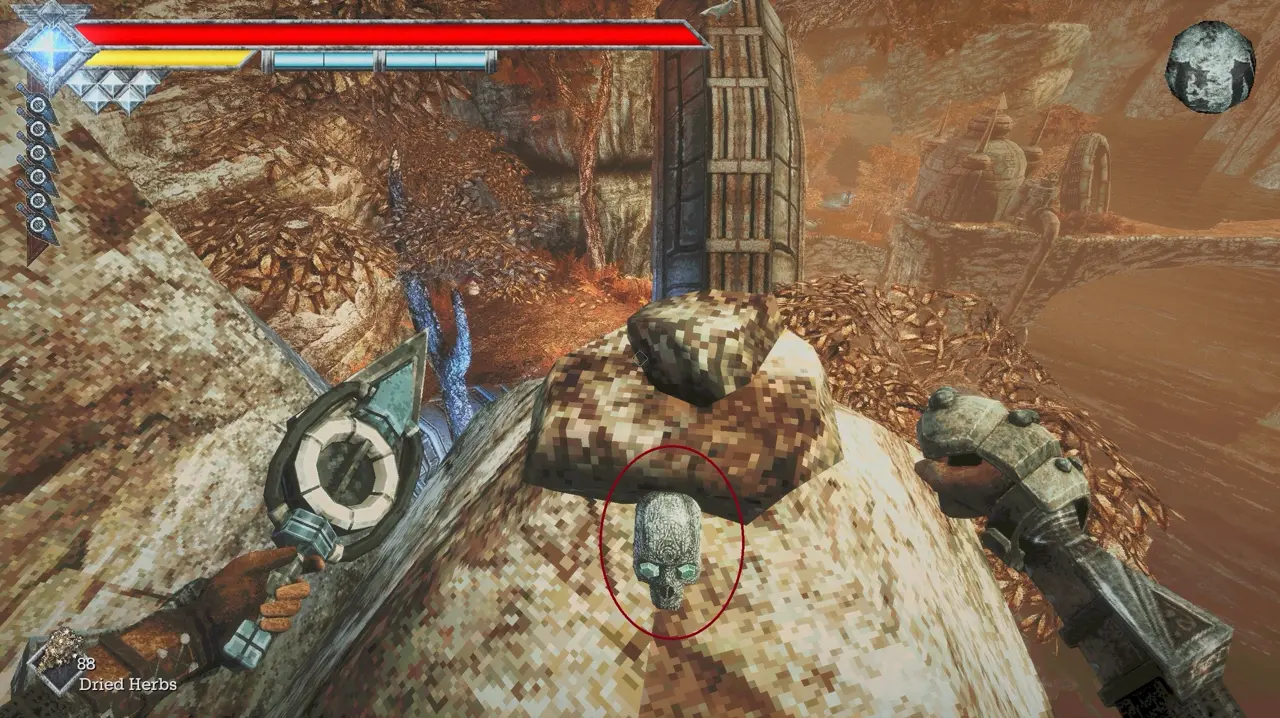
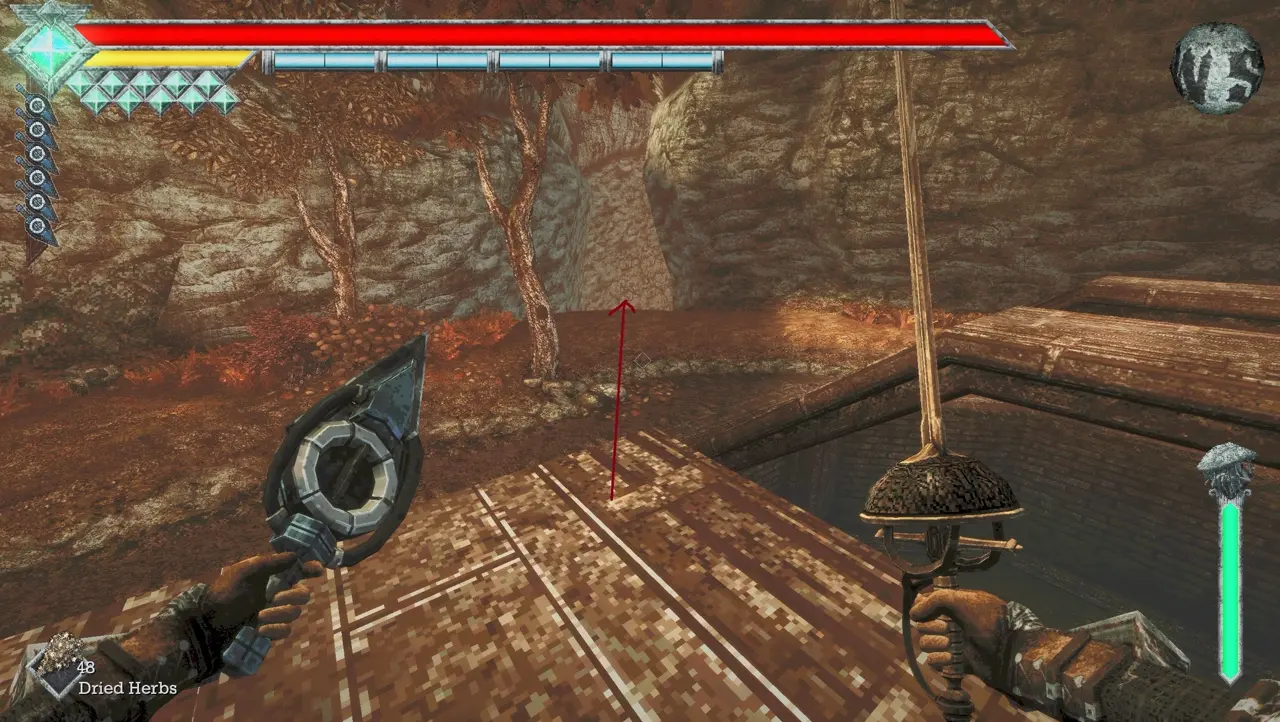
Skull #23: Near the Records of Sin Entrance
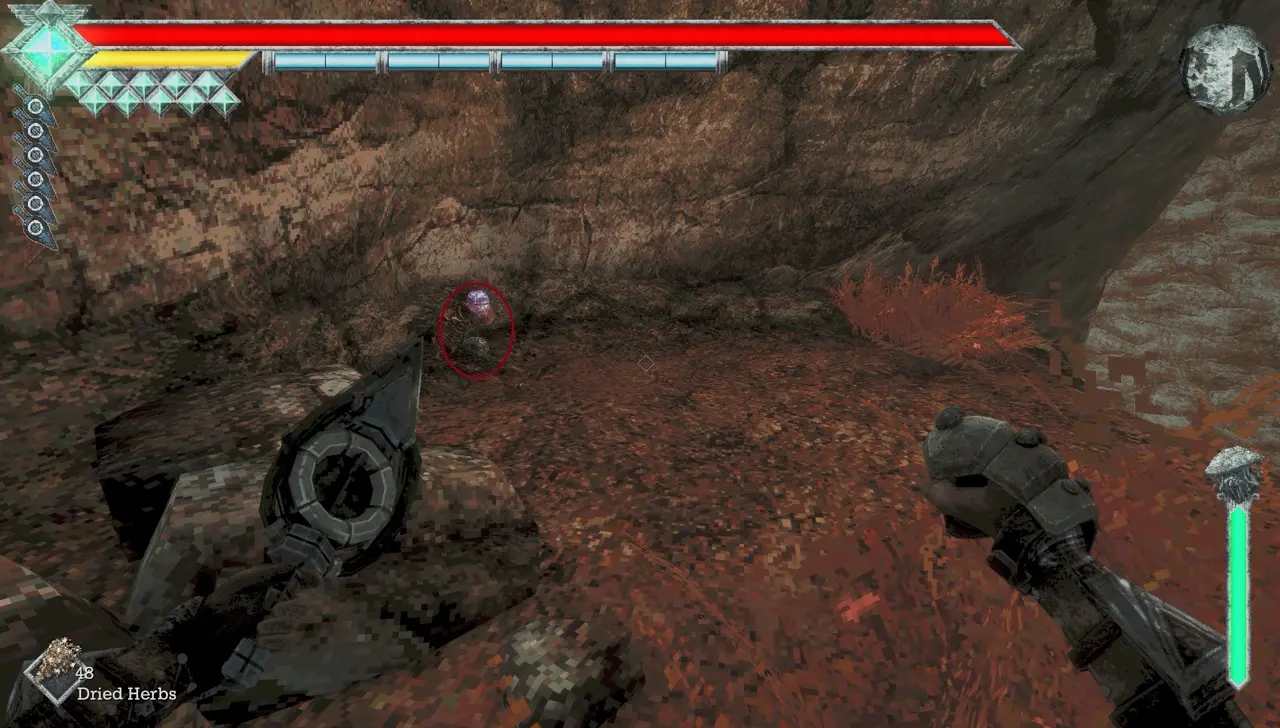
Requirements: Caestus and 5 Wind Dashes.
I head toward the entrance to the Records of Sin and use the Caestus together with five Wind Dashes to reach the nearby skull.
Obmuer Temple (With 5 Wind Dashes)
Skull #24: Distant Ledge Beyond the First Skull Tunnel
Requirements: Caestus, Pandora Blade, and 5 Wind Dashes.
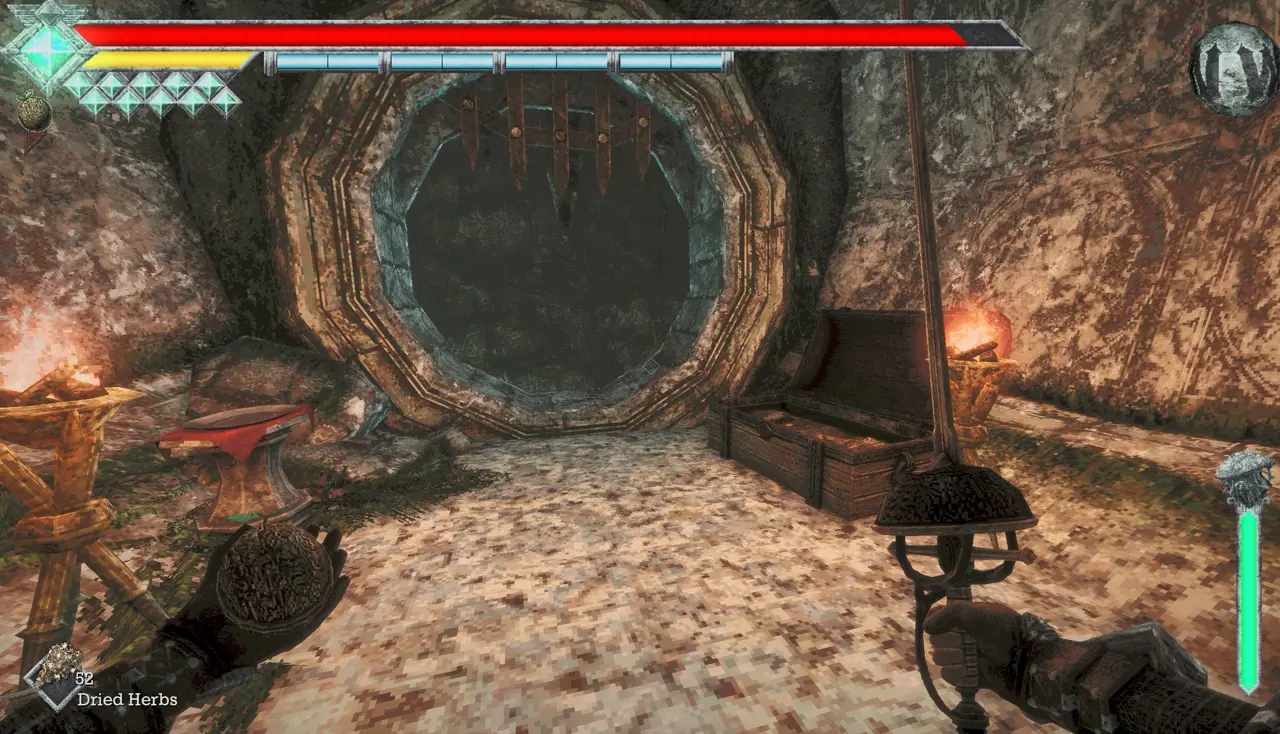
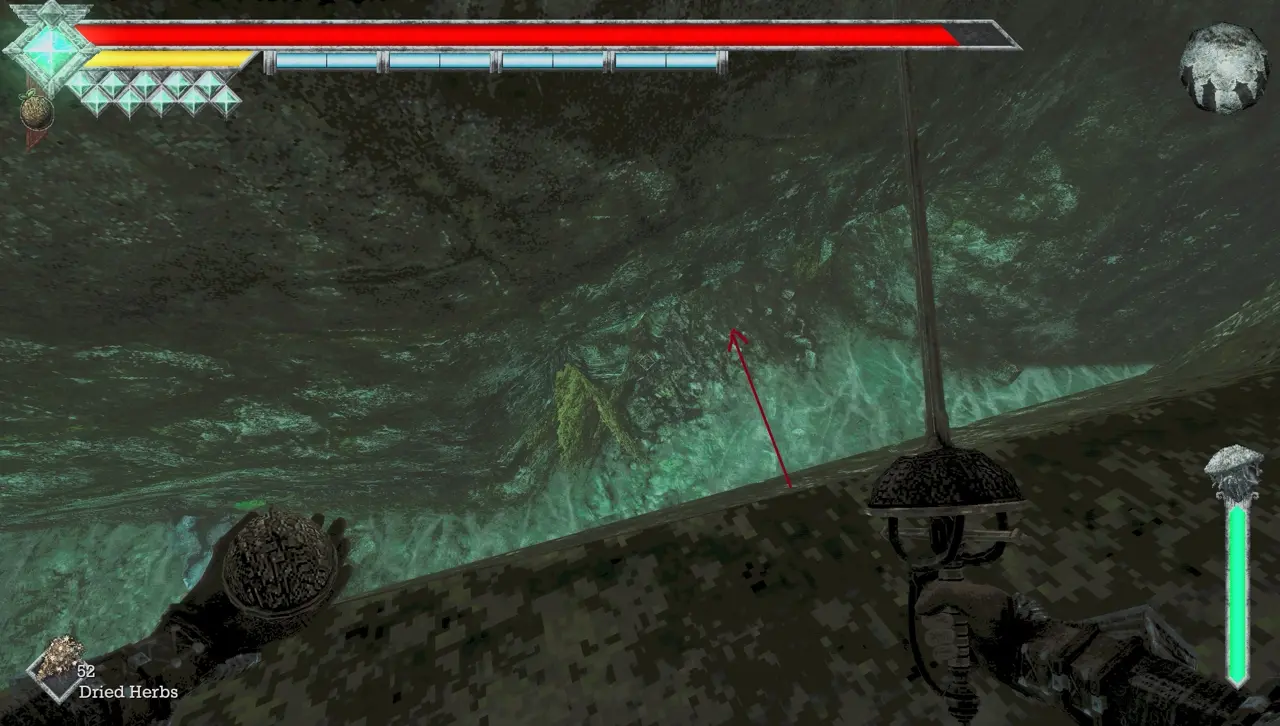
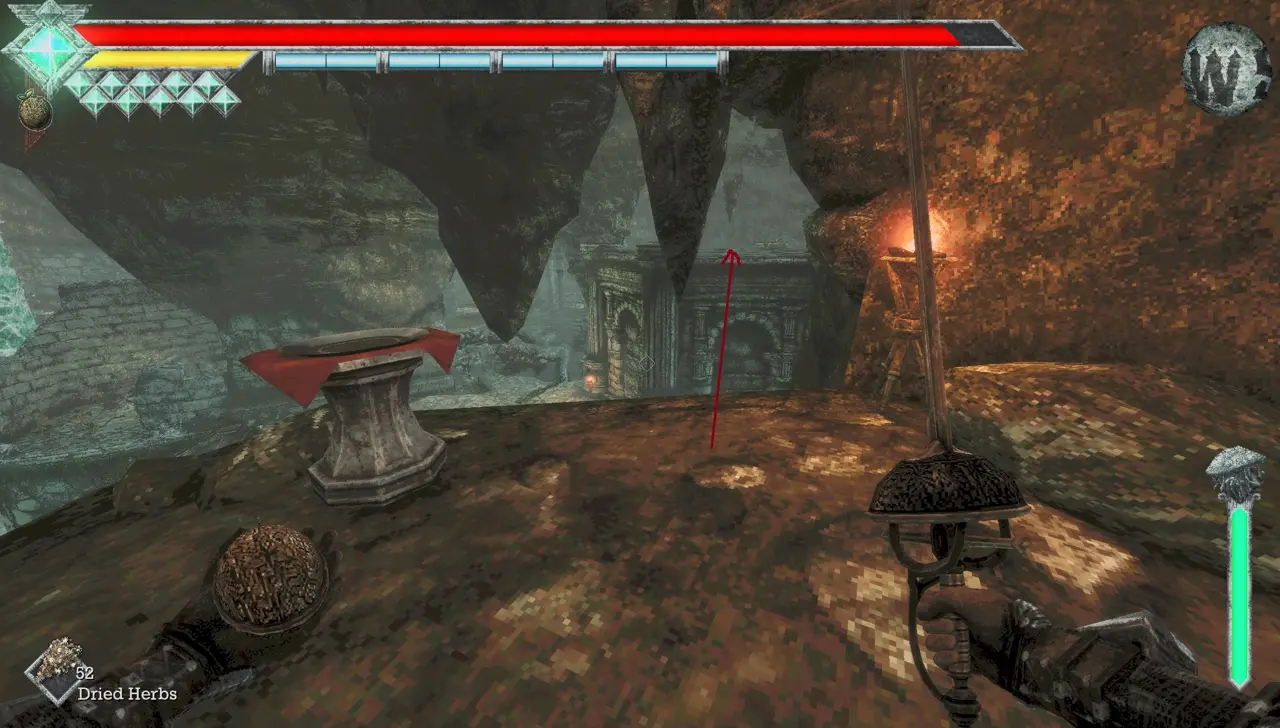
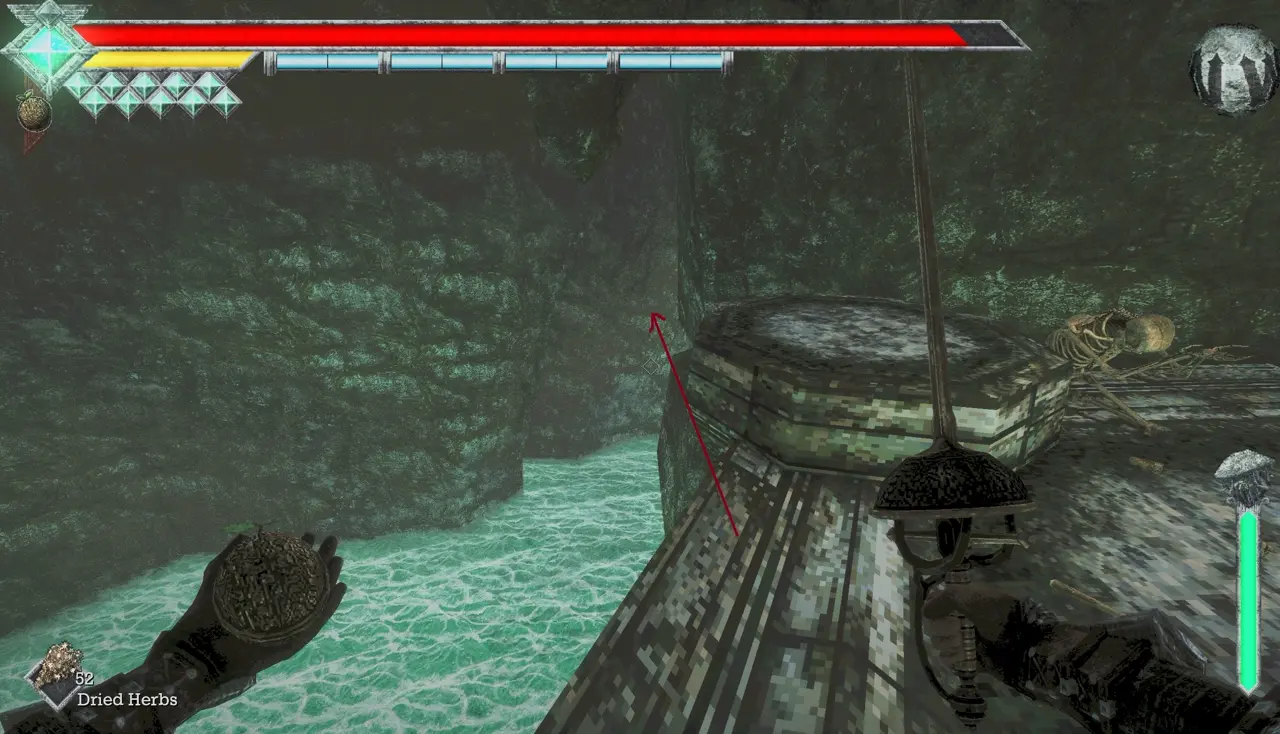
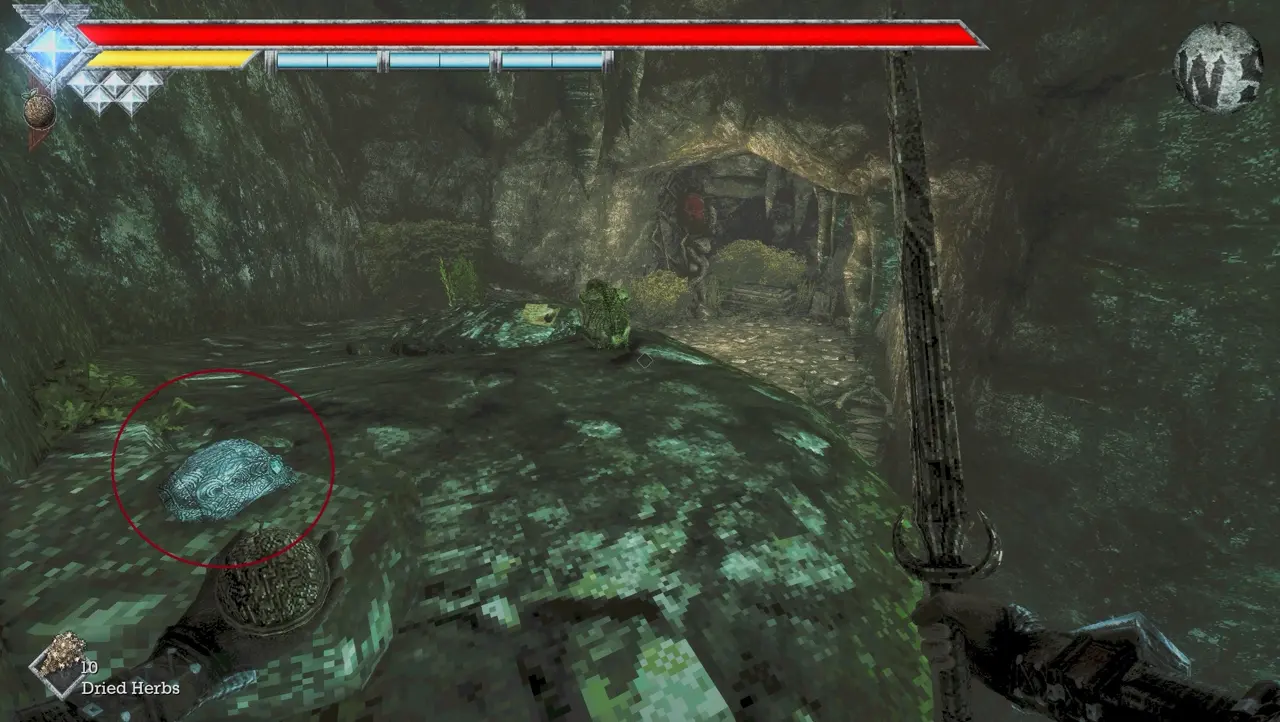
I return to the tunnel where I found Skull #1 and continue to the treasure chest and gate at the far end. After opening the gate, I drop down and follow the route until I come across some food. I Wind Dash to the large pillar across the way, then use the Caestus, all five Wind Dashes, and the Pandora Blade’s forward momentum to reach the distant ledge. The jump is very tight, so I can leave this one until I can fly or have all ten dashes.
Isle of Neasied (With 5 Wind Dashes)
Skull #25: Behind the Shop on Merchant’s Island
Requirements: Caestus, Pandora Blade, and 5 Wind Dashes.
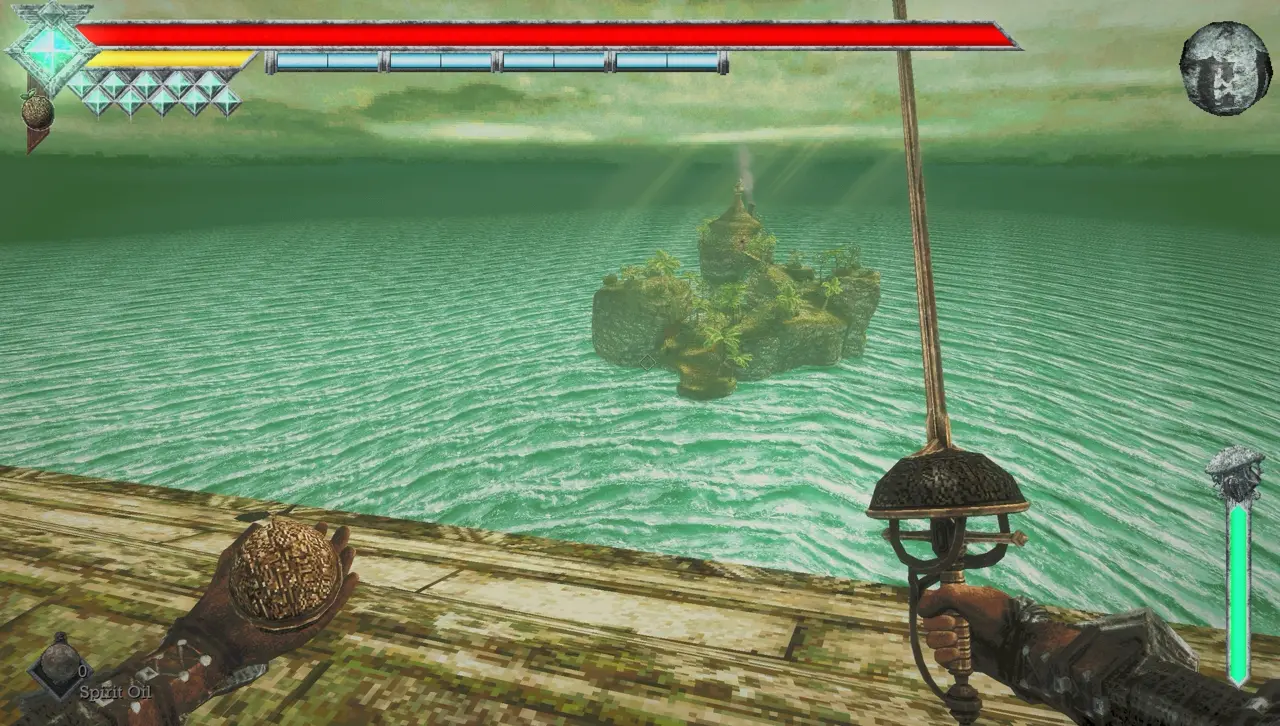
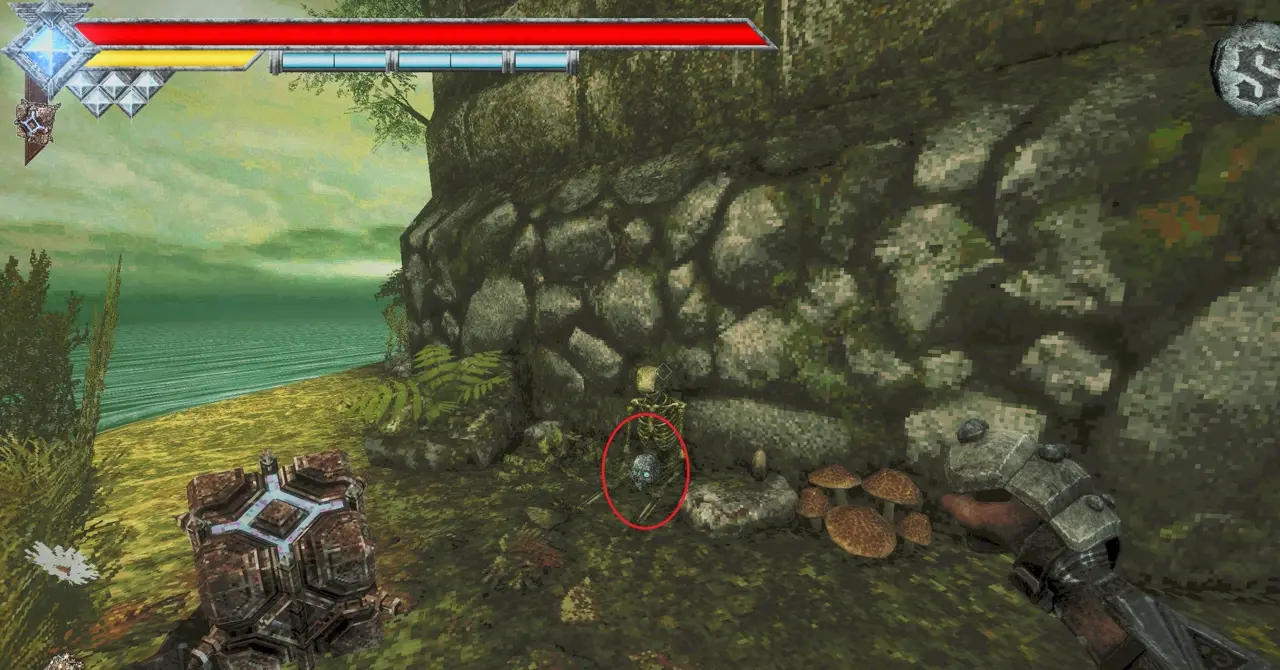
I start at the very back of the Deimpo Mausoleum rooftop, where there is enough height to reach Merchant’s Island. Using the Caestus, five Wind Dashes, and the Pandora Blade’s forward movement, I cross over to the island. I find the skull behind the shop.
Siraatsu Castle (Without Flying)
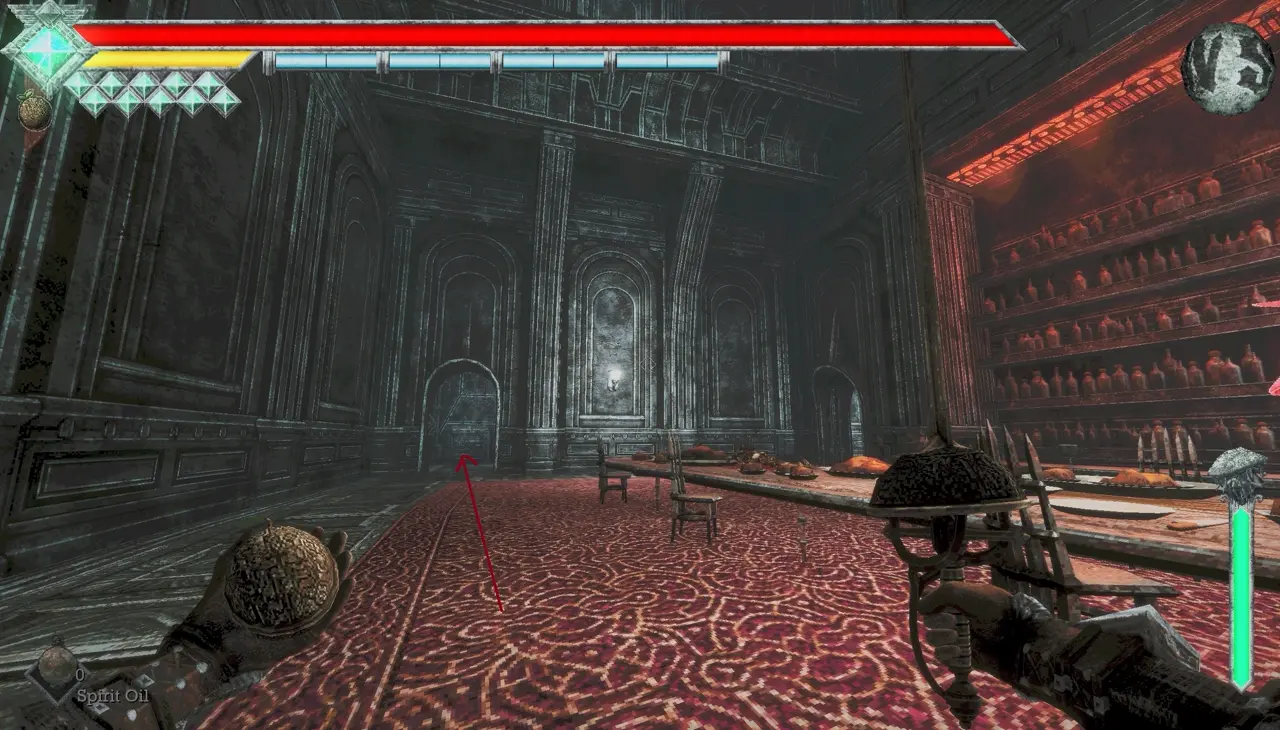
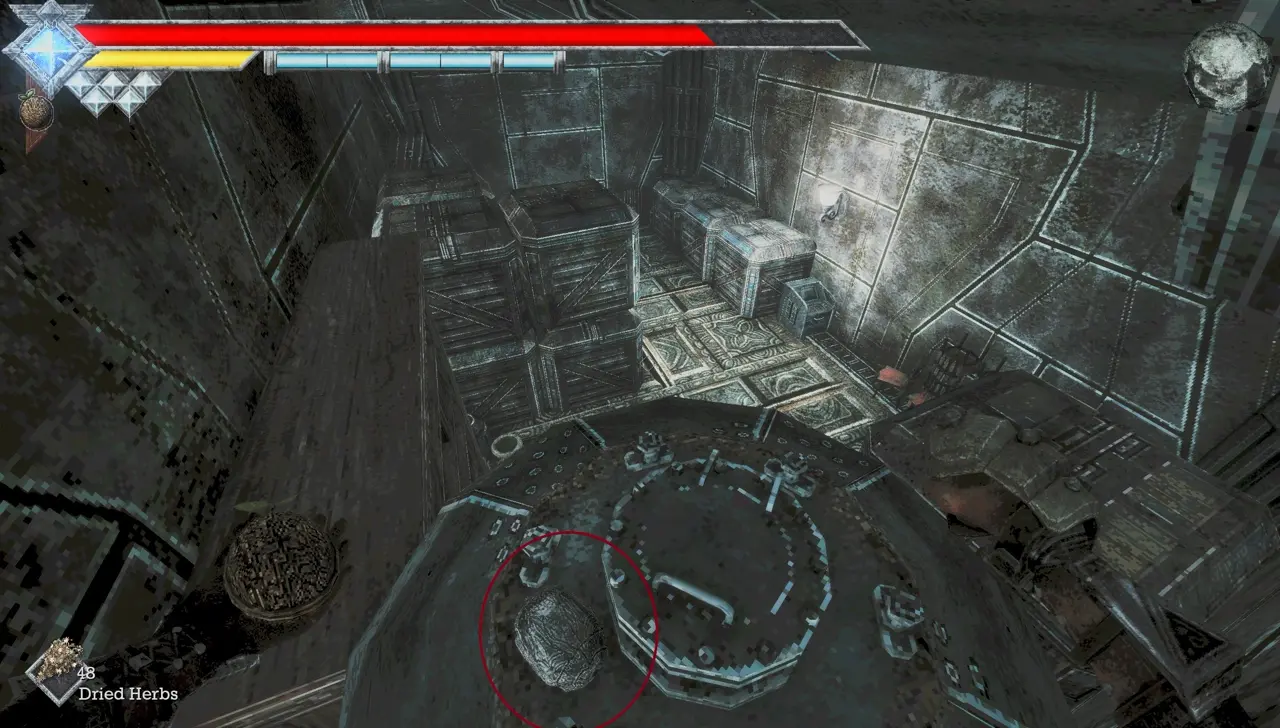
Skull #26: Metal Cylinder in the Storage Room
Requirements: Caestus.
In the storage room next to the dining room, where I find the Albino Bookbug, I look on top of the metal cylinder.
Skull #27: Tall Trash Pile
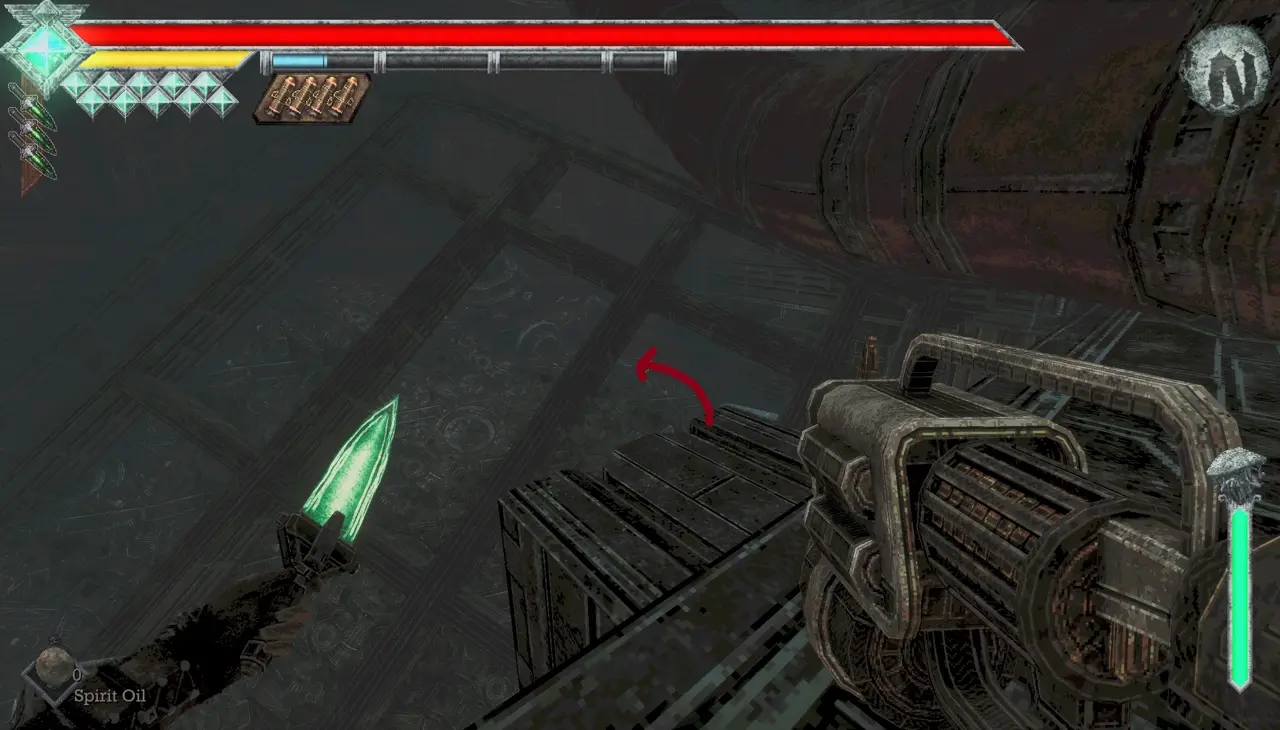
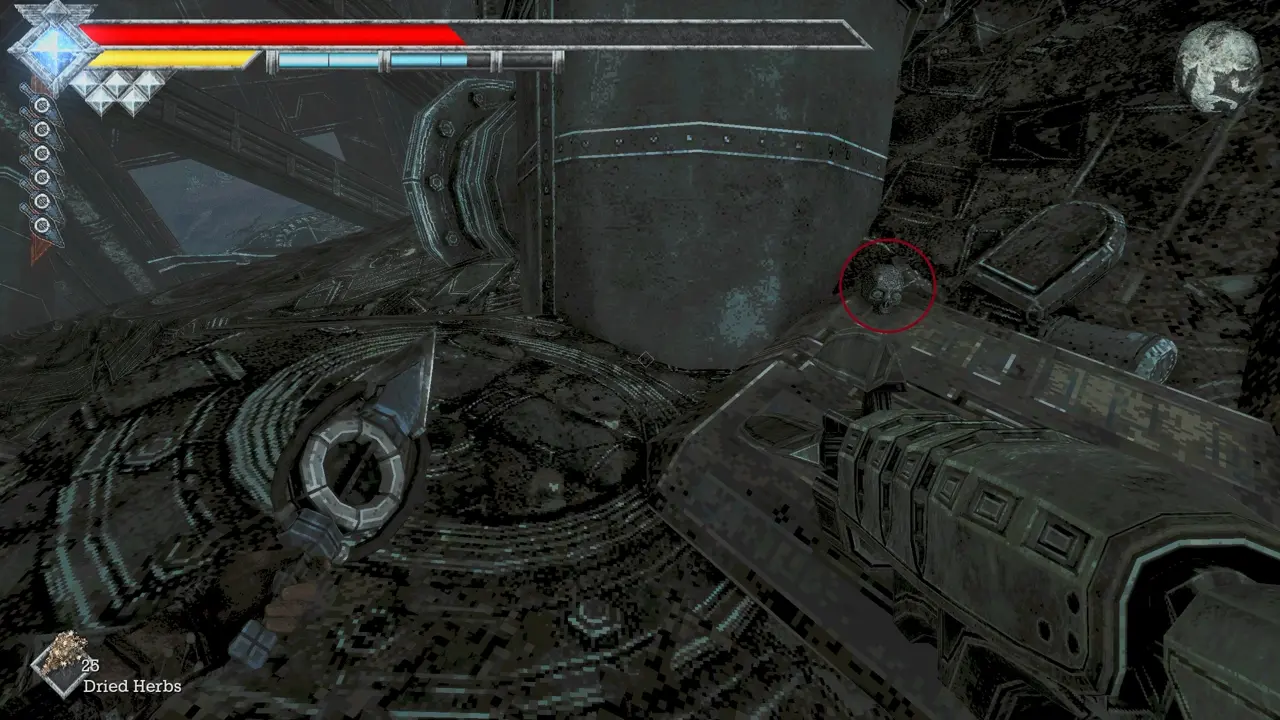
Requirements: None.
Inside the trash room, I find the skull on a tall pile of rubbish. I can reach it by jumping down from the upper part of the room.
Underworld (Without Flying)
How I Reach the Underworld
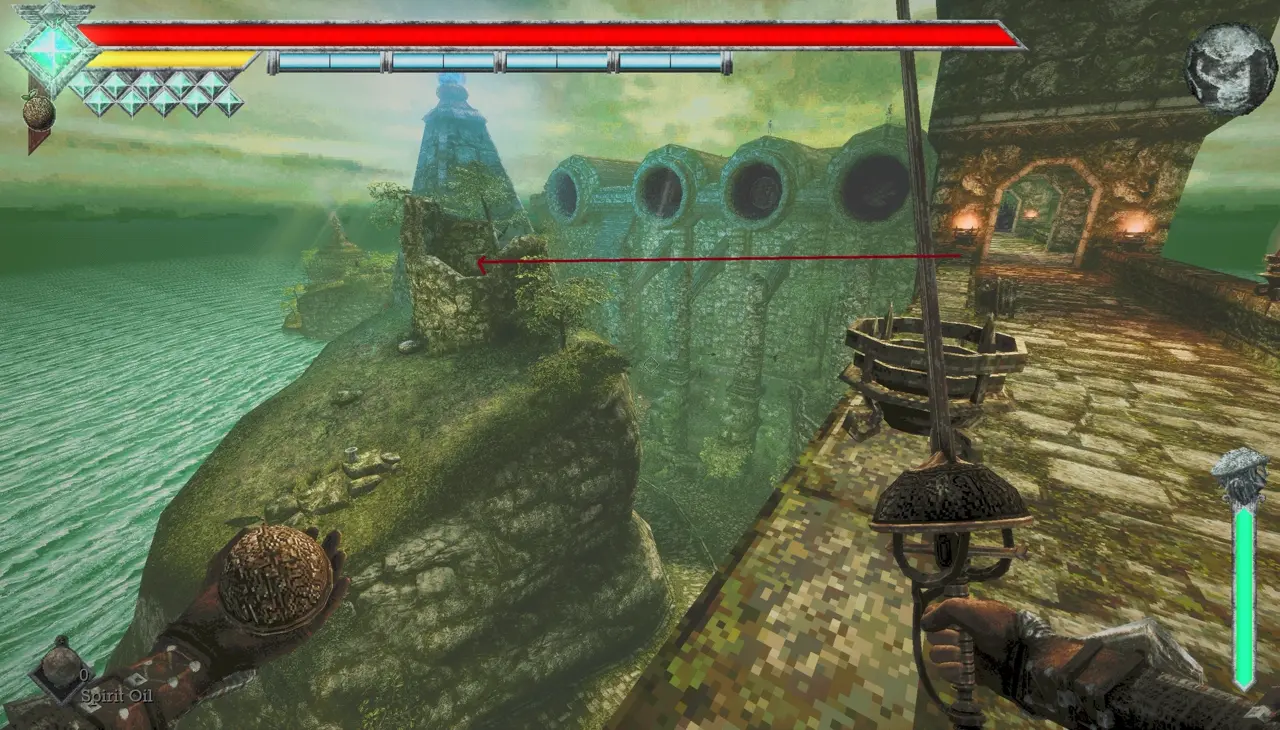
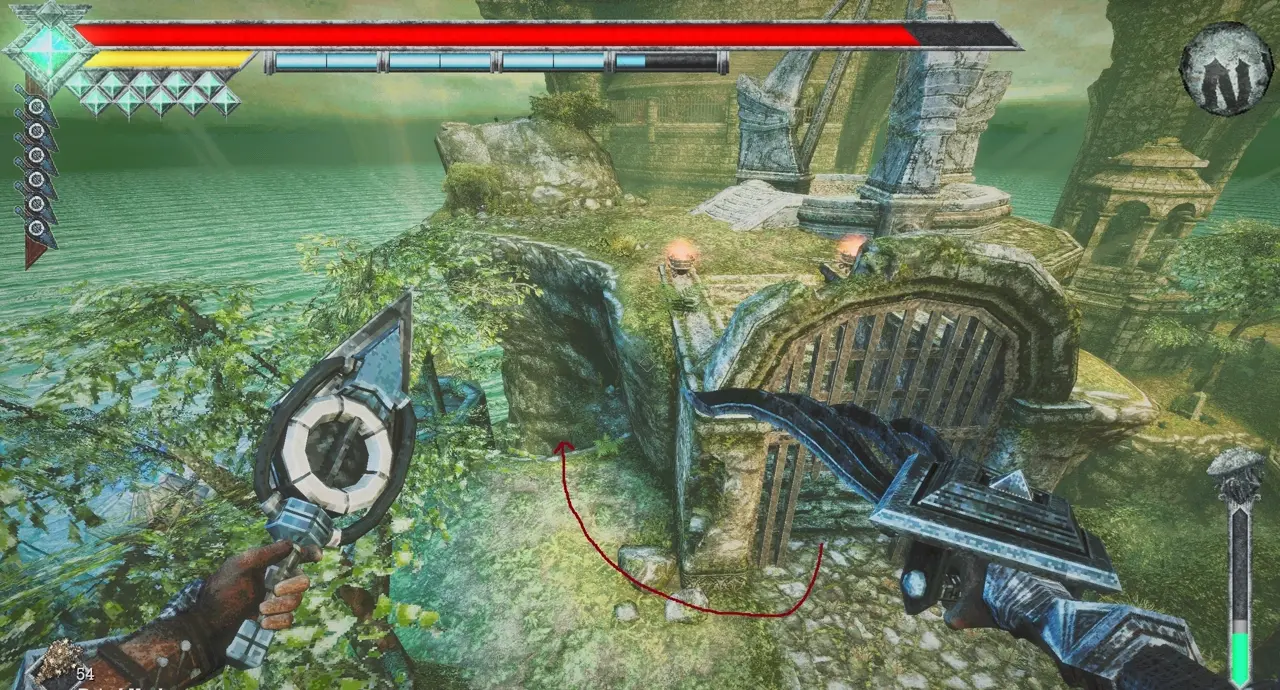
I can enter the Underworld in two ways. One route takes me through the large opening in a ruined structure, which I can reach by jumping from the bridge connecting the tower and mausoleum. The other route starts from a ledge beside the Isle of Neasied warp station.
Skull #28: Rubble on the Second-Highest Elevator Ring
Requirements: None.
At the elevator, I jump off before reaching the top and land on the second-highest outer ring. The skull is resting on some rubble.
Forsaken Dungeon (Without Flying)
How I Reach the Forsaken Dungeon
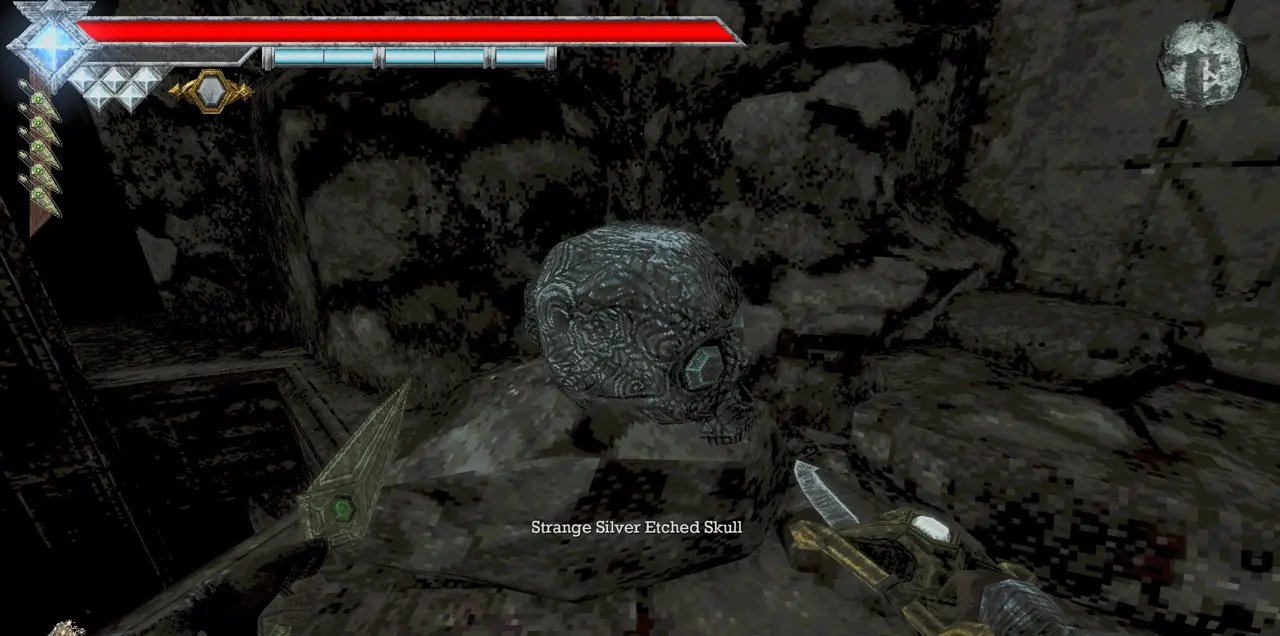
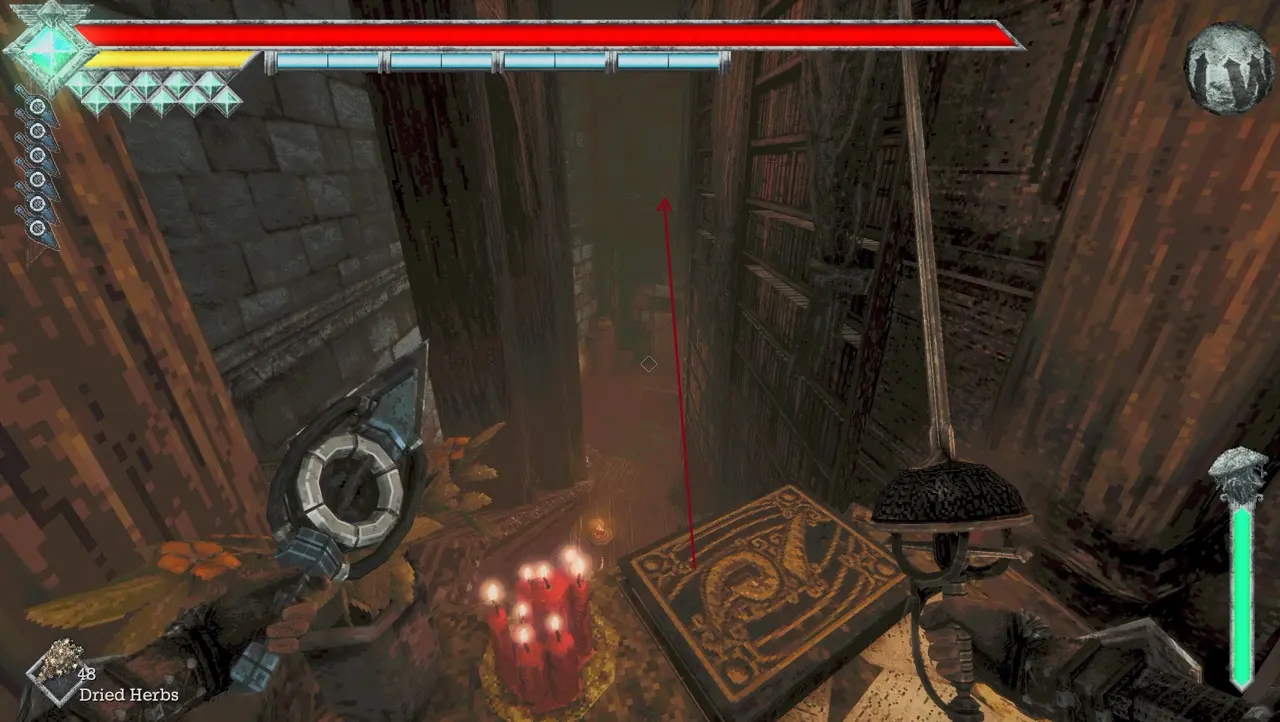
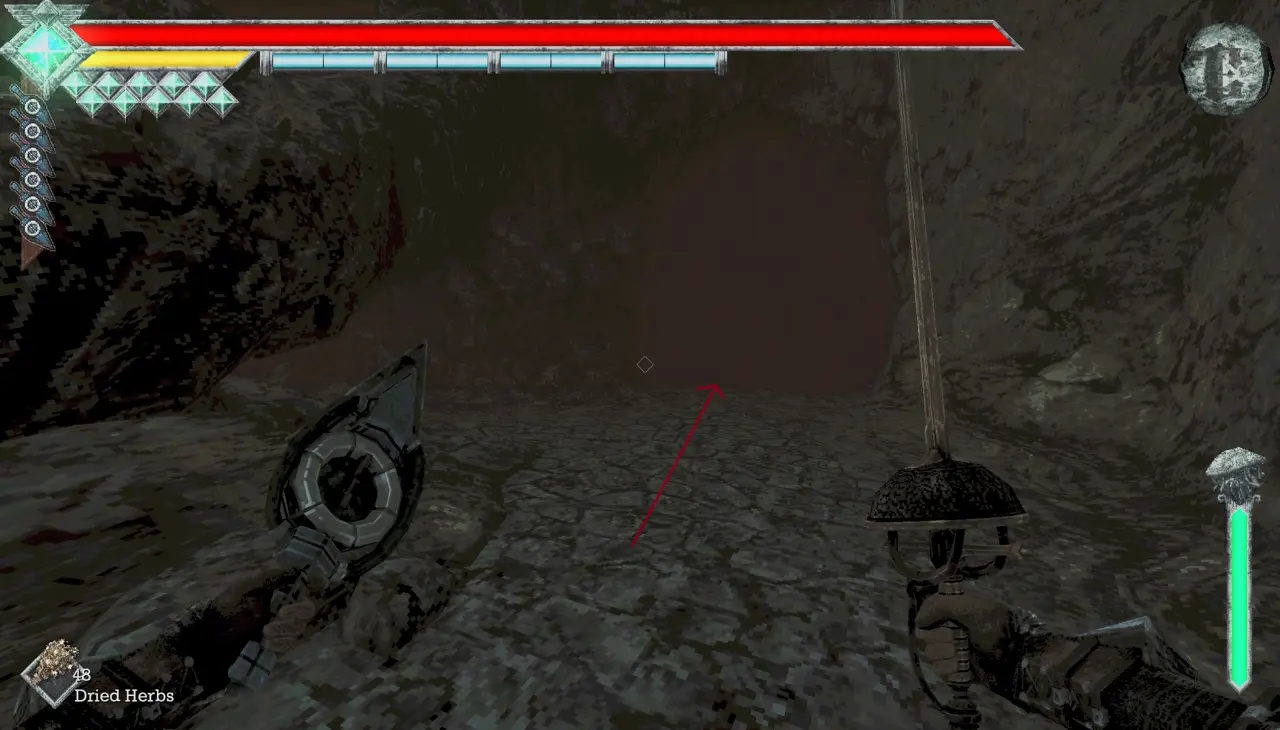
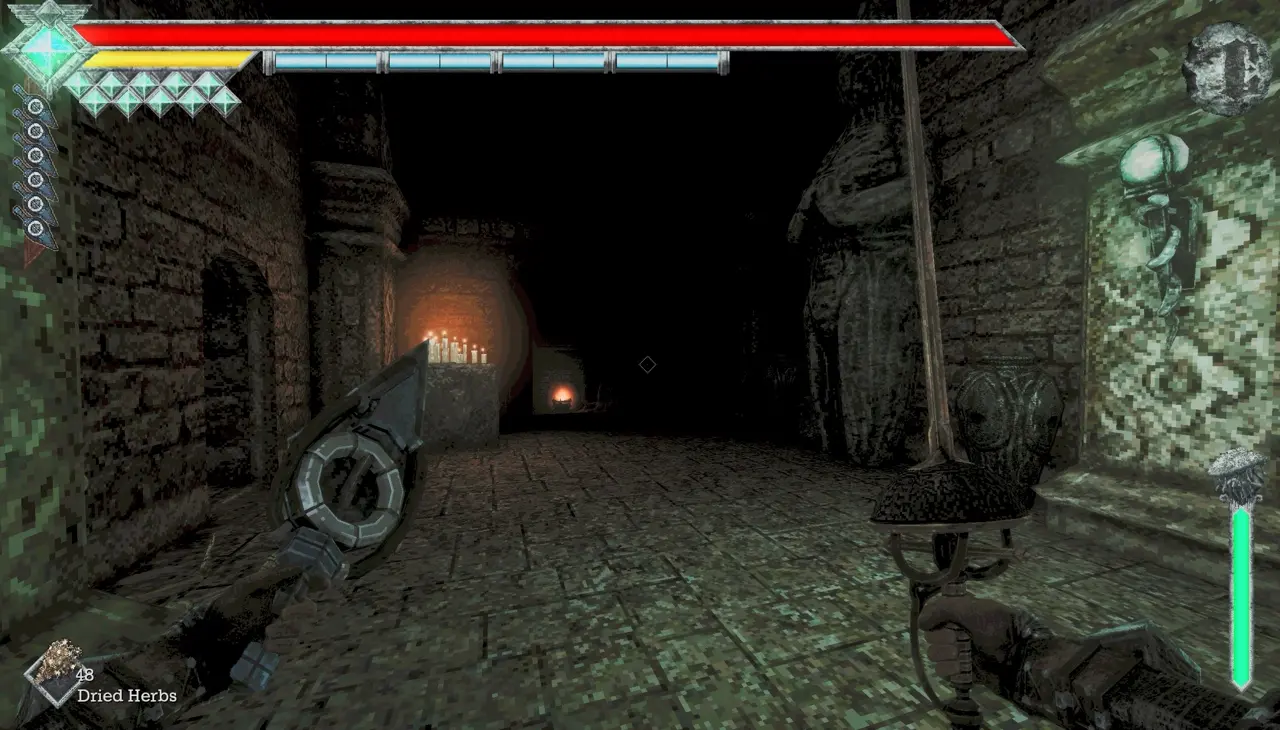
Inside the Tower of Knowledge, I look above the trapdoor leading to the basement for a hidden wall. I Wind Dash to it and follow the passage until I drop into the basement. From there, I take the nearby downward path toward the dungeon. The cave-like surroundings give way to ruins as I approach the right route.
Skull #29: Third Ring Down the Elevator
Requirements: None.
While following the route into the dungeon, I reach an elevator. I jump off at the third ring down to collect the skull.
Skull #30: Behind the Altar Above the Josami Warden
Requirements: Caestus.
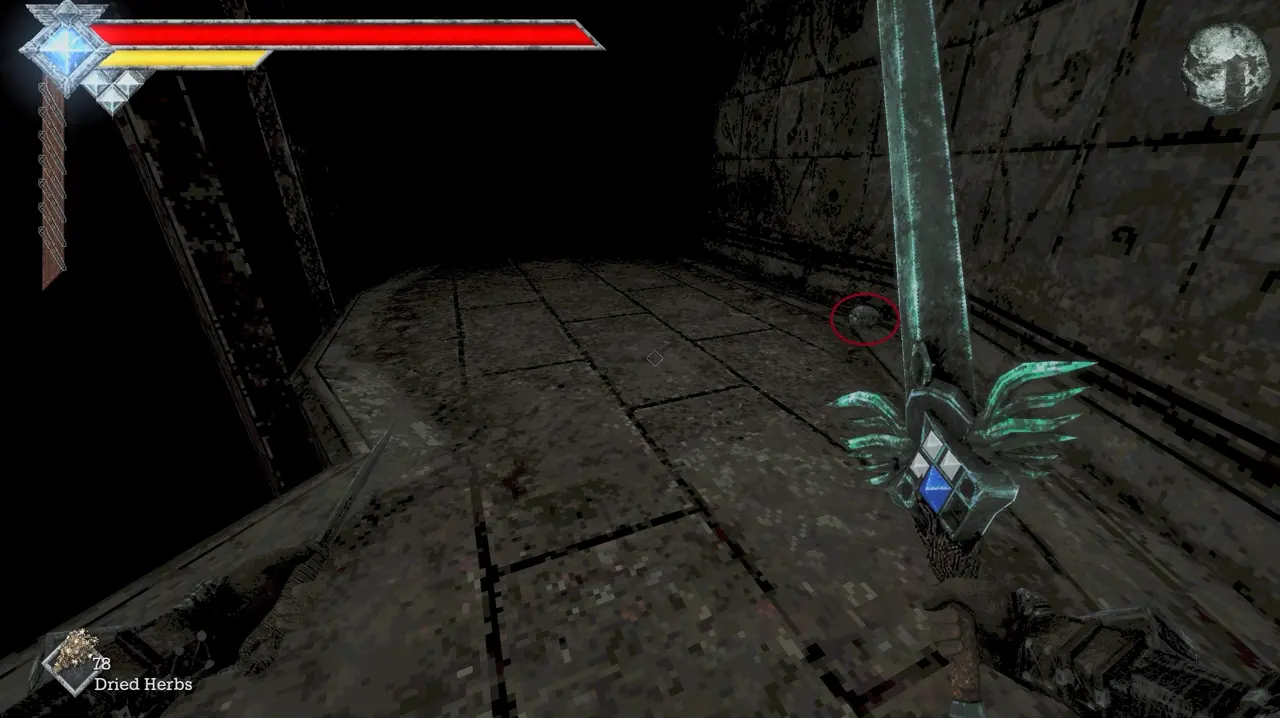
Just before the dungeon proper, I enter the large room with a lone Josami Warden. I look up for the large opening, use the Caestus to reach it, and find the skull behind the altar.
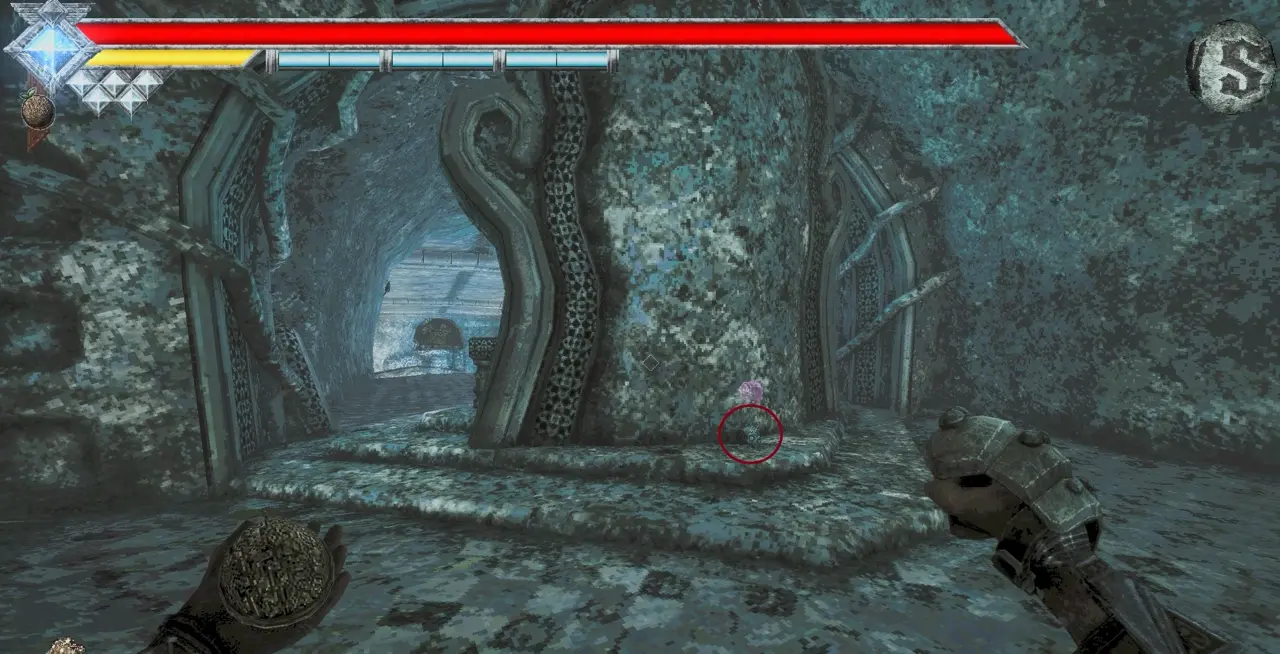
Skull #31: Snake Statue Near Skull #30
Requirements: None.
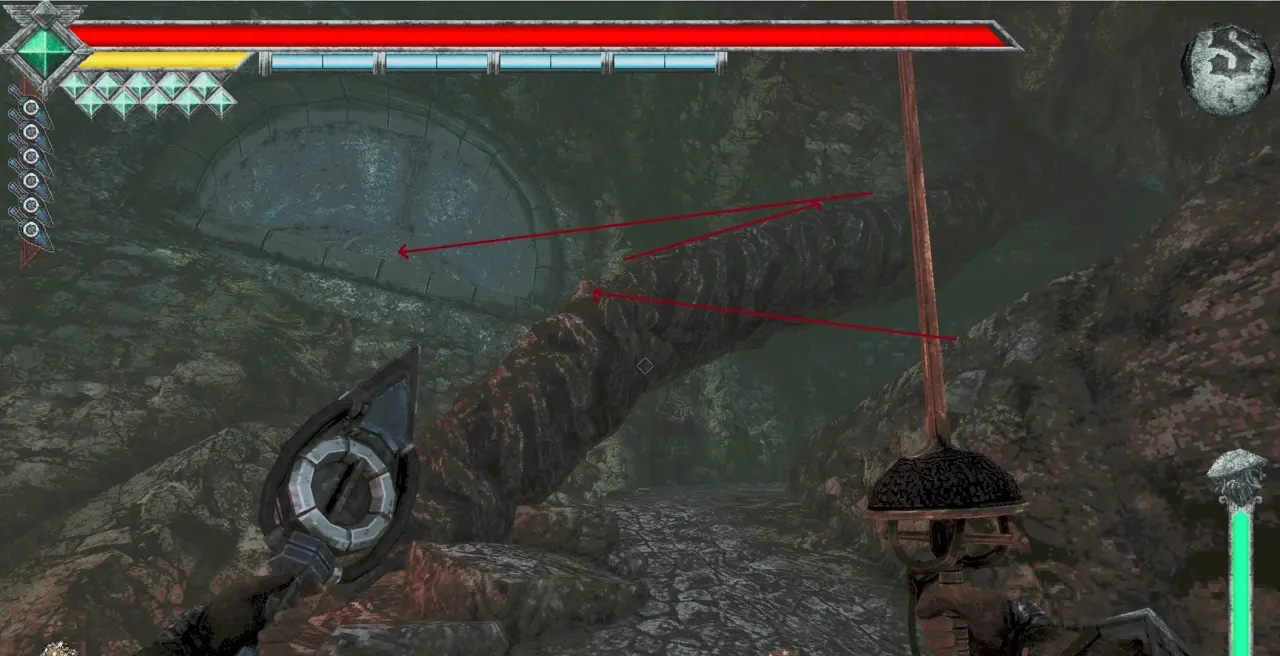
In the same room as Skull #30, I move farther along to the snake statue. I Wind Dash to the skull sitting on top.
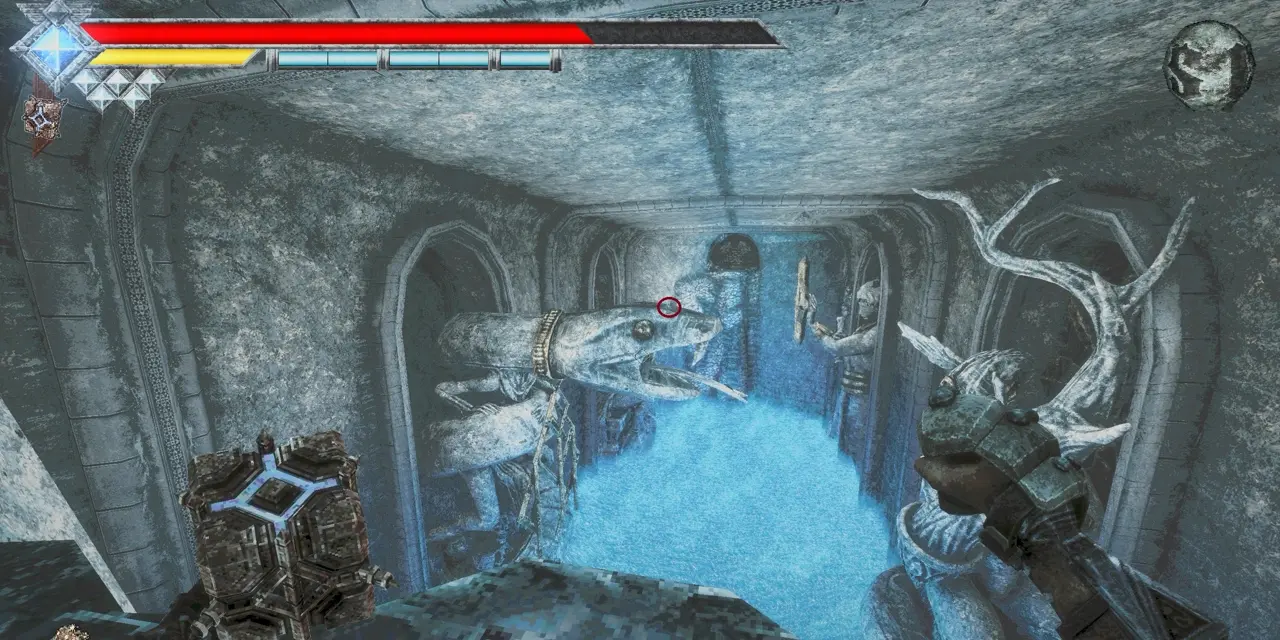
Skull #32: Small Ledge Across the Gap
Requirements: None.
Near Skulls #30 and #31, I look across the gap in the direction opposite the dungeon. I Wind Dash to the small ledge near the food and collect the skull.
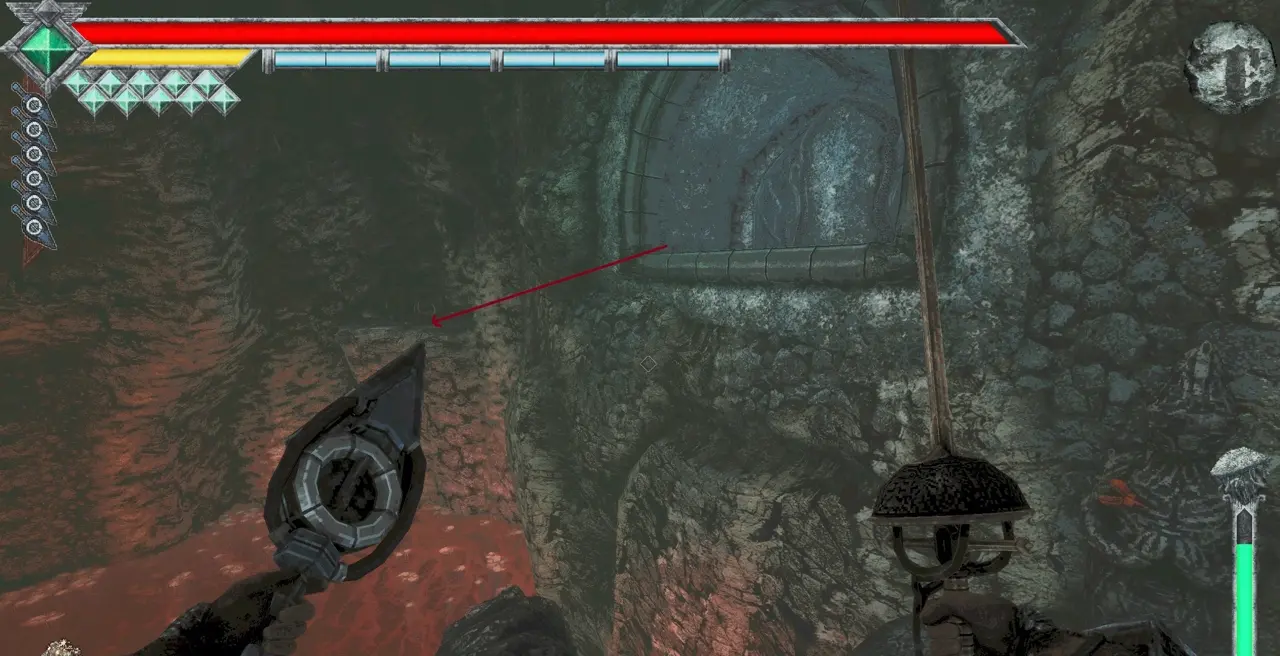
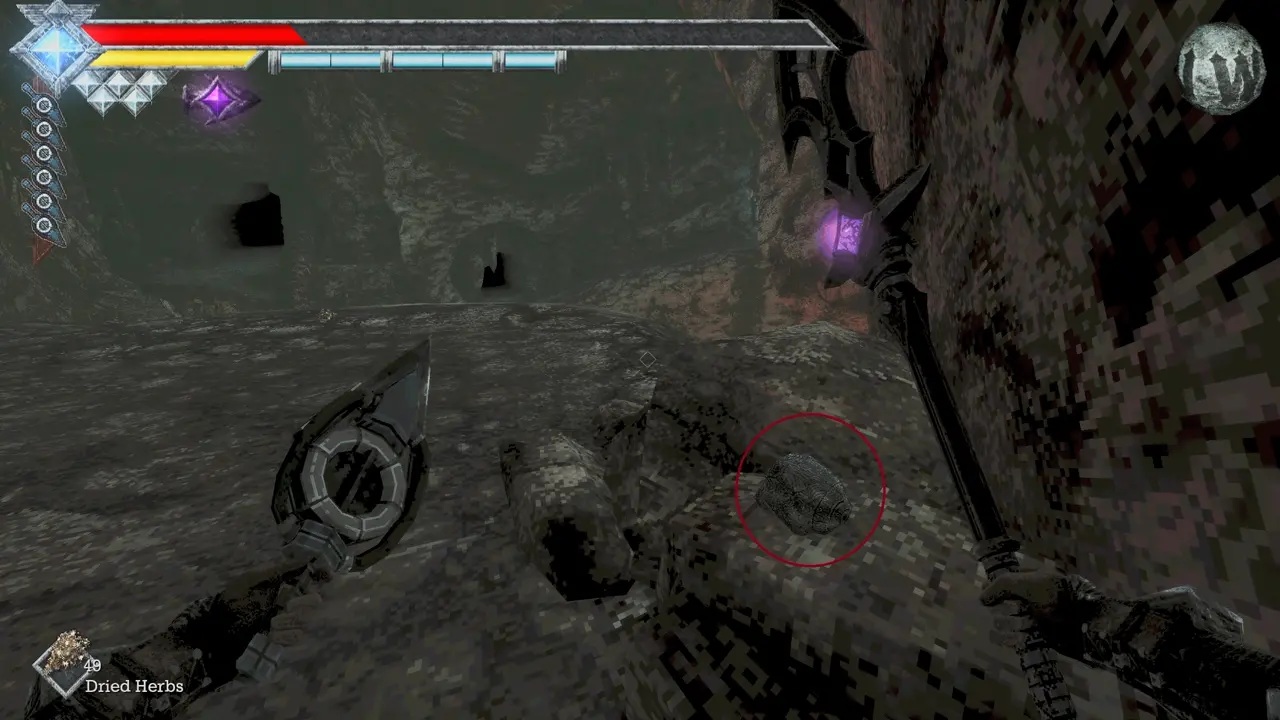
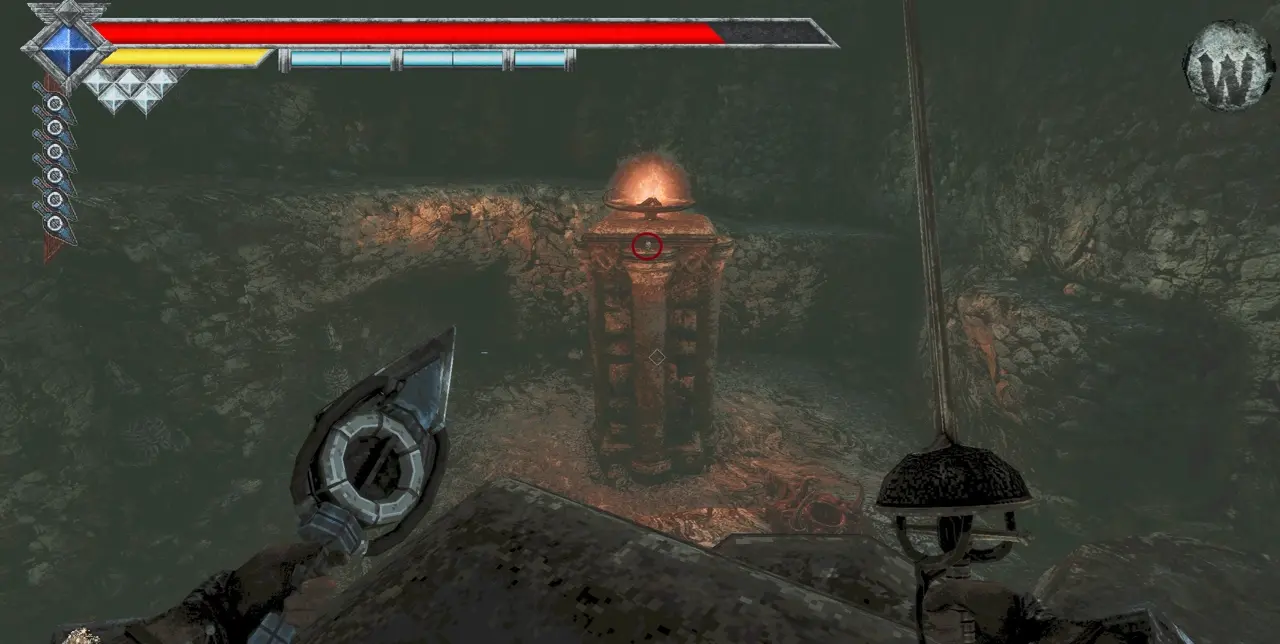
Skull #33: Large Brazier by the Rusted Cell Key
Requirements: None.
After leaving the Forsaken Dungeon for Verdant Hollow, I find the nearby elevator that leads back into the dungeon, close to a save point. In the room containing the Rusted Cell Key, I Wind Dash to the skull on the large brazier.
Rotting Cavern (Without Flying)
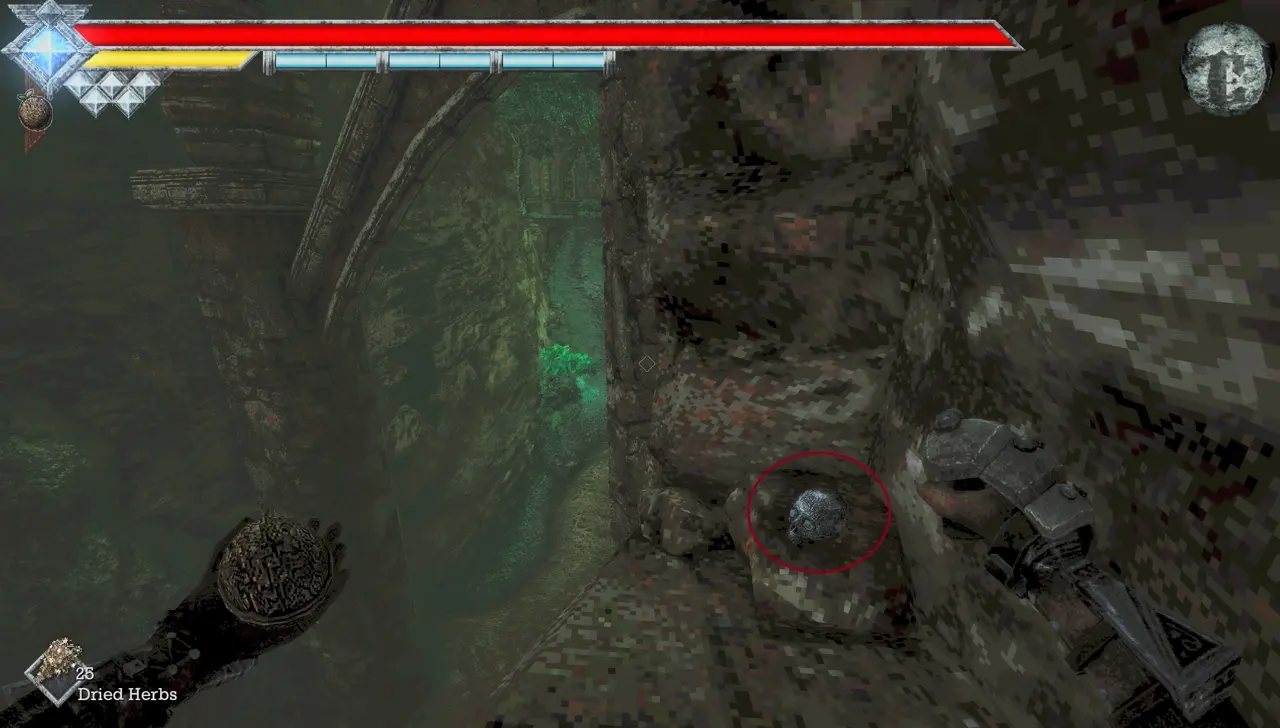
Skull #34: Pillar Near the Exit Toward the Sipeha Lenses
Requirements: Caestus.
At the far end of Rotting Cavern, near the exit toward the temple containing the Sipeha Lenses, I look for a skull on a pillar. I begin from the high ledge along Verdant Hollow, use the Caestus for height, and Wind Dash across.
Verdant Hollow (Without Flying)
Skull #35: Branch Behind the Josami Warden
Requirements: None.
I take the shortcut from Deimpo Mausoleum to Verdant Hollow. The hidden wall is in the large stairwell beside the mausoleum warp station, one level below the green vault. After passing through, I drop onto the branch behind the Josami Warden to get the skull.
Skull #36: Tree Below the Upper Forest
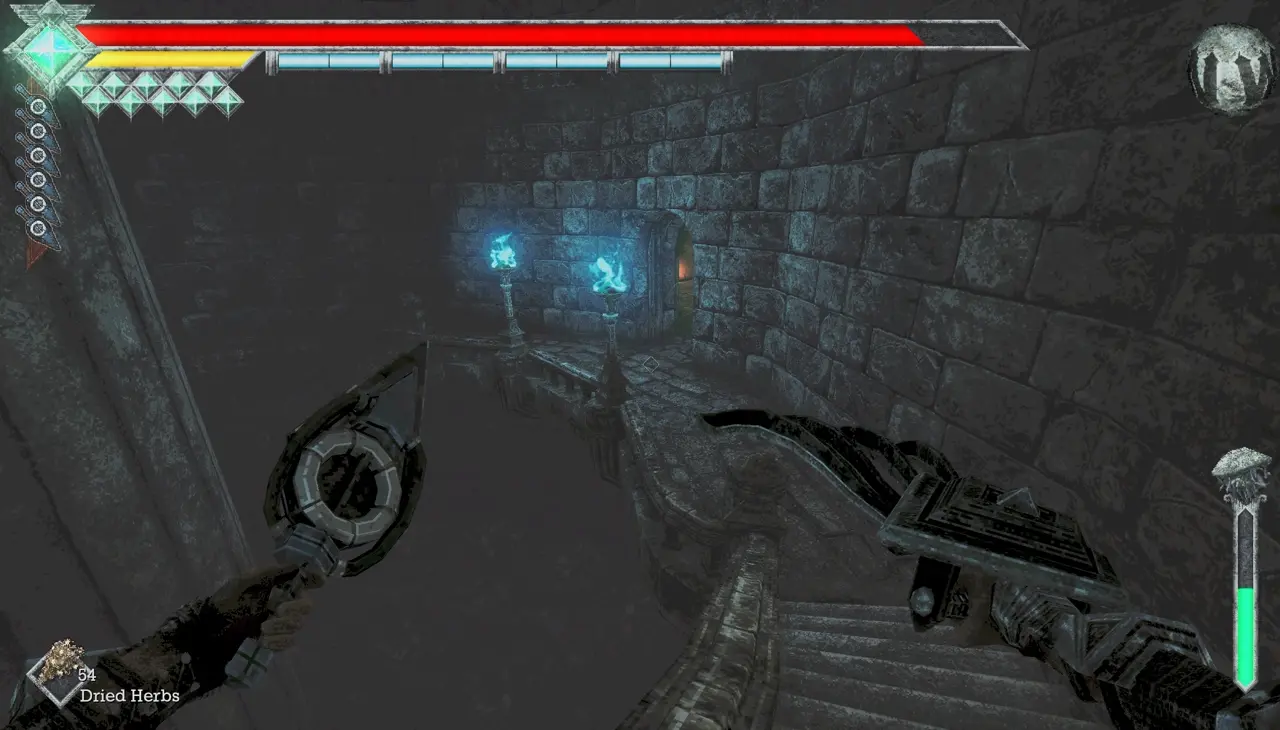
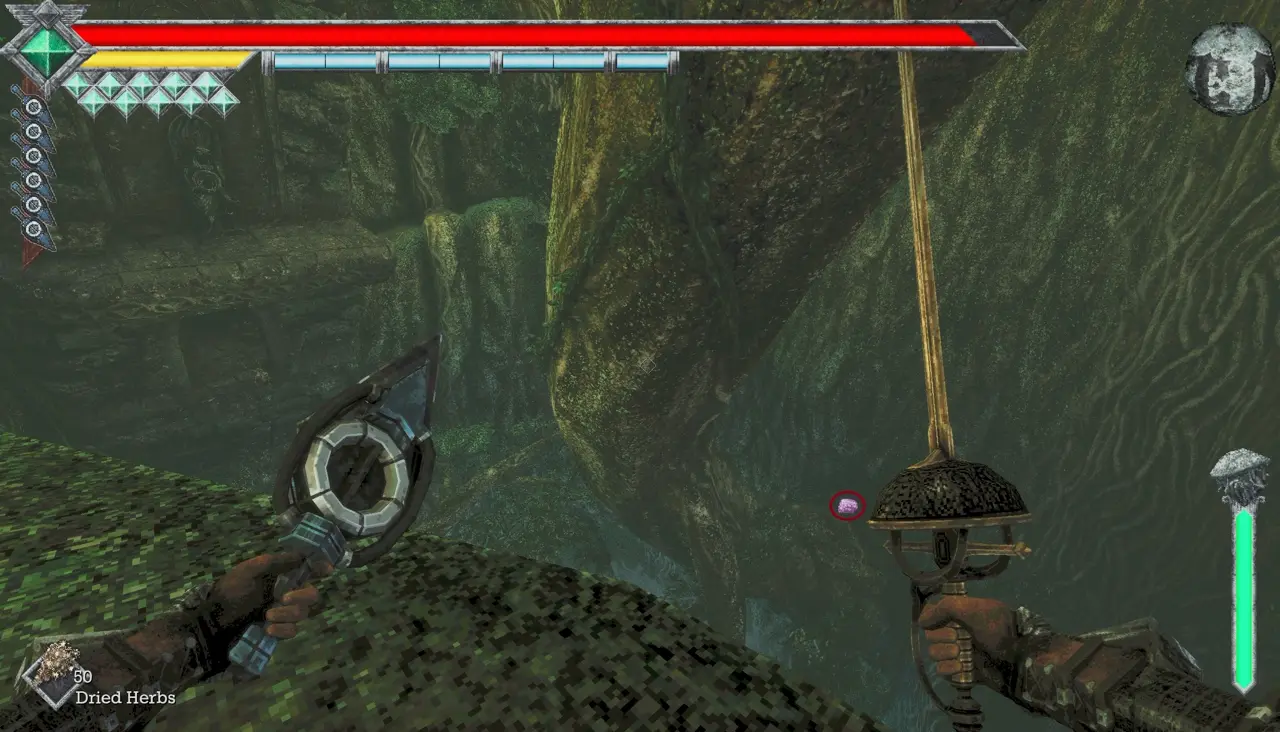
Requirements: None.
From the upper forest near the temple containing the Sipeha Lenses, I Wind Dash down to the tree holding the skull. Before attempting this, I unlock the elevators serving the two lower floors so a failed jump does not mean a long walk back.
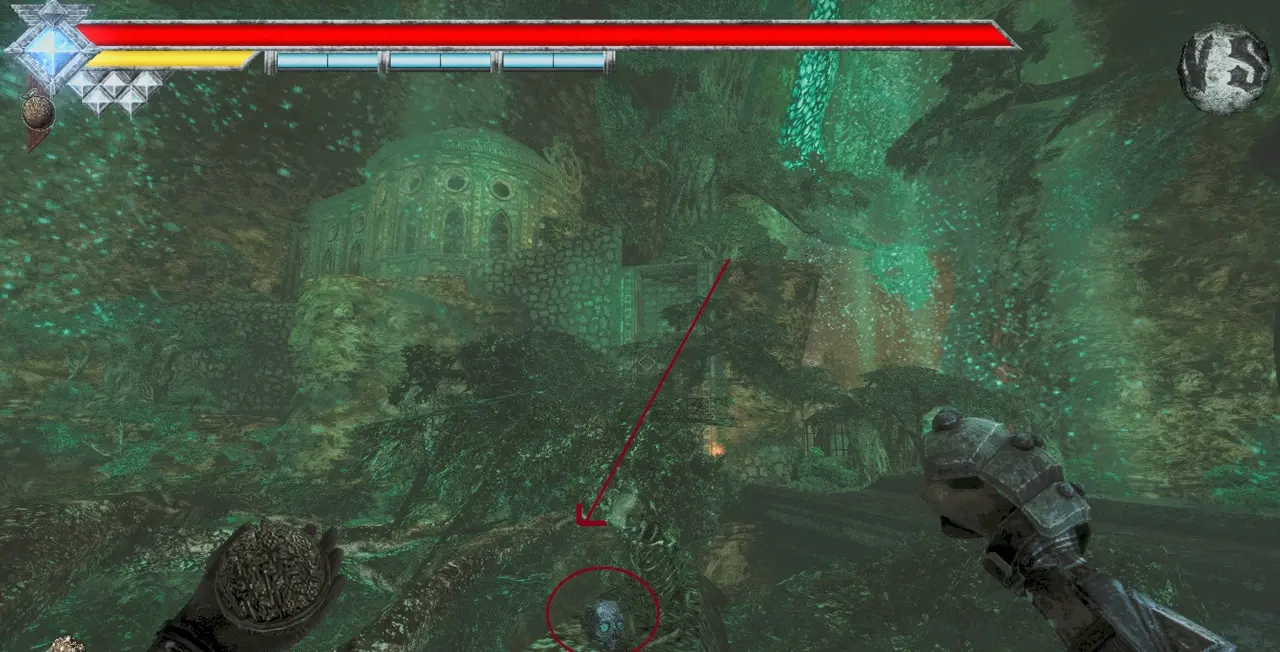
Skull #37: Ledge Below Skull #35
Requirements: None.
I look directly below the location of Skull #35 and drop onto the ledge with the next skull.
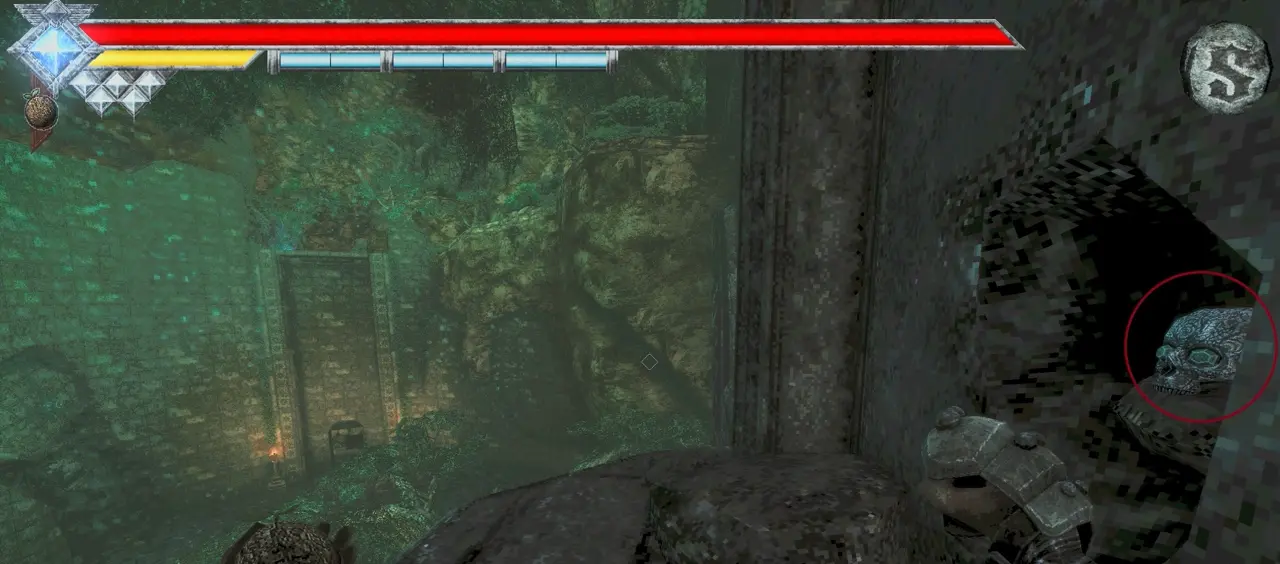
Skull #38: Broken Pillar Below Skull #35
Requirements: None.
I drop farther down beneath the area of Skull #35 to reach the skull sitting on a broken pillar.
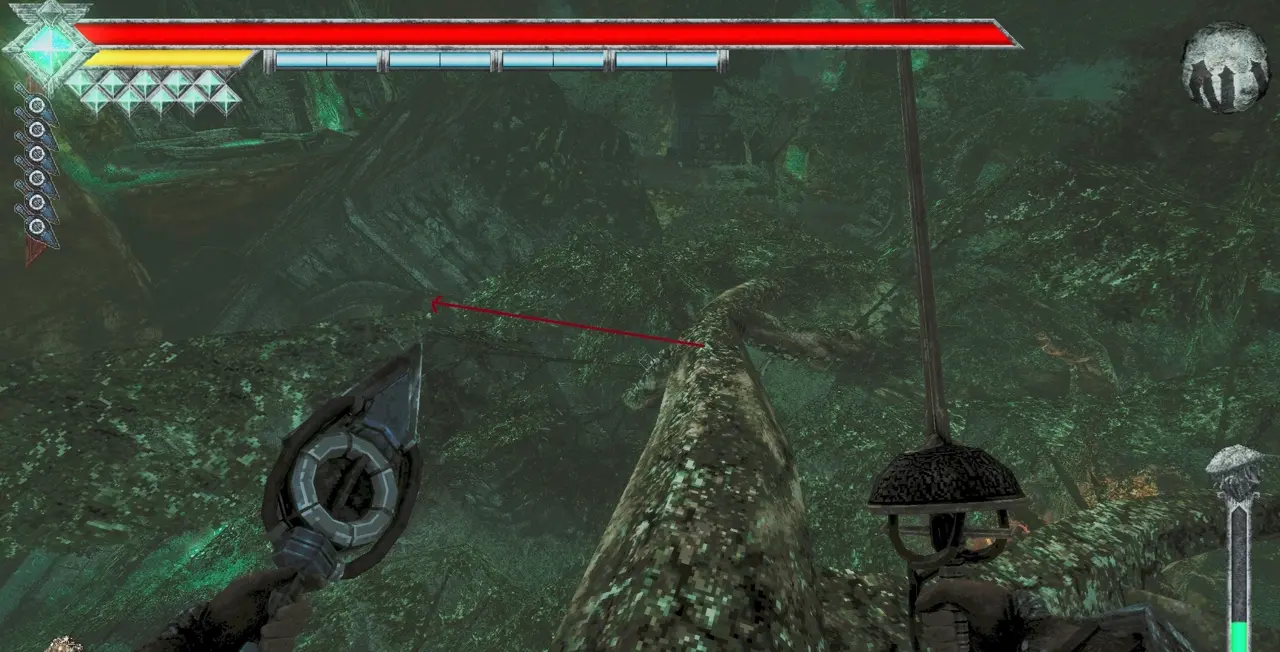
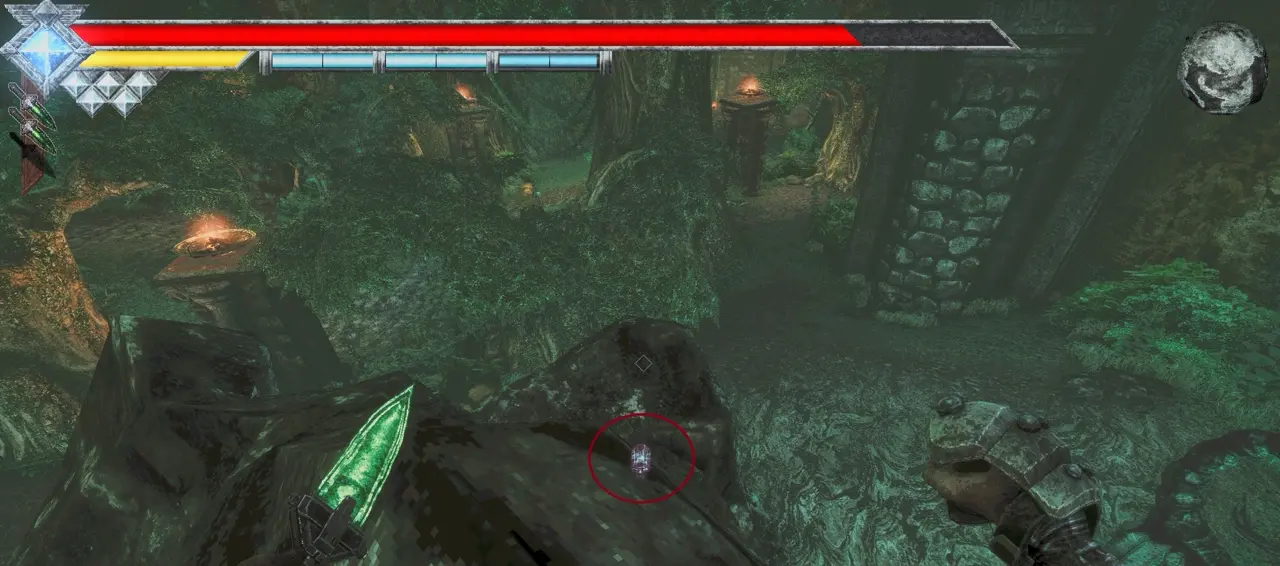
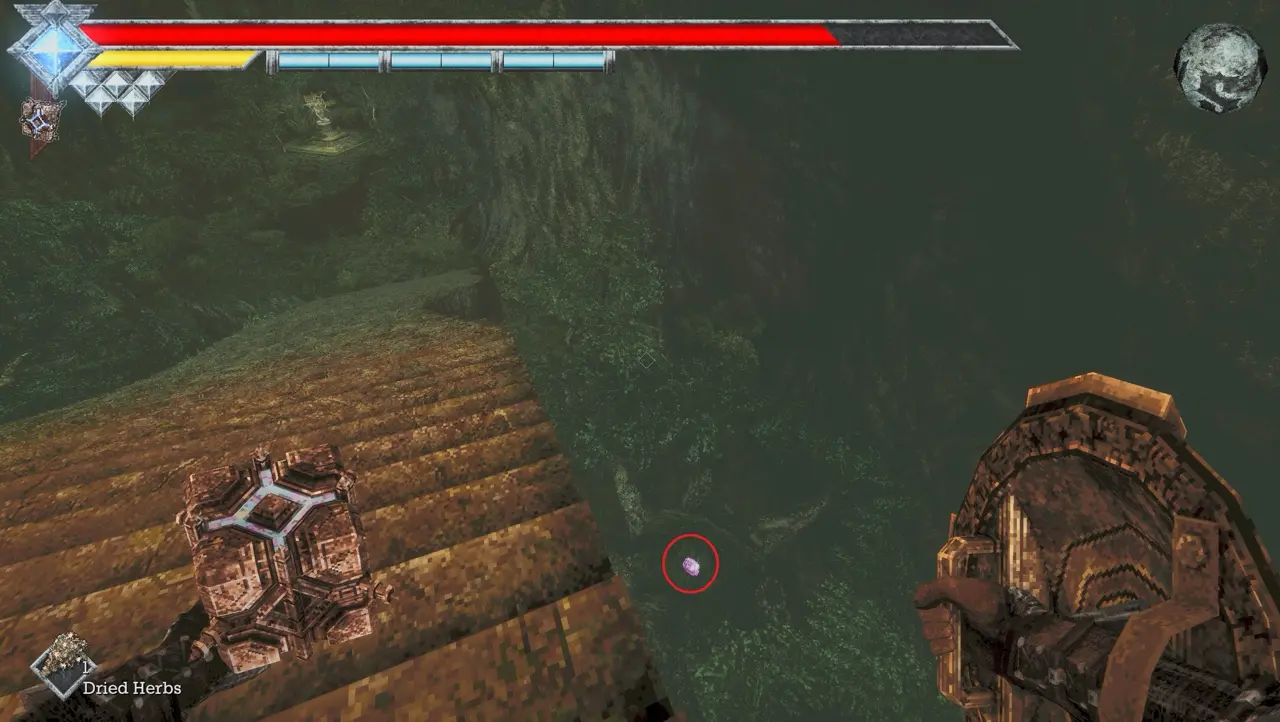
Skull #39: Shrine of the True Holy Sword Akunra
Requirements: All 4 Mask of Second Sight lenses and interactions with all 8 Sipeha statues.
Once I complete the steps for Ending 2 and unlock the shrine where I obtain the True Holy Sword Akunra, I find the skull in the same room near the shrine.
Petrified Garden (Without Flying)
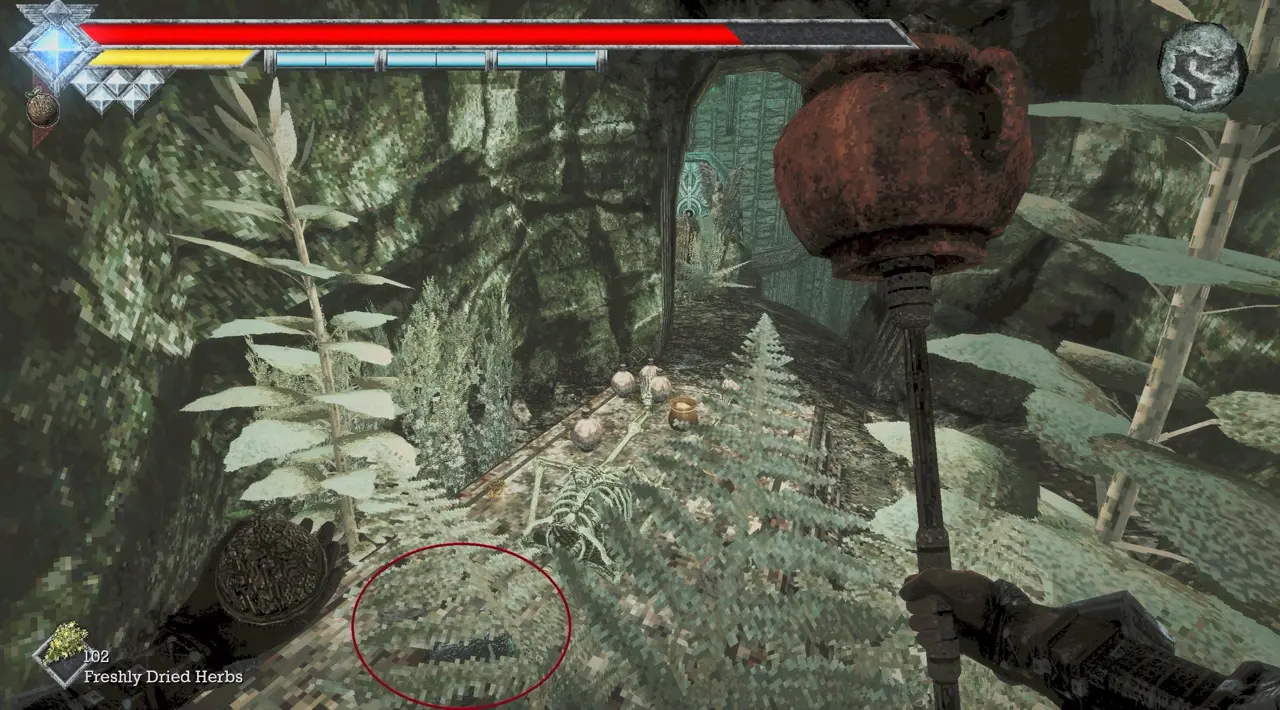
Skull #40: Hidden Wall Near the Skull Turn-In Door
Requirements: All 4 Mask of Second Sight lenses.
After opening the route to the skull door beneath Petrified Garden, I search for a hidden wall close to the place where I turn in my skulls. The skull is behind that wall.
Isle of Neasied (Flying)
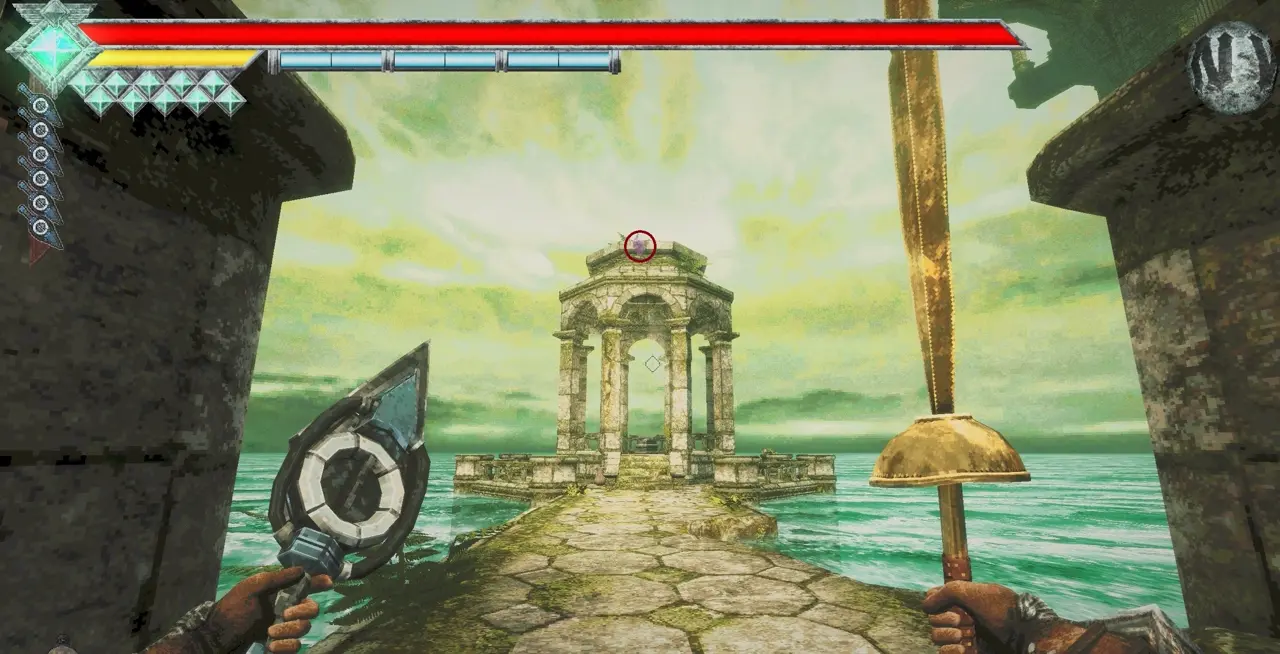
Skull #41: Top of the Wind Sword Shrine
Requirements: Flying.
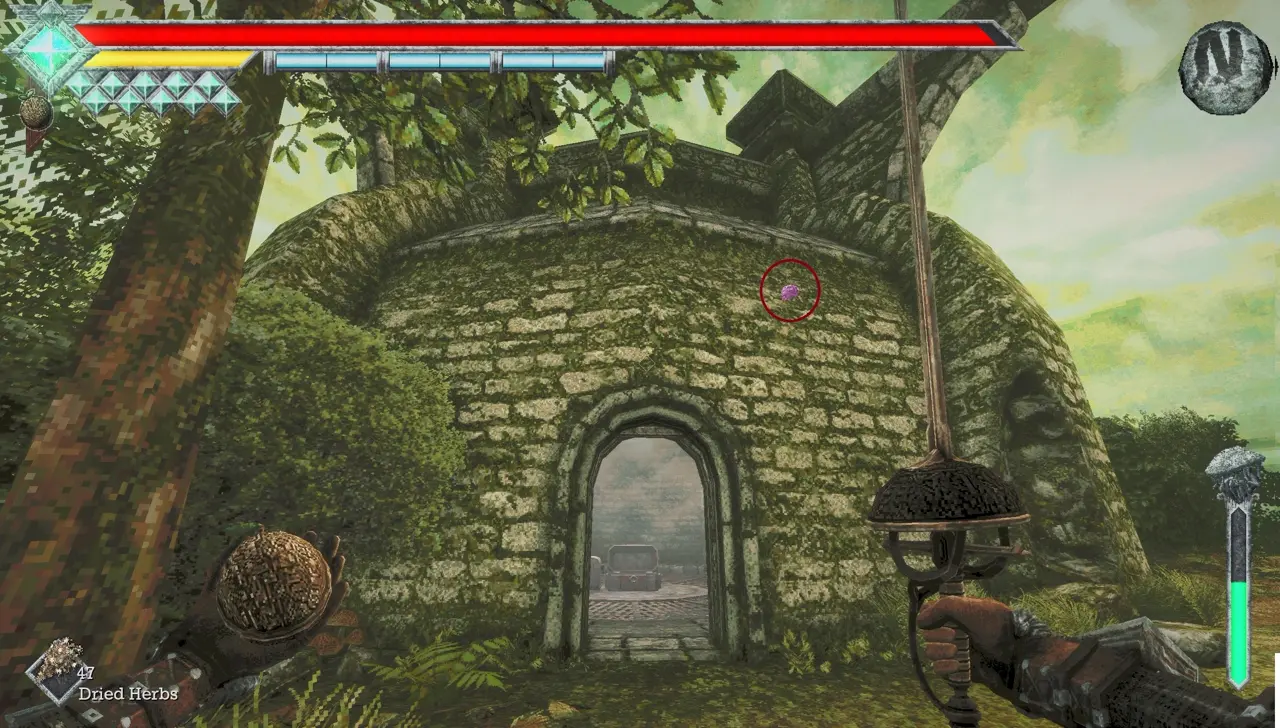
I fly onto the shrine where I previously obtained the Wind Sword.
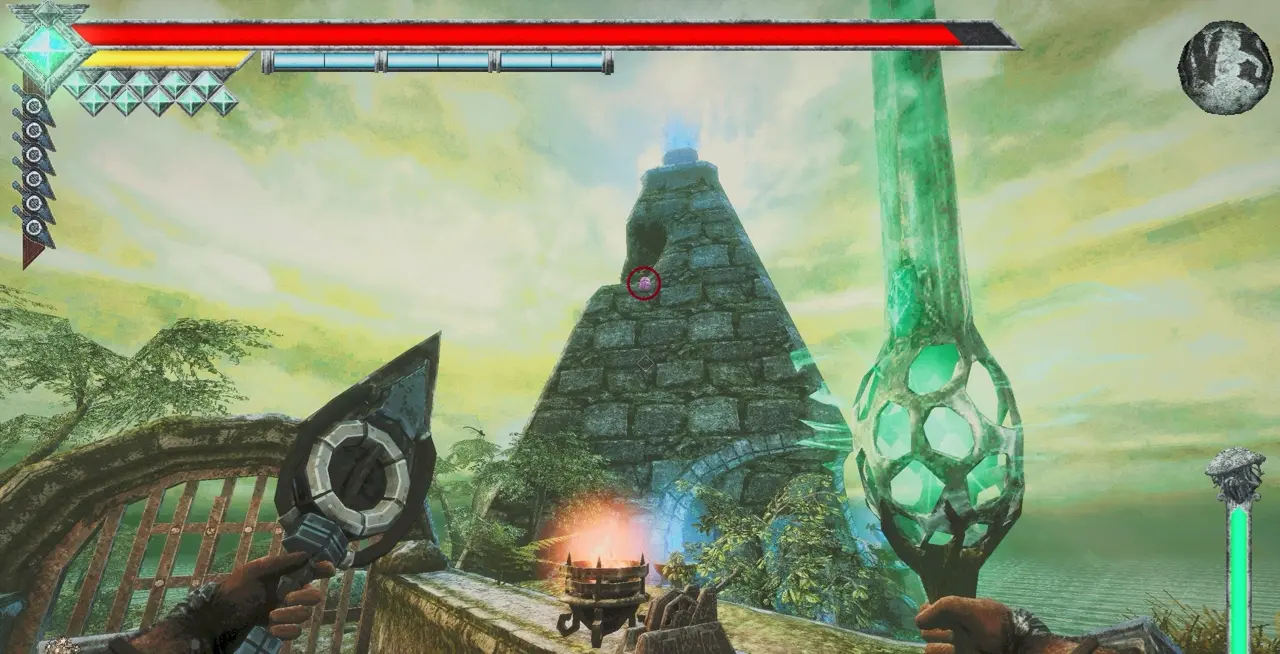
Skull #42: Pyramid Near the Warp Station
Requirements: Flying.
I fly to the top of the pyramid near the warp station.
Skull #43: Structure Where the Wodaso Lenses Were Found
Requirements: Flying.
I return to the structure containing the Wodaso Lenses and fly to its highest point for the skull.
Tower of Knowledge (Flying)
Skull #44: Bell Tower Rooftop
Requirements: Flying.
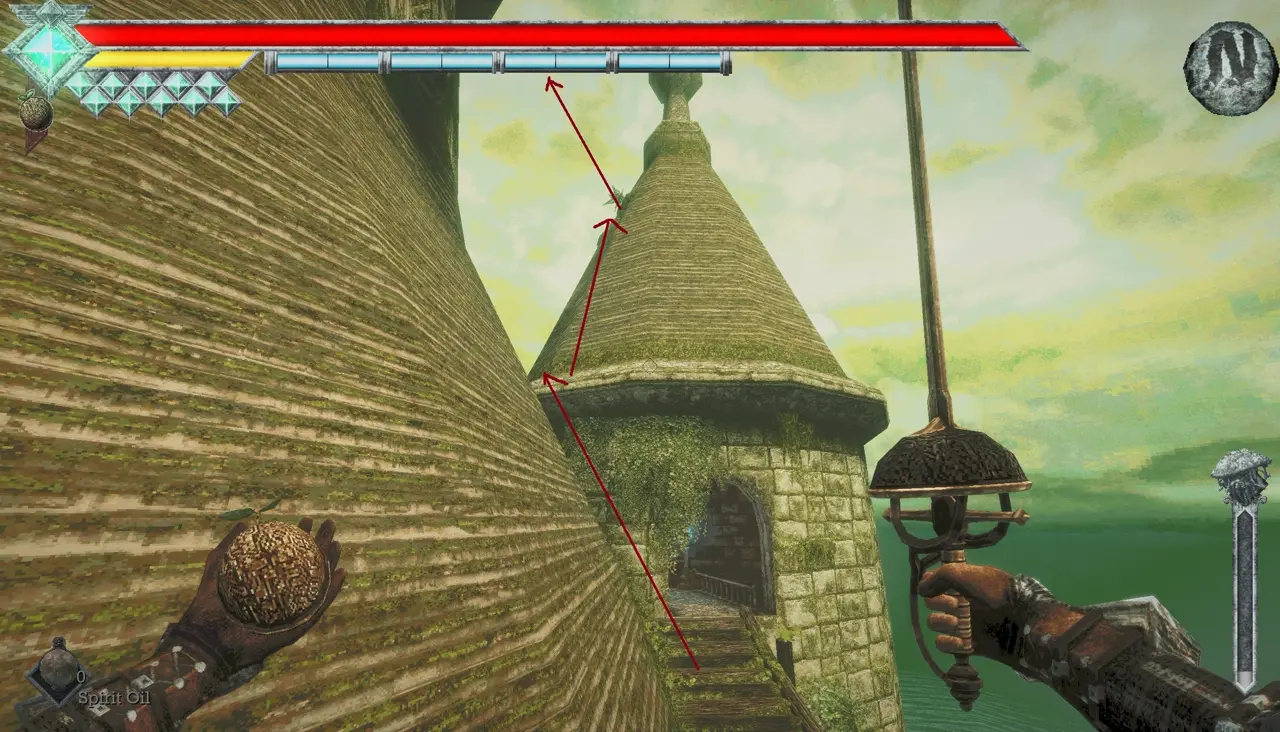
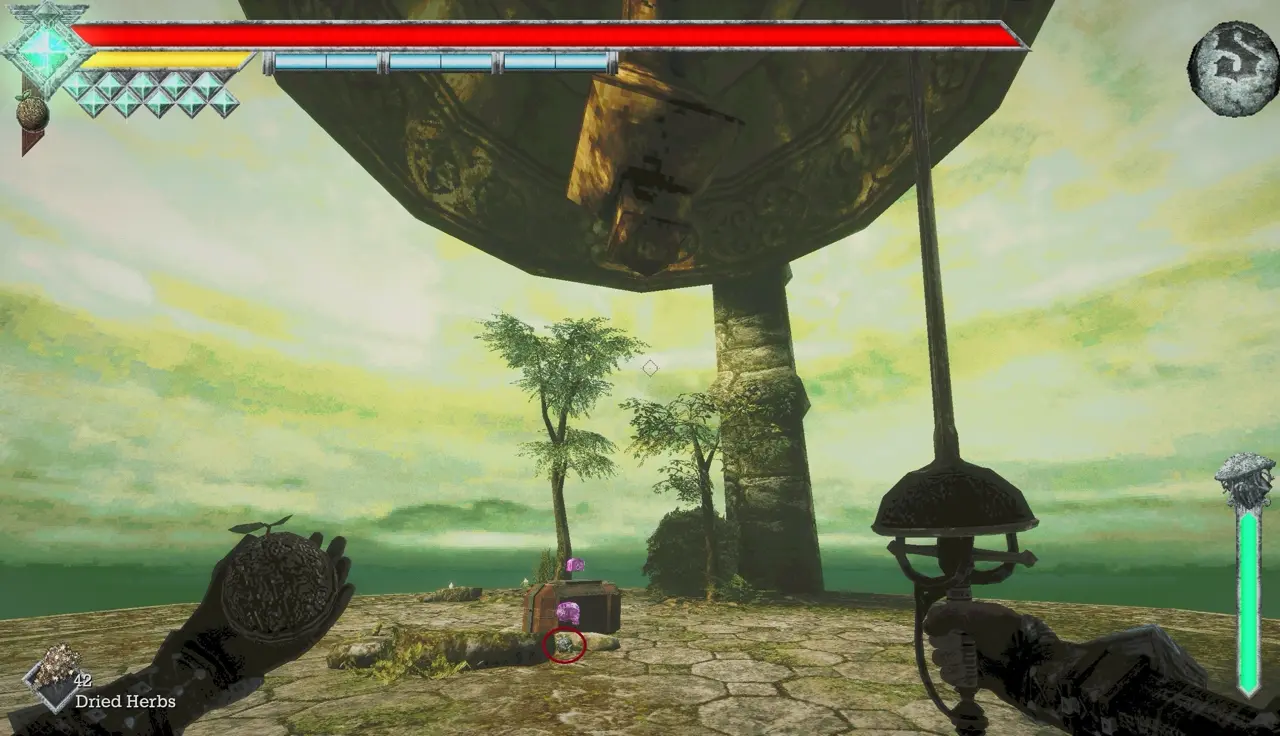
I return to the area just outside where I found the Skull Rod. From there, I fly to the building’s roof, then to the small broken ledge on the roof, and finally up to the bell tower to collect the skull.
Deimpo Mausoleum (Flying)
Skull #45: Ledge in the Wind Crystal Room
Requirements: Flying.
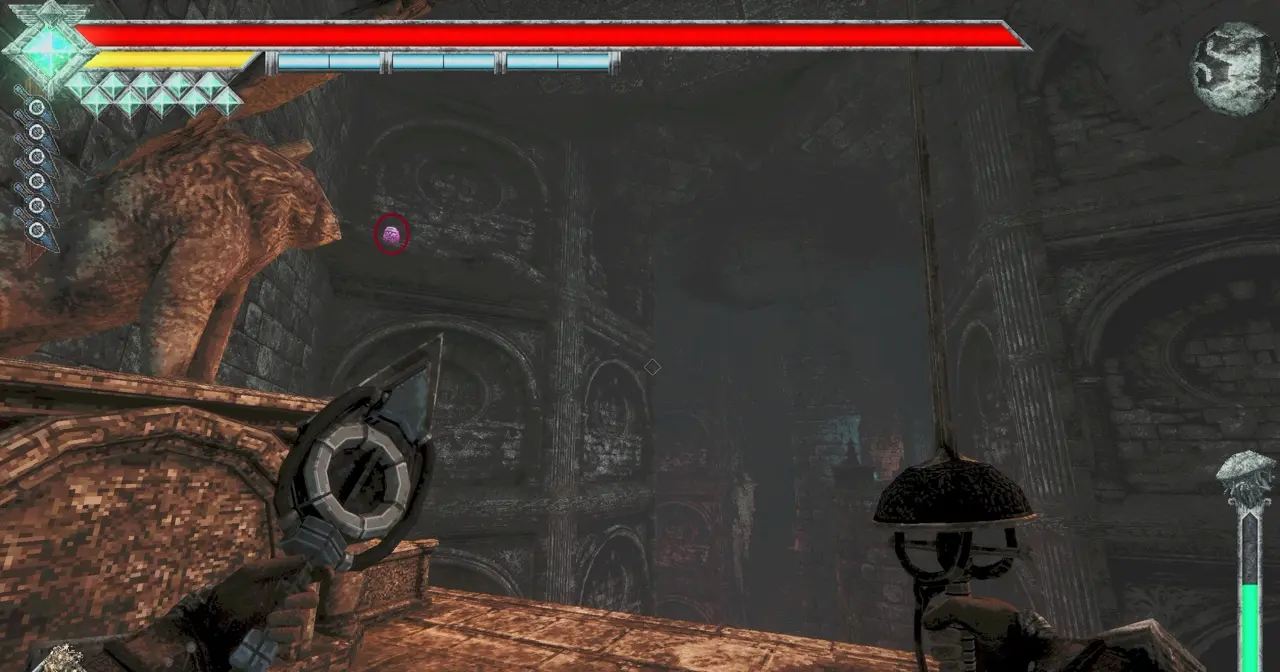
In the room where I found the Wind Crystal, I fly up to the ledge holding the skull.
Unknown Area (Flying)
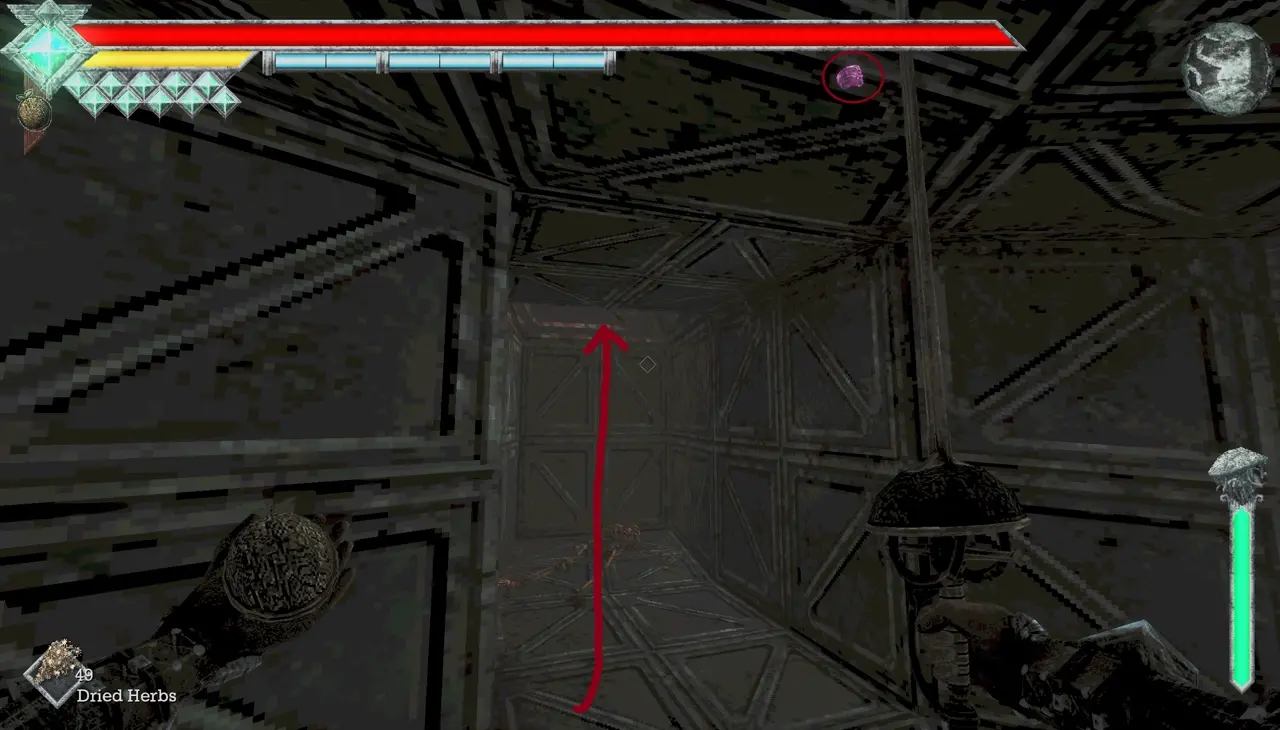
Skull #46: Opening in the Ventilation Shaft
Requirements: Flying.
While crossing the large ventilation shaft, I look for an opening in the wall. I fly through it to reach the skull.
Ancient World (Flying)
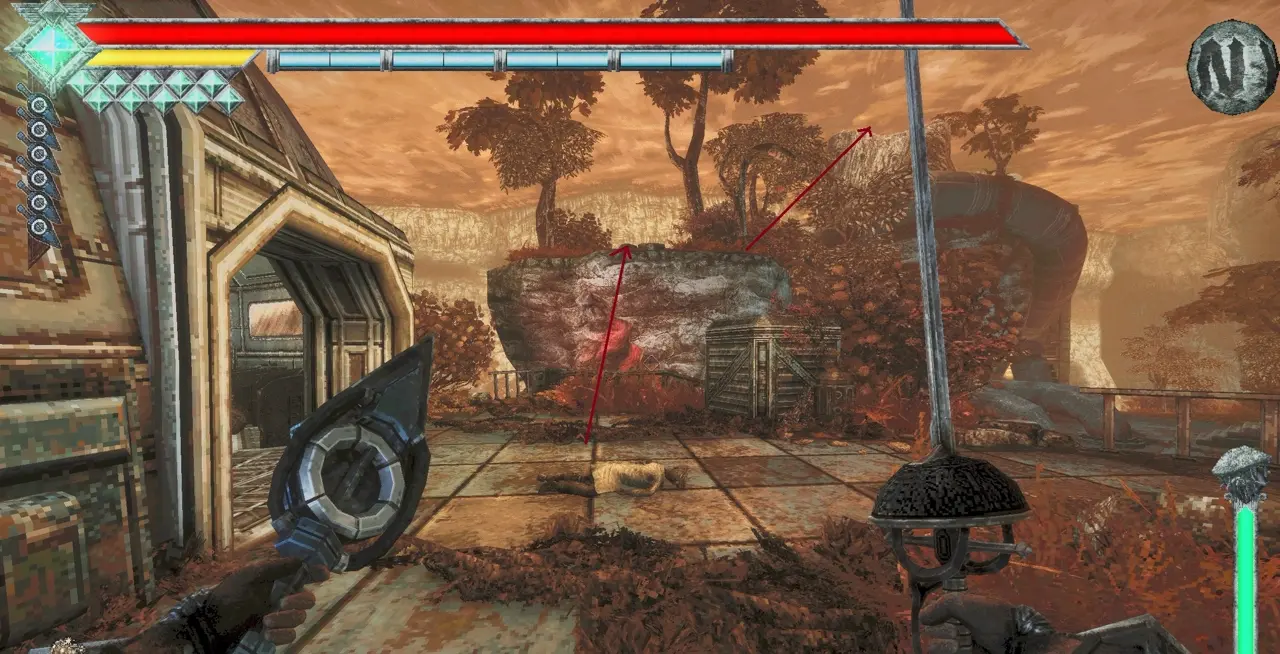
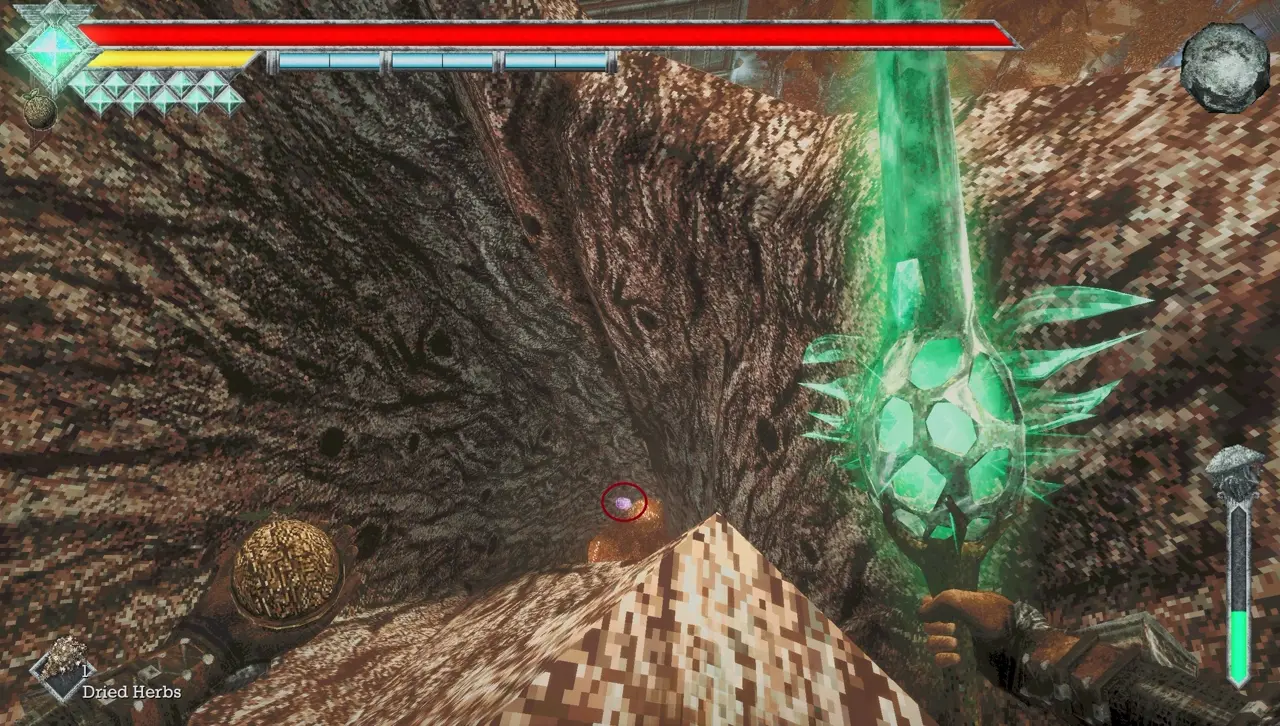
Skull #47: Hollow Tree Stump Above the Scientist’s Workshop
Requirements: Flying.
Above the workshop where I encounter the scientist, I search inside the large hollow tree stump for the skull.
Skull #48: Building on an Island Near the Locked Warp Tunnel
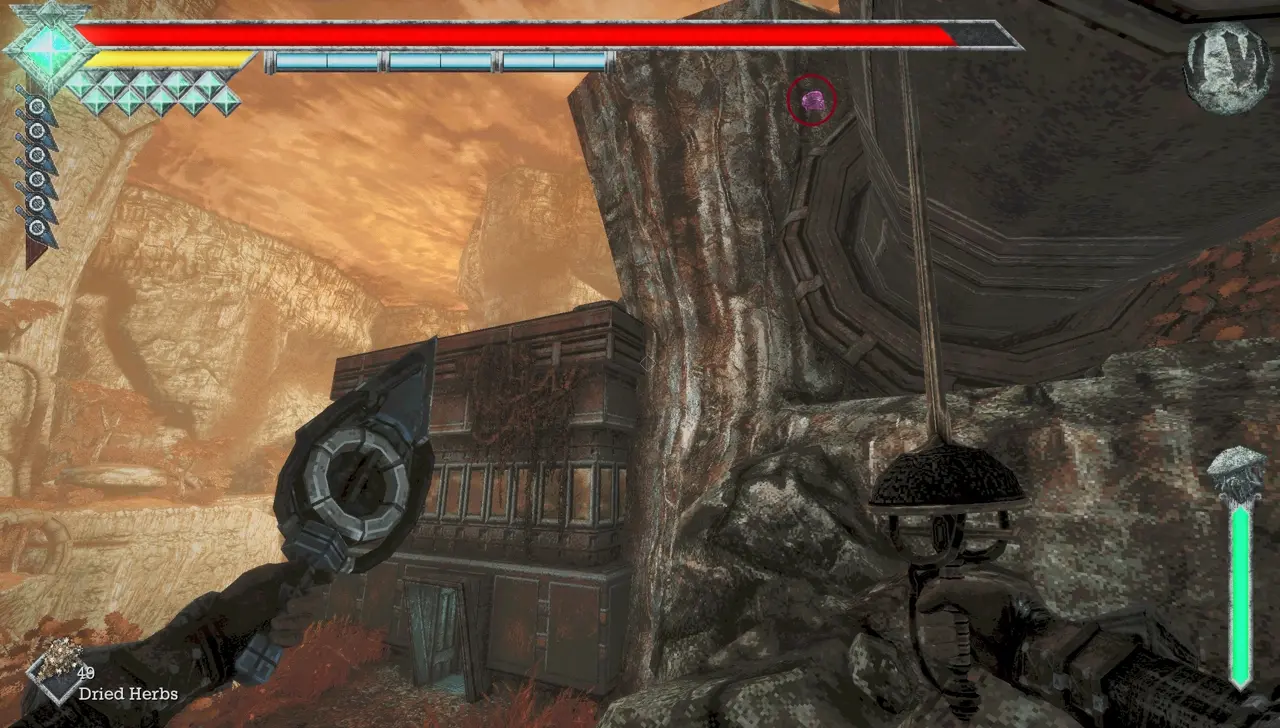
Requirements: Flying.
I return to the small islands I crossed when first entering the area, past the initially locked warp tunnel. I fly above one of the buildings to pick up the skull.
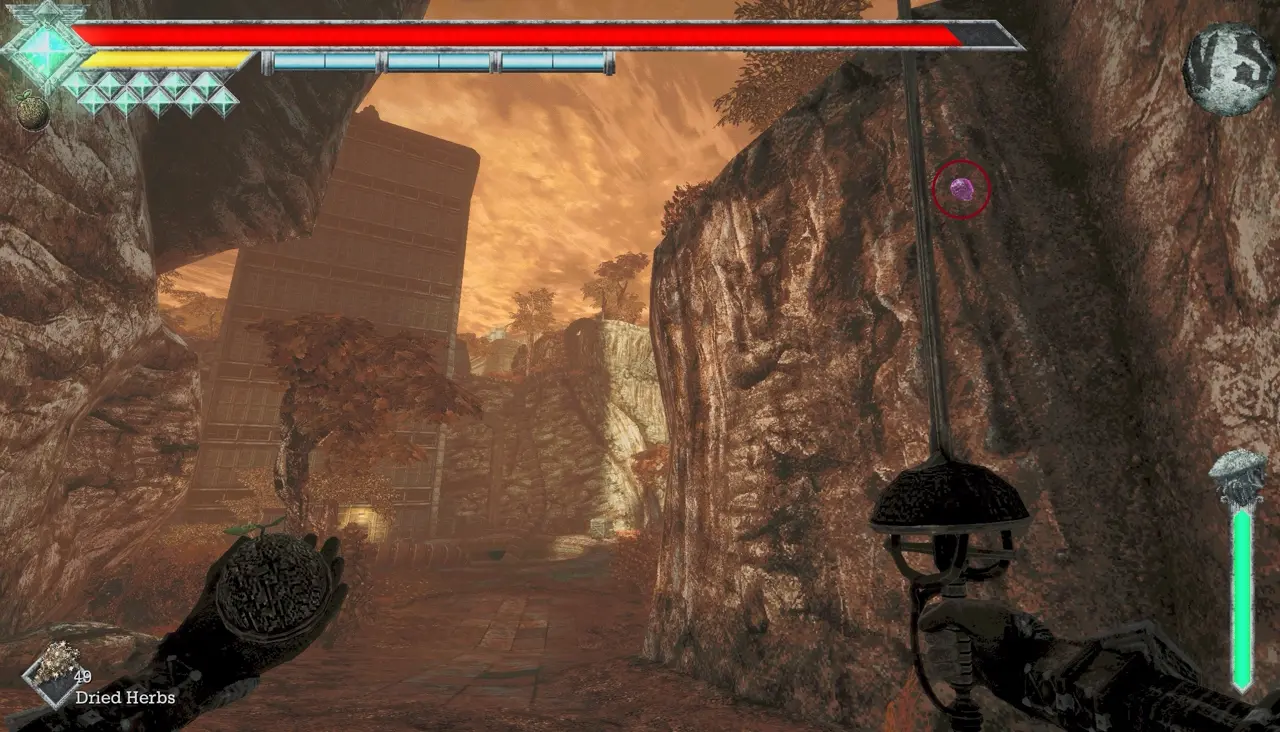
Skull #49: Cliff Near the Warp Station Power Station
Requirements: Flying.
I fly onto the cliff close to the power station nearest the warp station.
Skull #50: Structure Reached by a Power Cable
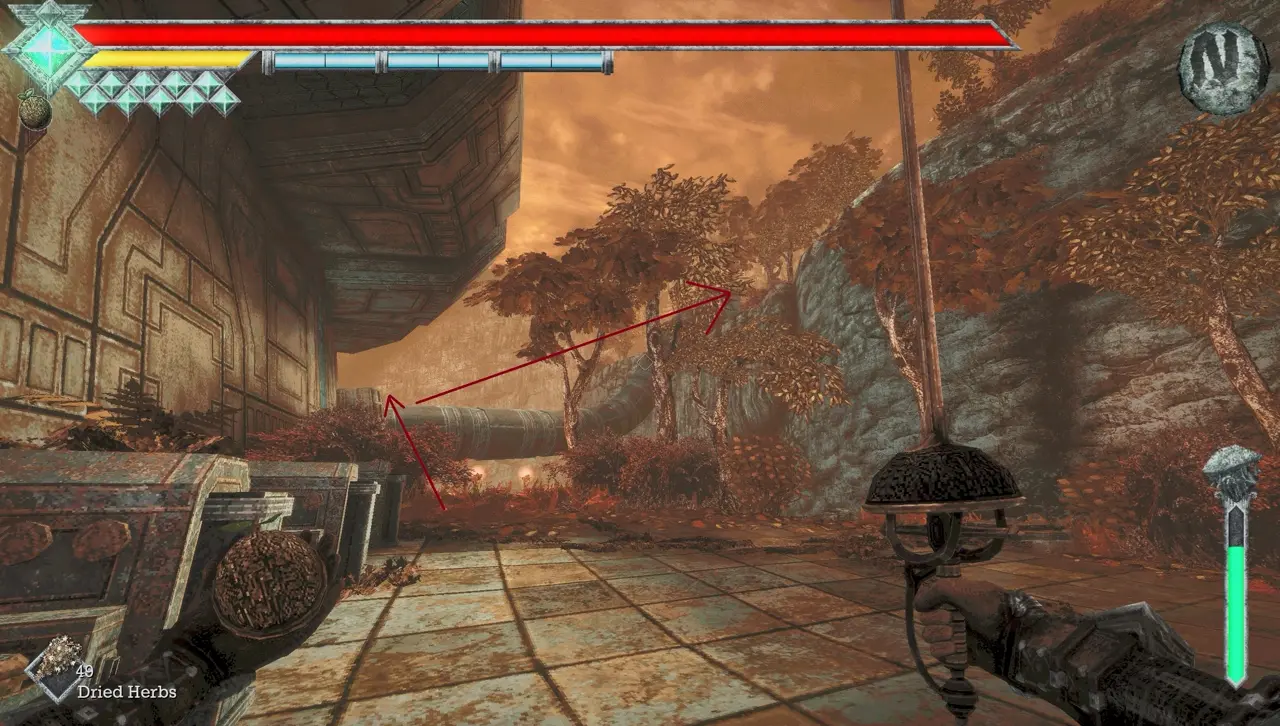
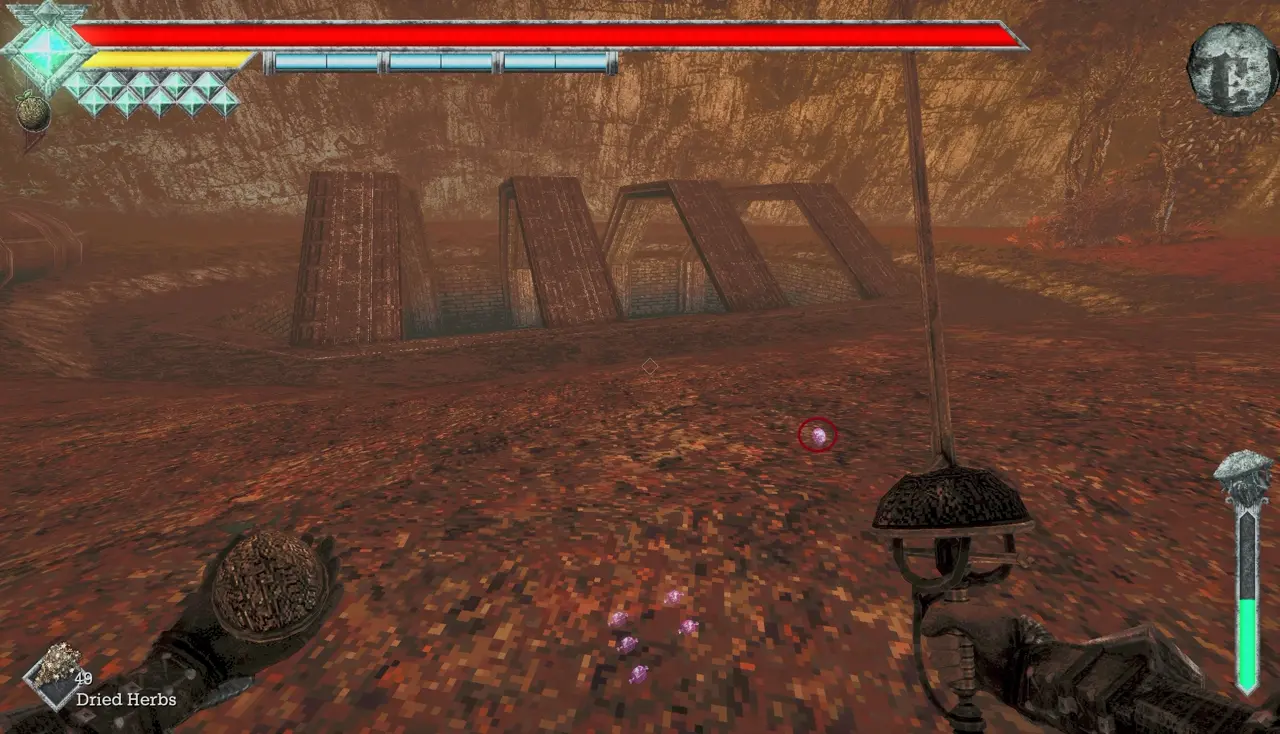
Requirements: Flying.
Near the entrance to the power station closest to the warp station, I follow the power cable upward. It leads toward a structure resembling the one that connects to the Records of Sin, where I find the skull.
Skull #51: Opening Above the Wind Crystal
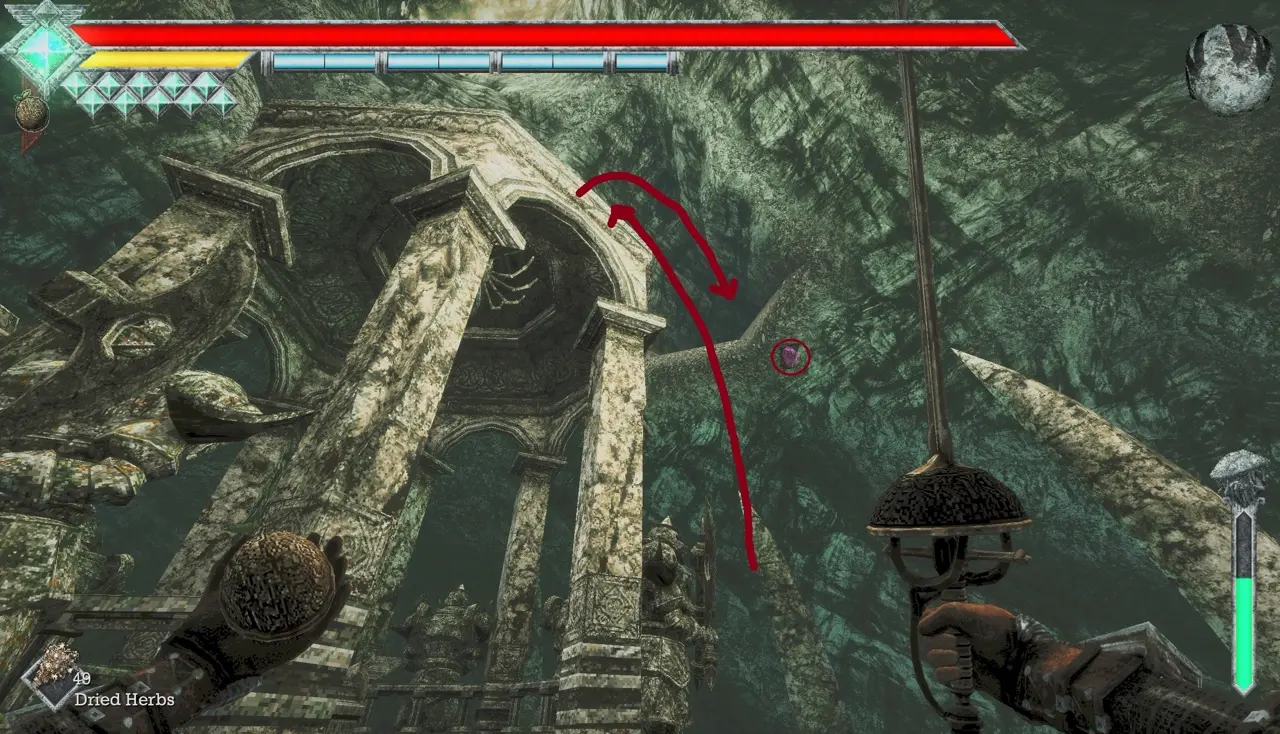
Requirements: Flying.
I return to the spot where I found the Wind Crystal and fly into the opening directly above it.
Skull #52: Above the Wind Crystal Cave
Requirements: Flying.
I reach the nearby building first, then fly onto the outside top of the cave where I found the crystal. The skull is above the cave rather than inside it.
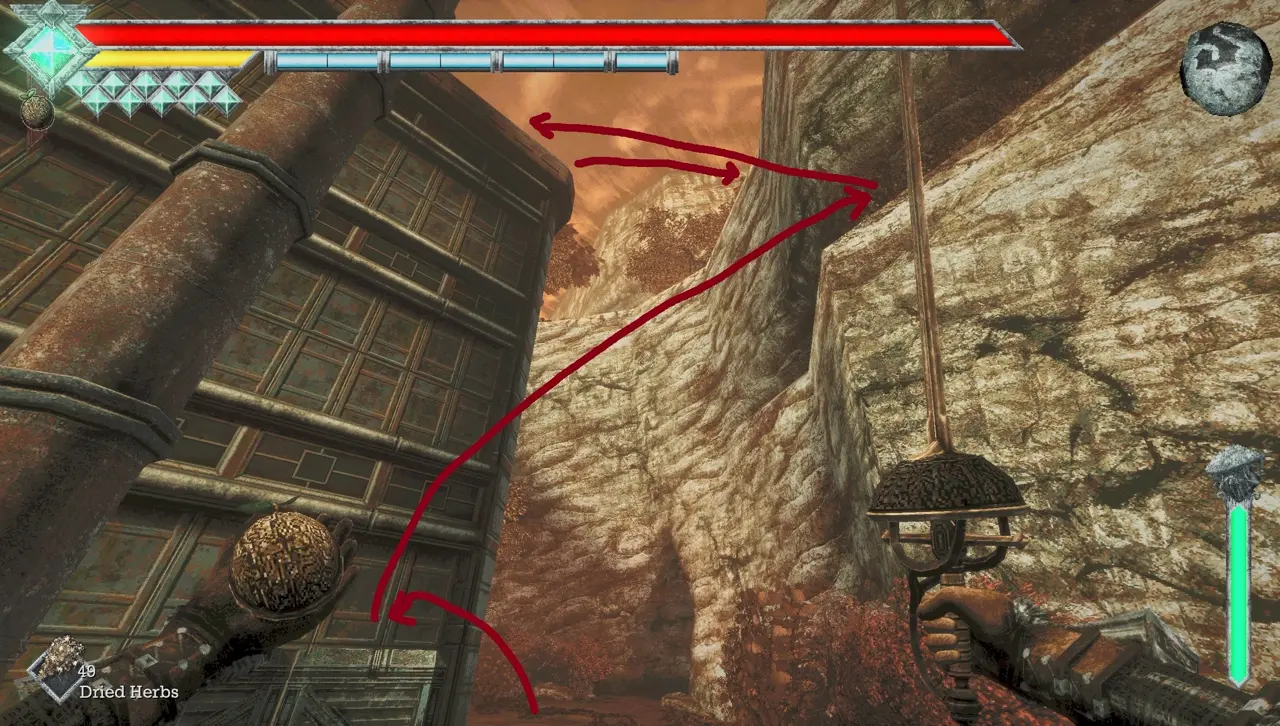
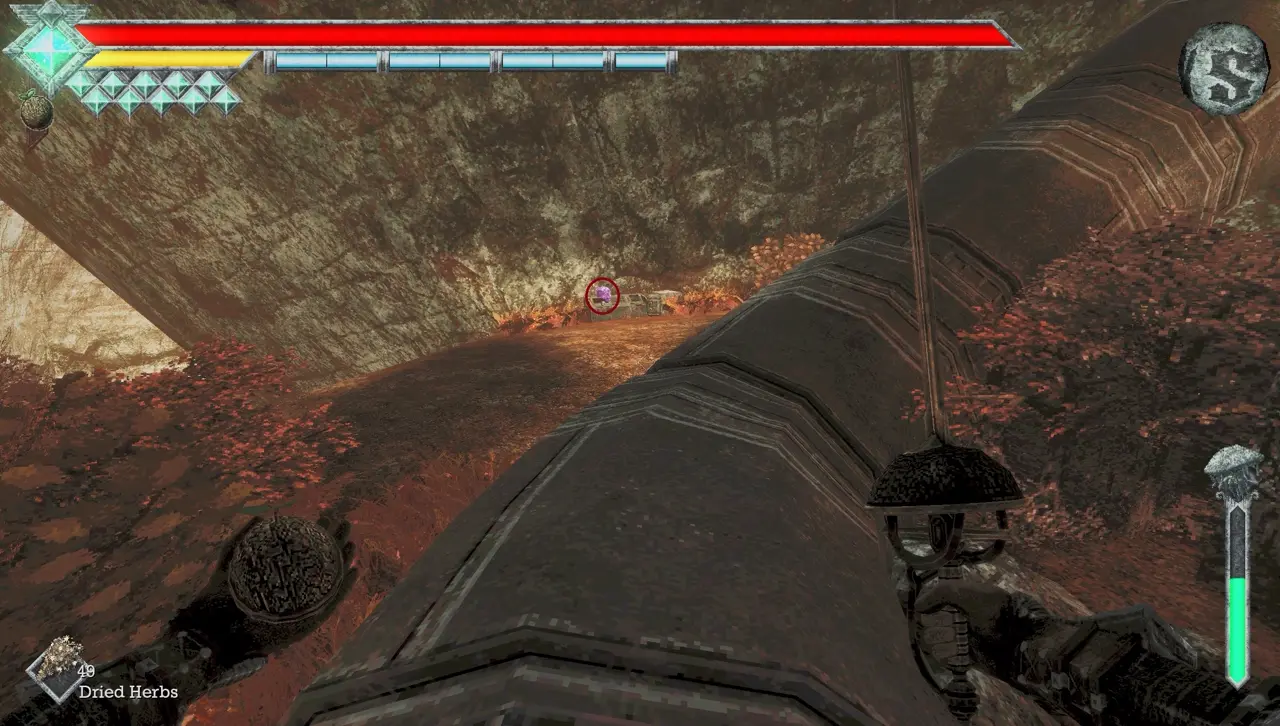
Skull #53: Ledge Near the Shock Rifle
Requirements: Flying.
Inside the building where I found the Shock Rifle, I go back to the preceding room with the conveyor belt. I fly to the upper ledge containing the skull.
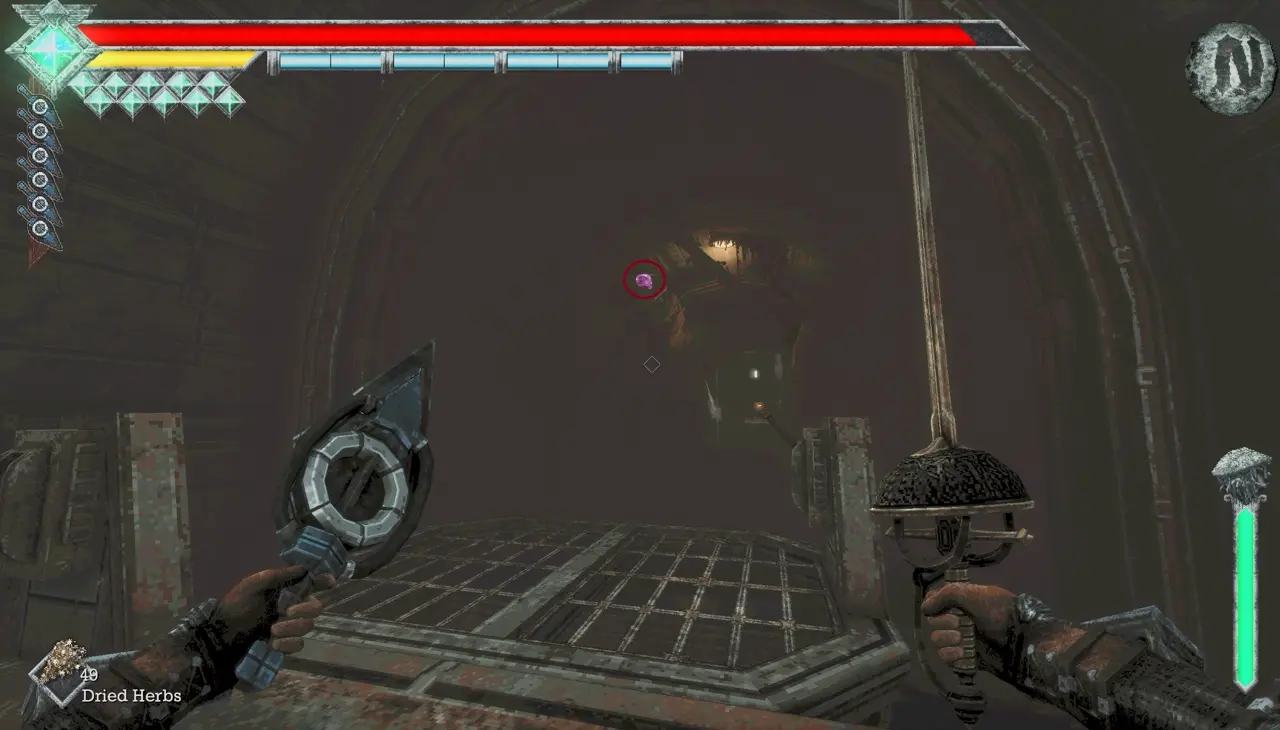
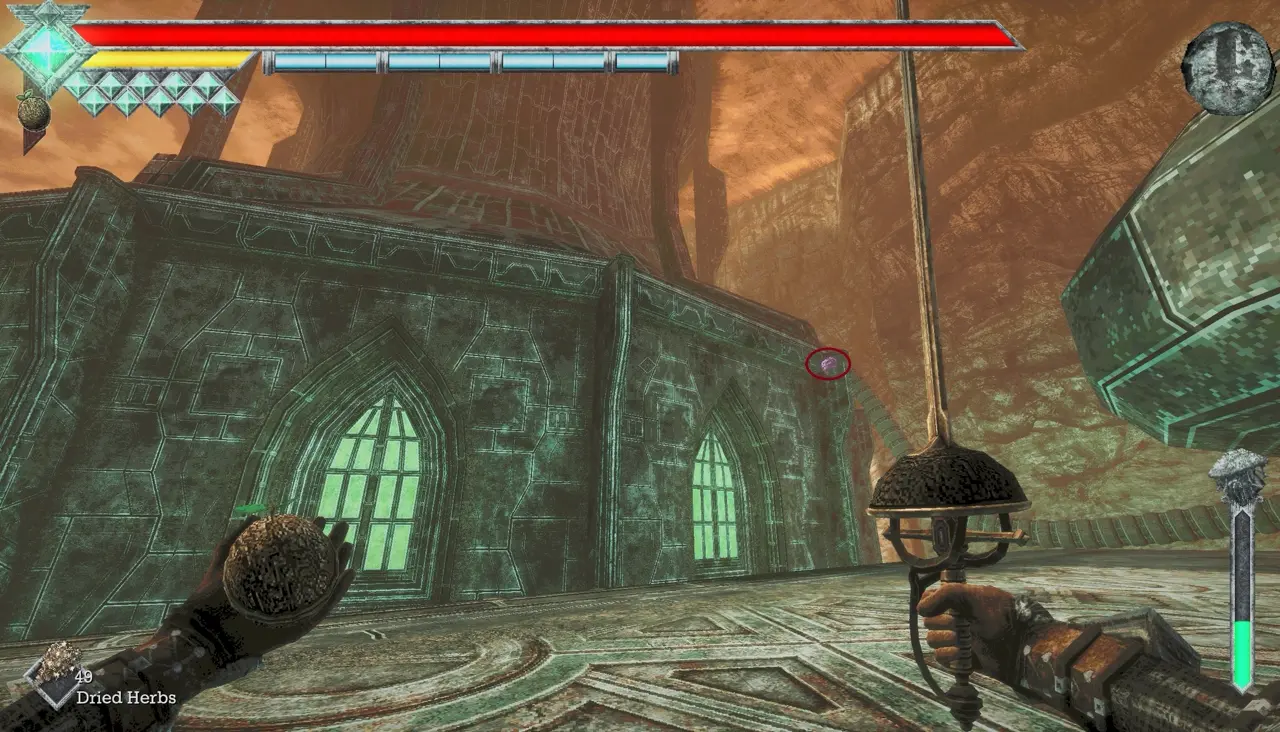
Skull #54: Right Side of Siraatsu Castle Roof
Requirements: Flying.
I fly high up to the right-hand side of Siraatsu Castle’s rooftop to find this skull.
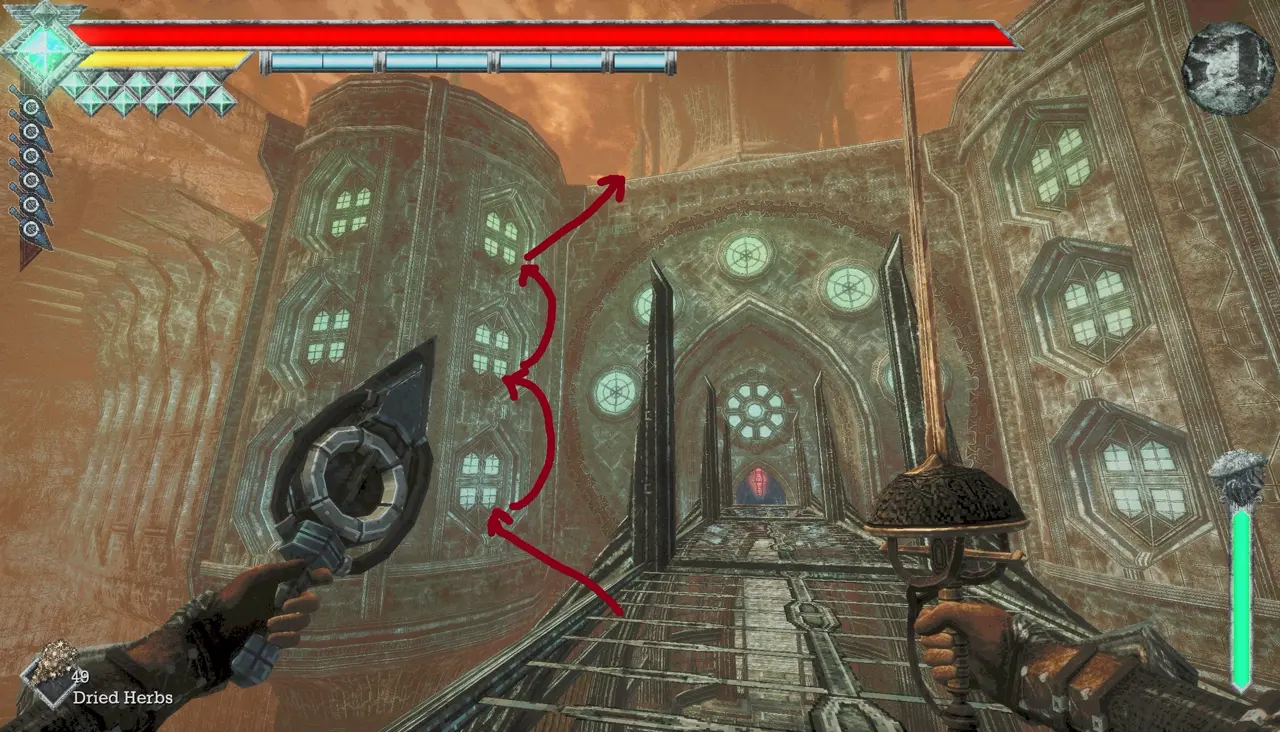
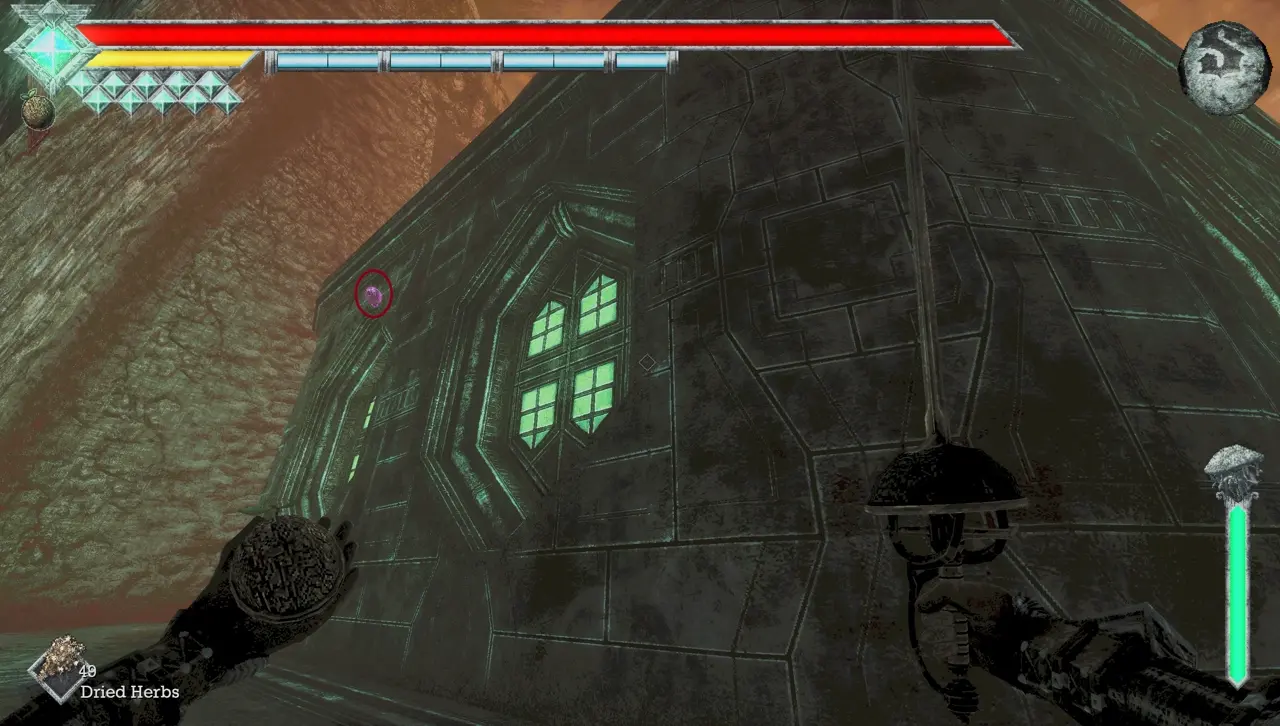
Skull #55: Left Side of Siraatsu Castle Roof
Requirements: Flying.
I stay on the same rooftop as Skull #54 and check the opposite, left-hand side.
Siraatsu Castle (Flying)
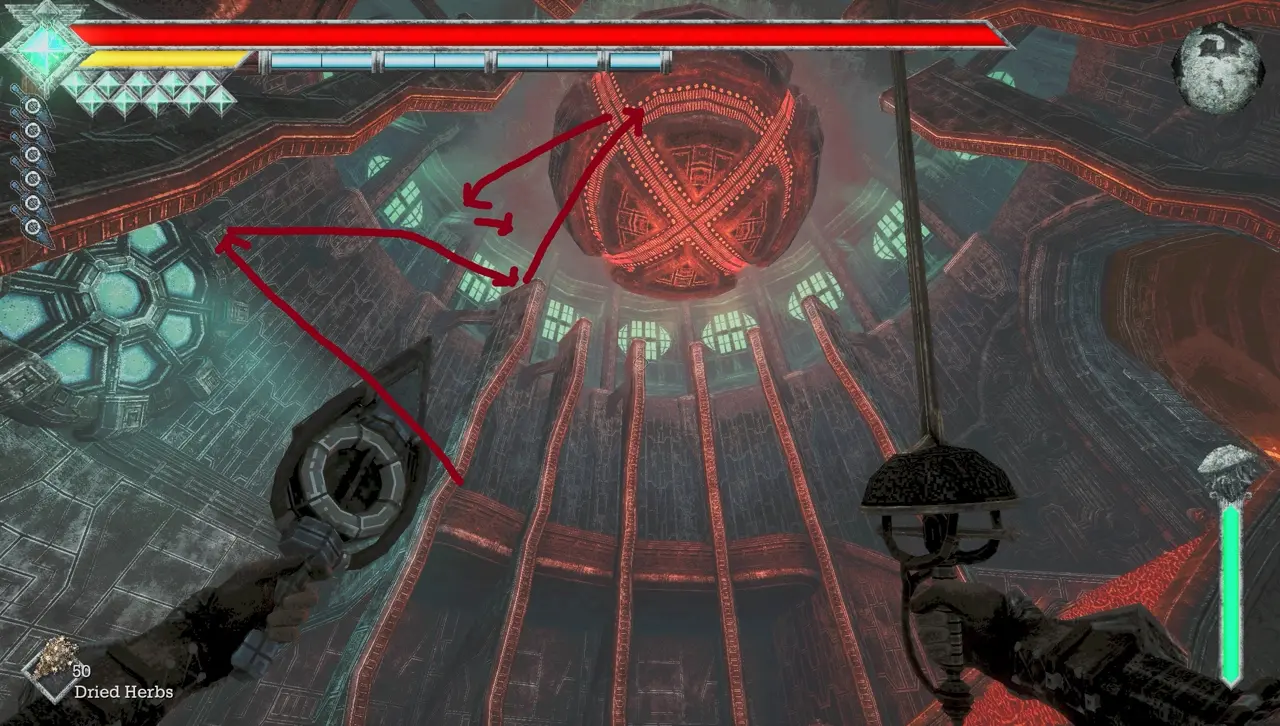
Skull #56: Top of the Castle Foyer
Requirements: Flying.
I make my way to the very top of the castle foyer. Reaching this skull takes several jumps.
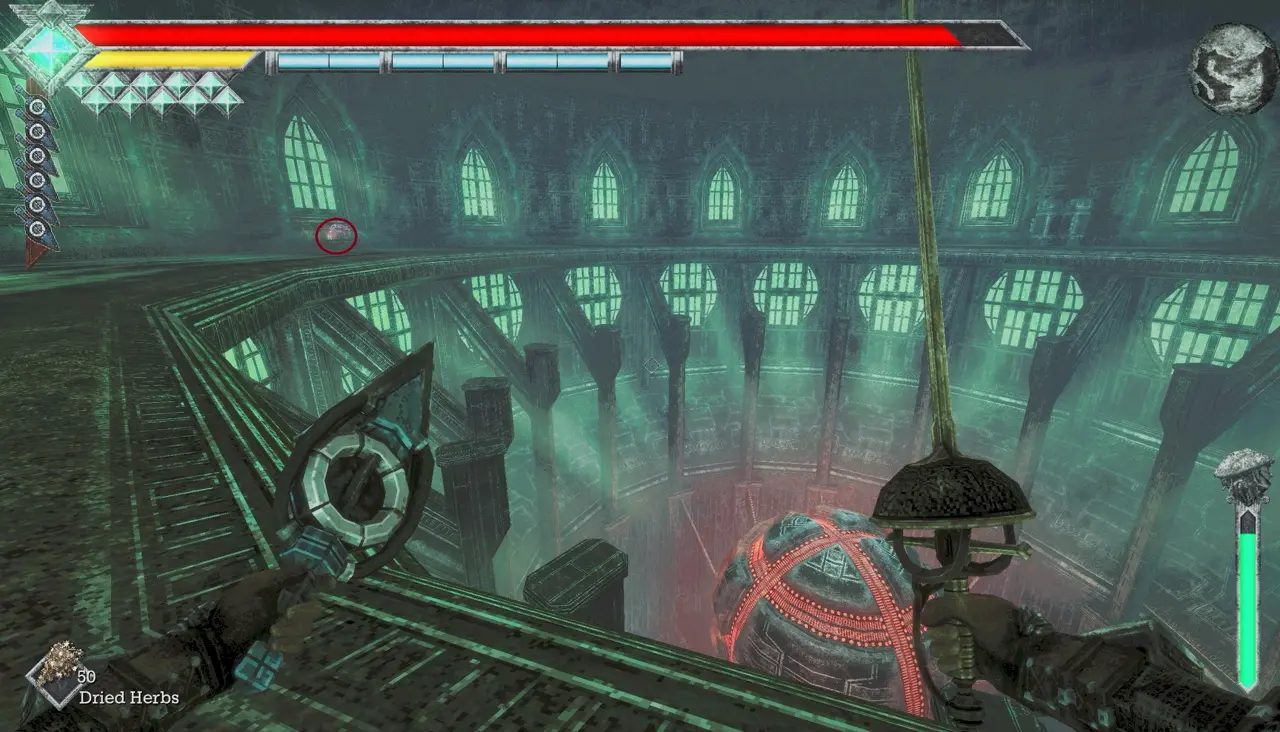
Skull #57: High Ledge in the Trash Room
Requirements: Flying.
Back in the trash room, I fly to the high ledge where the skull is located.
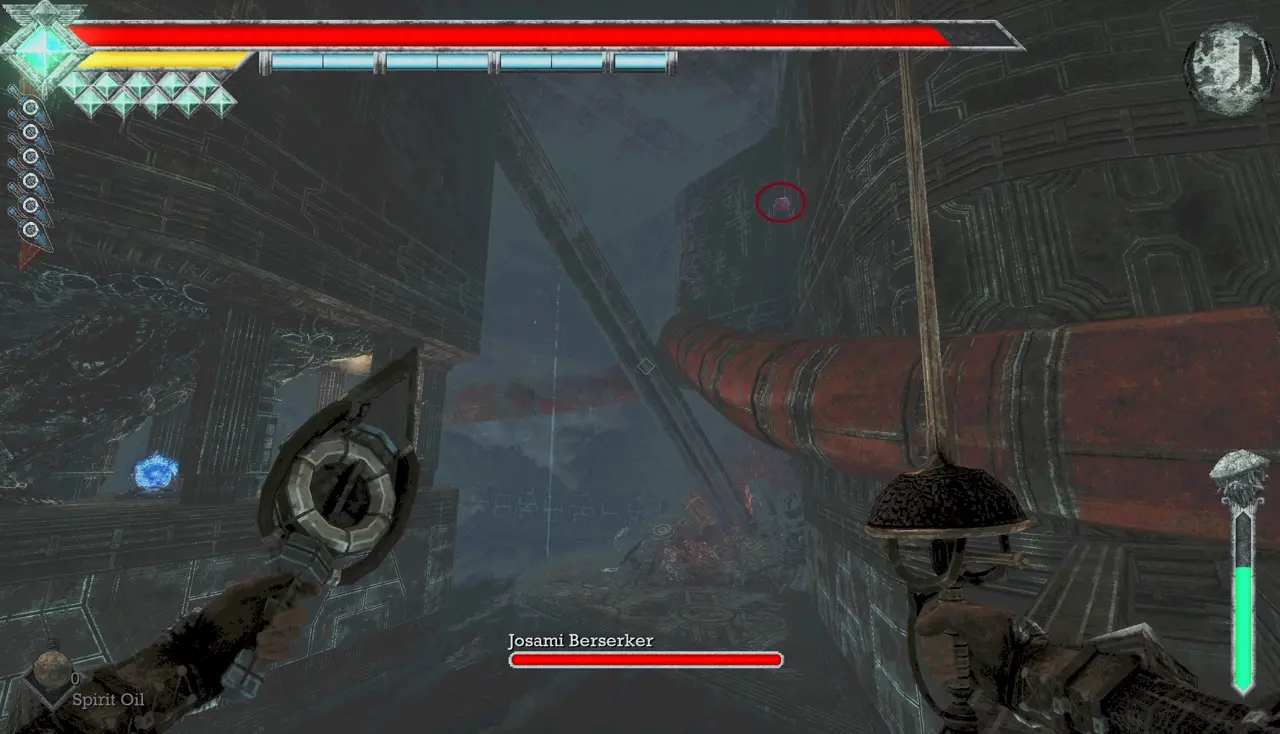
Underworld (Flying)
Skull #58: High Ledge Near the Blue Vault
Requirements: Flying.
Near the blue vault, I look high up and fly to the ledge holding the skull.
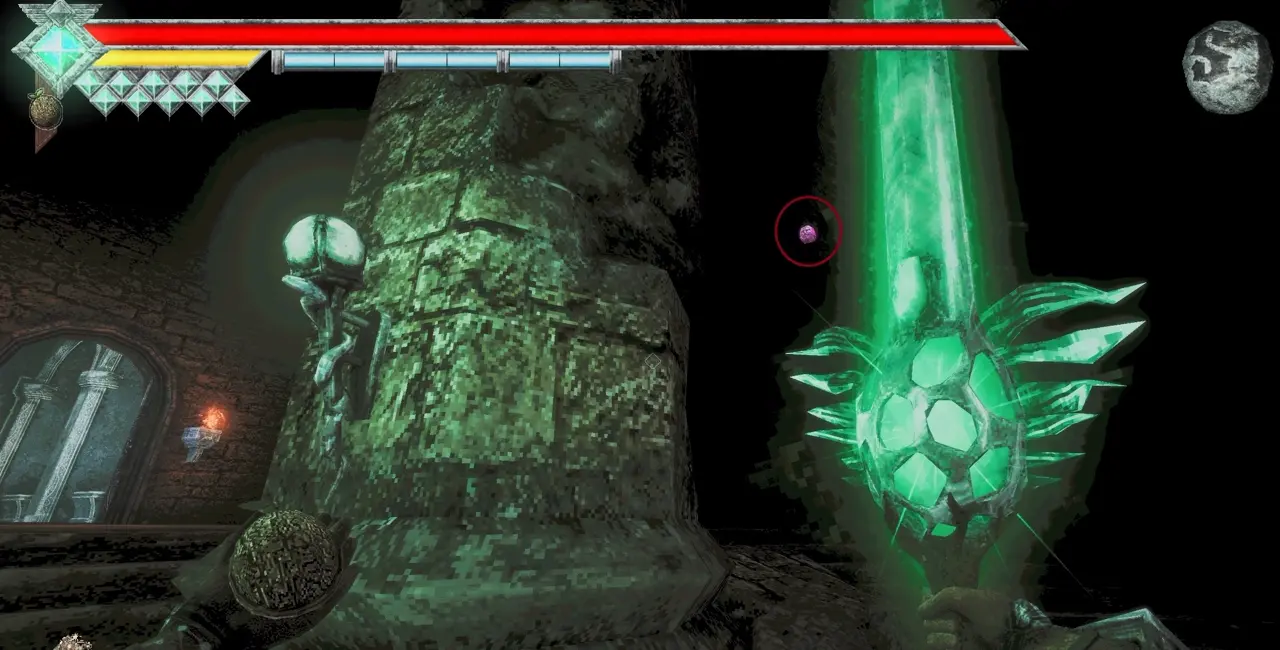
Forsaken Dungeon (Flying)
Skull #59: Pillar in the Bone Witch Boss Room
Requirements: Flying.
I return to the room where I fought the Bone Witch and fly up to the pillar with the skull.
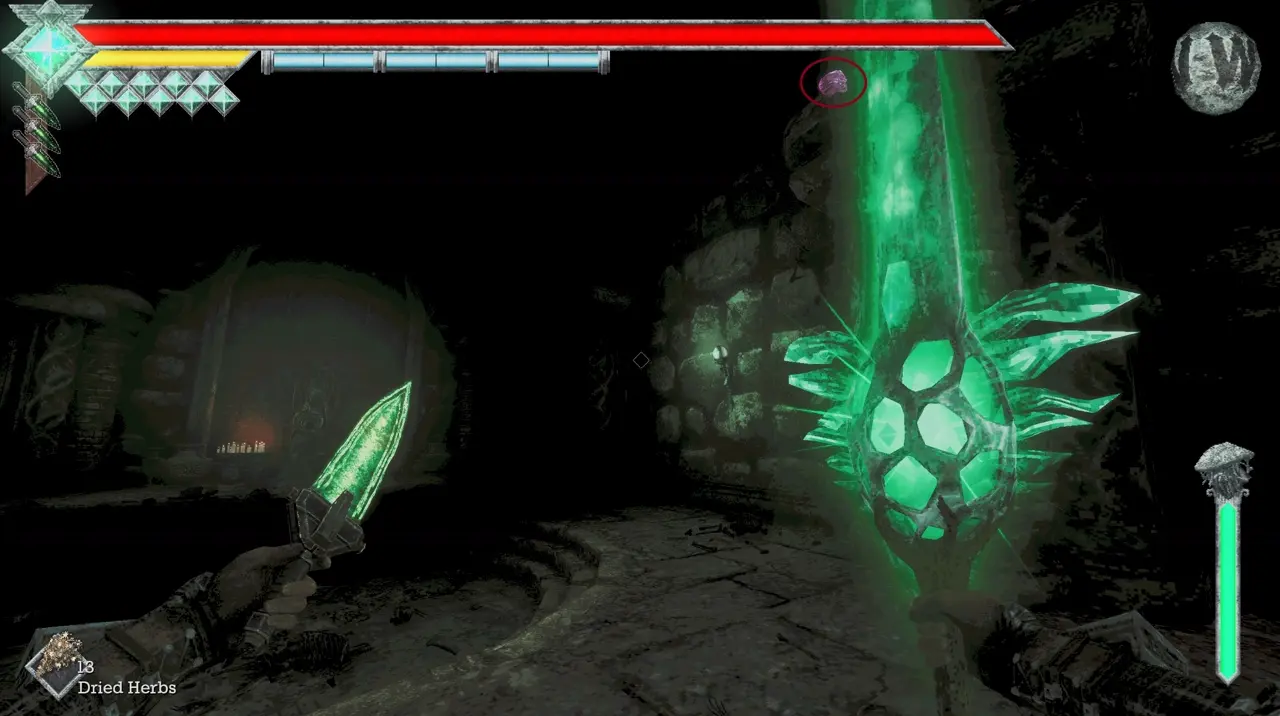
Rotting Cavern (Flying)
Skull #60: Cliff Above the Save Point
Requirements: Flying.
Near the place where I drop in from the Obmuer Temple shortcut, I fly to the cliff directly above the nearby save point.
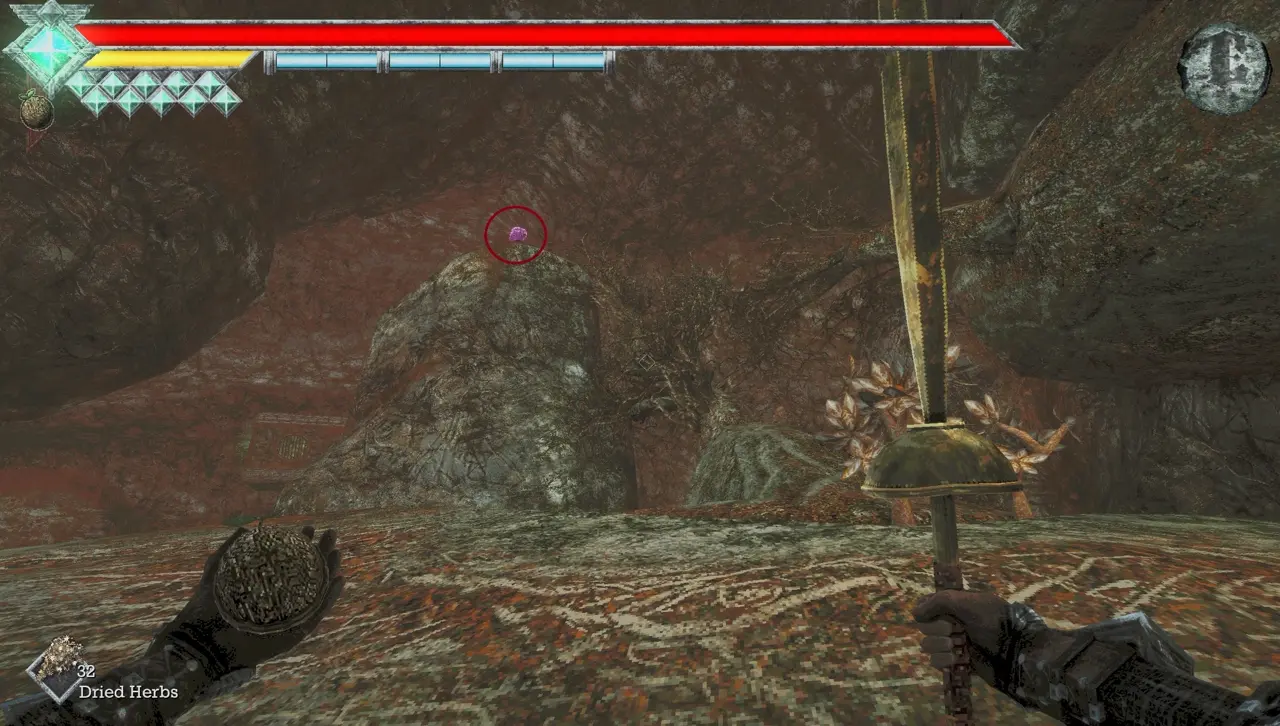
Skull #61: Structure Opposite Skull #60
Requirements: Flying.
From the area of Skull #60, I cross to the structure opposite it and fly to the top.
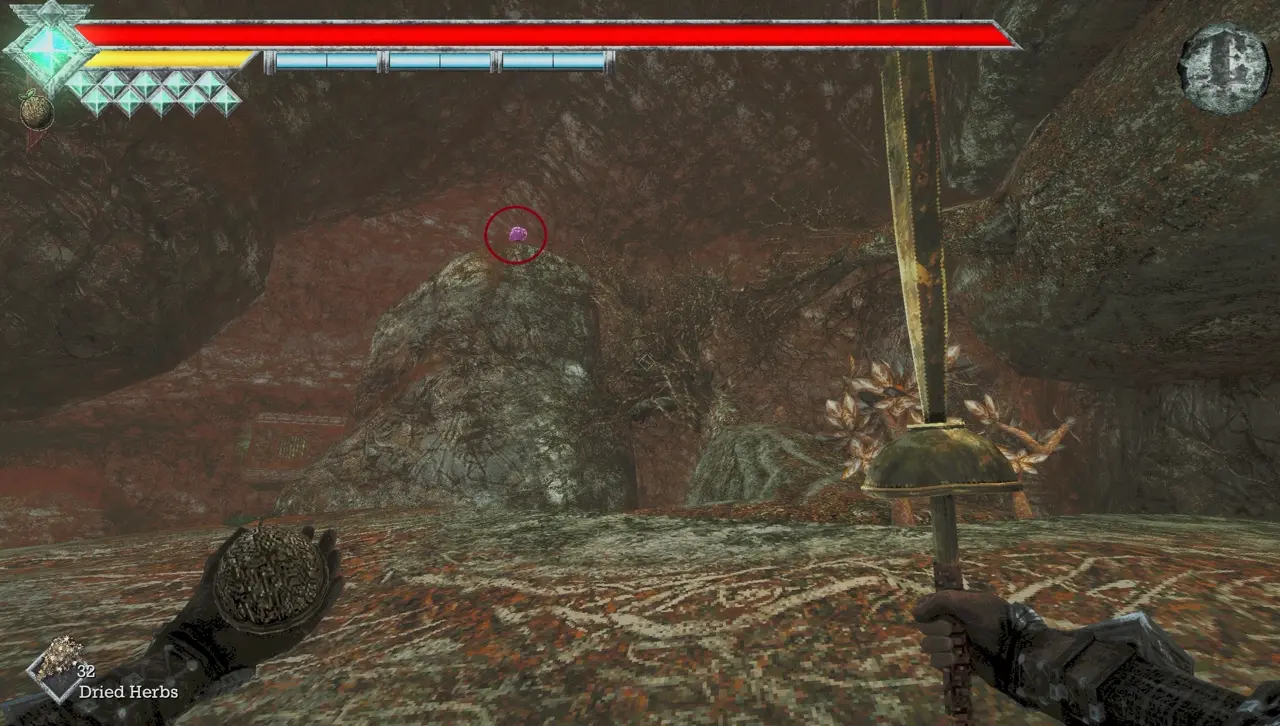
Skull #62: Structure Occupied by Lost Sentinels
Requirements: Flying.
I locate the structure filled with Lost Sentinels and fly above it to retrieve the skull.
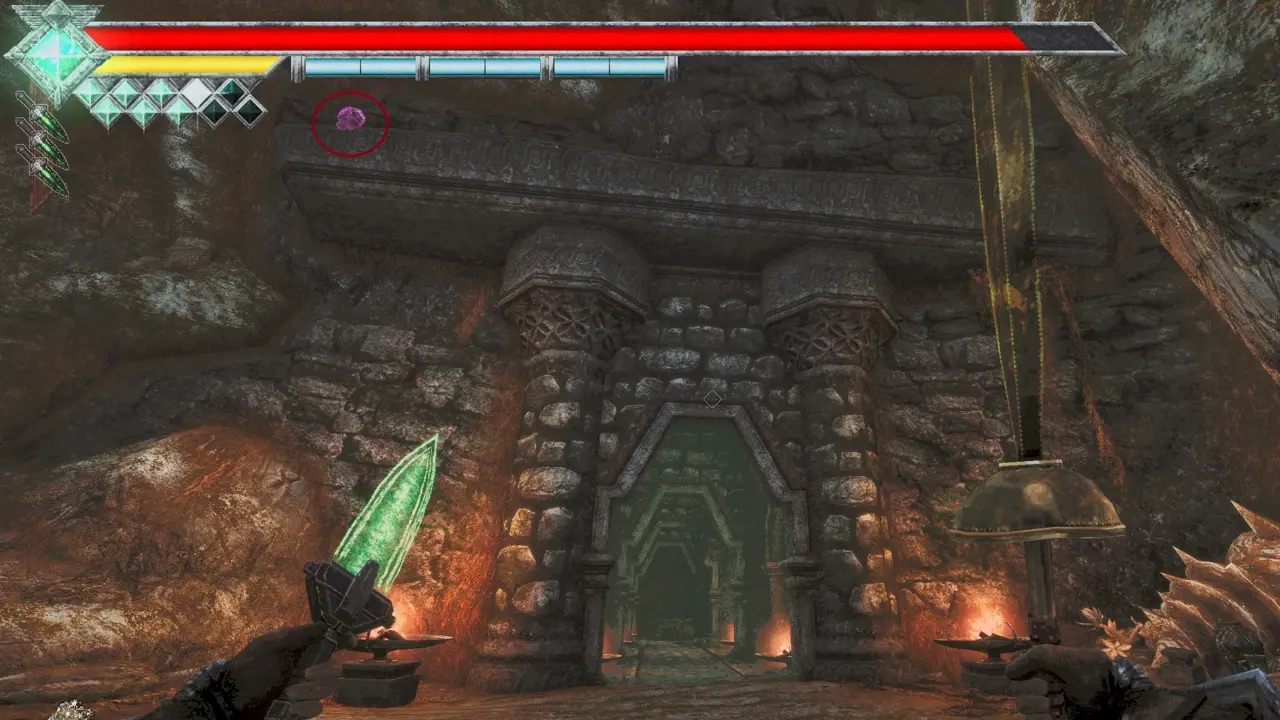
Skull #63: Above the Door to Jejano the Forgotten
Requirements: Flying.
I check directly above the doorway leading to the unique enemy Jejano the Forgotten and fly up to the skull.
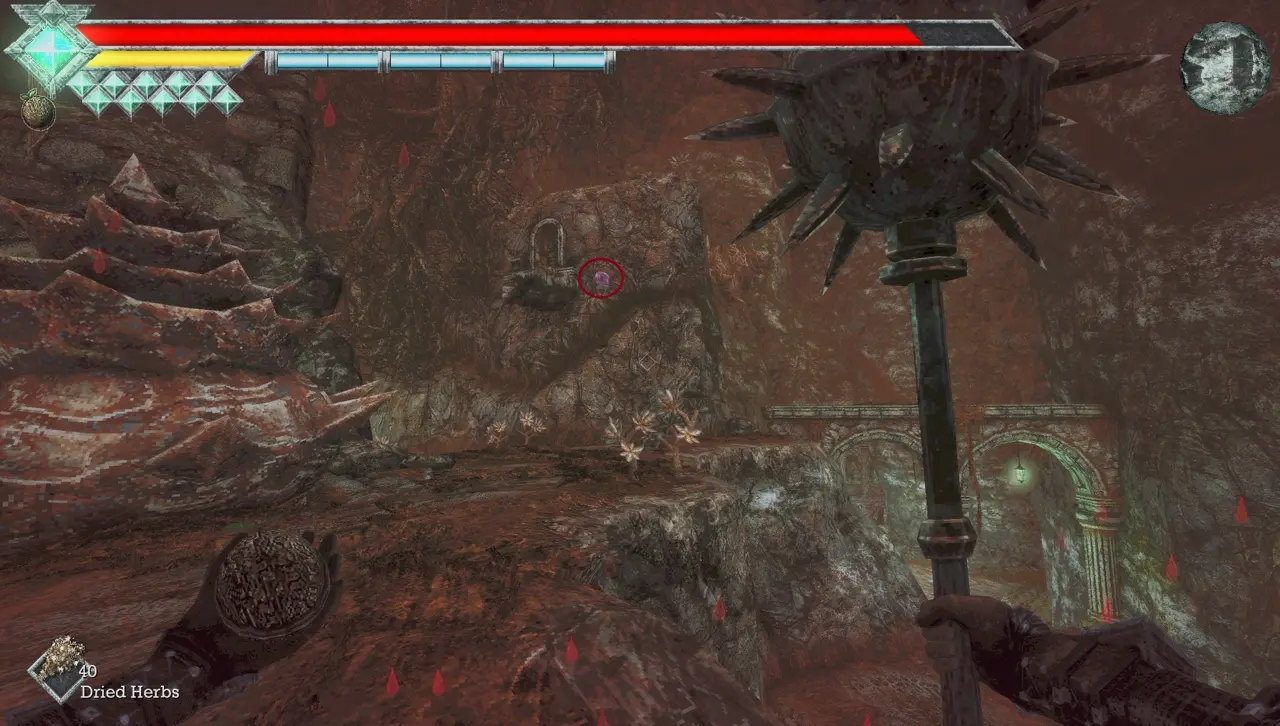
Verdant Hollow (Flying)
Skull #64: Ledge Above the Data Module
Requirements: Flying.
I return to the location of the Data Module and fly to the ledge above it.
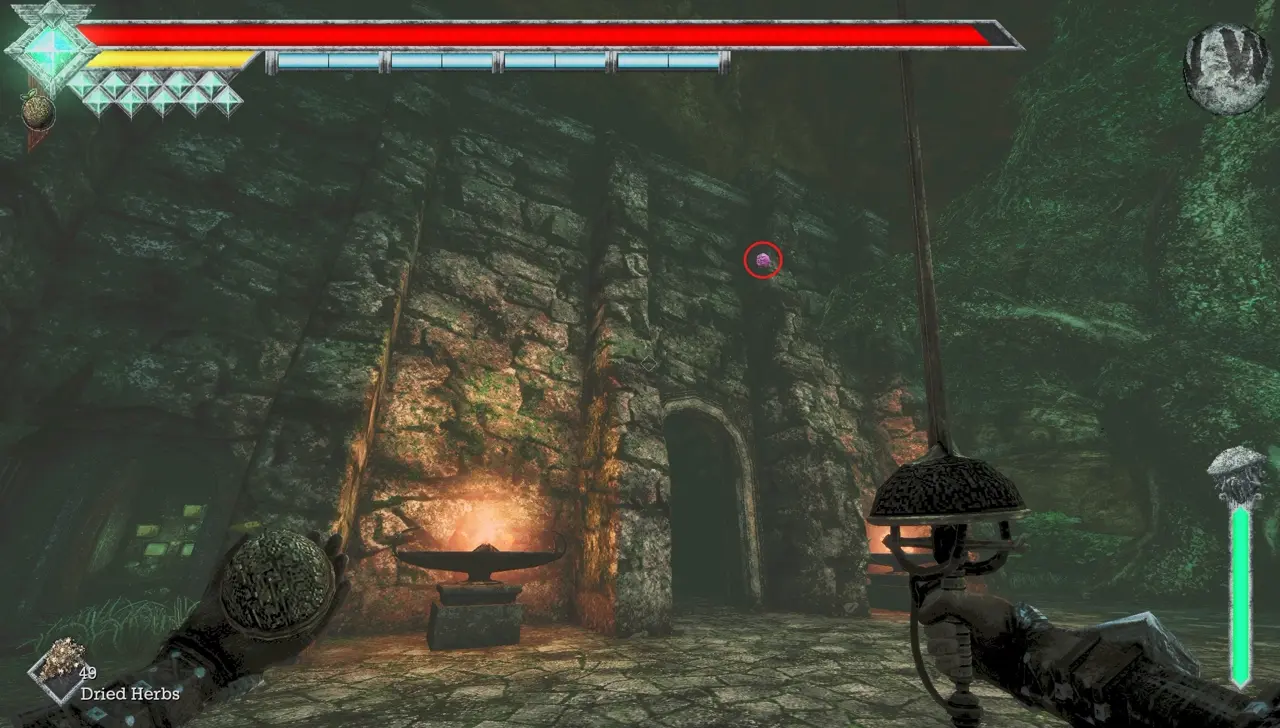
Skull #65: Above the Sipeha Lenses Temple
Requirements: Flying.
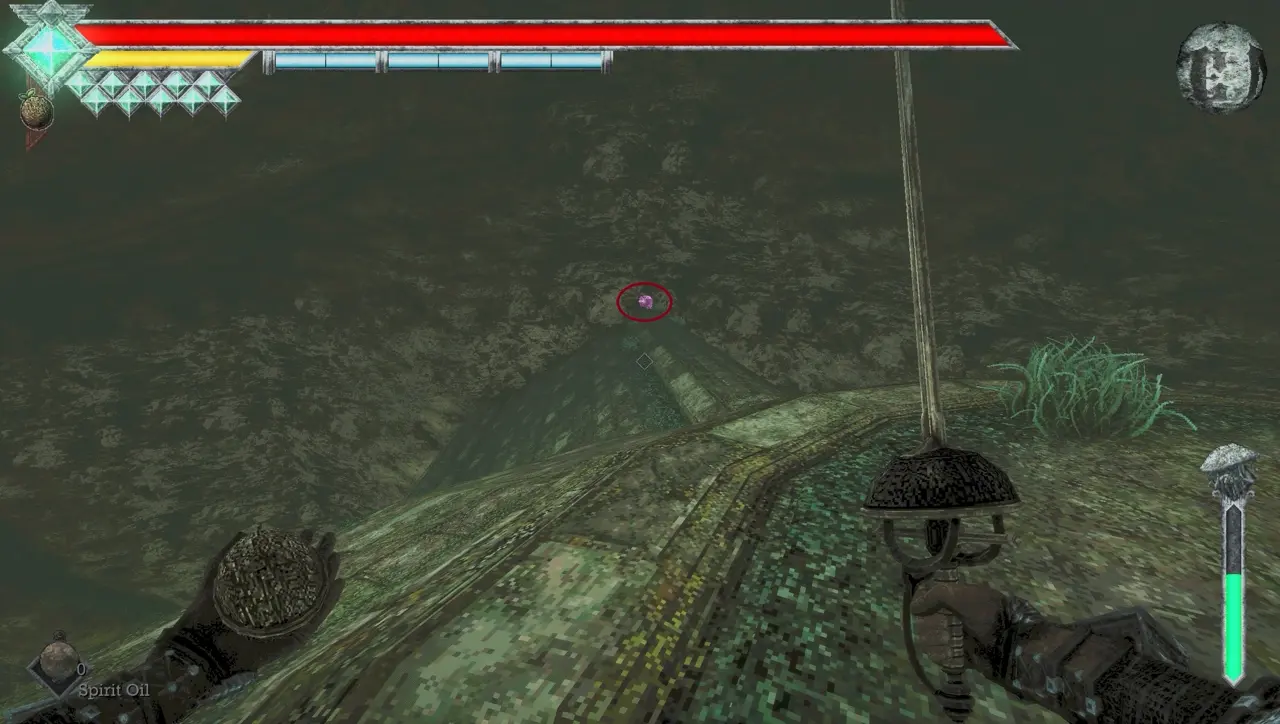
I fly onto the upper part of the temple where I obtained the Sipeha Lenses.
Records of Sin (Flying)
Skull #66: High Ledge on the First Floor
Requirements: Flying.
On the tower’s first floor, I fly to a high ledge to collect the skull.
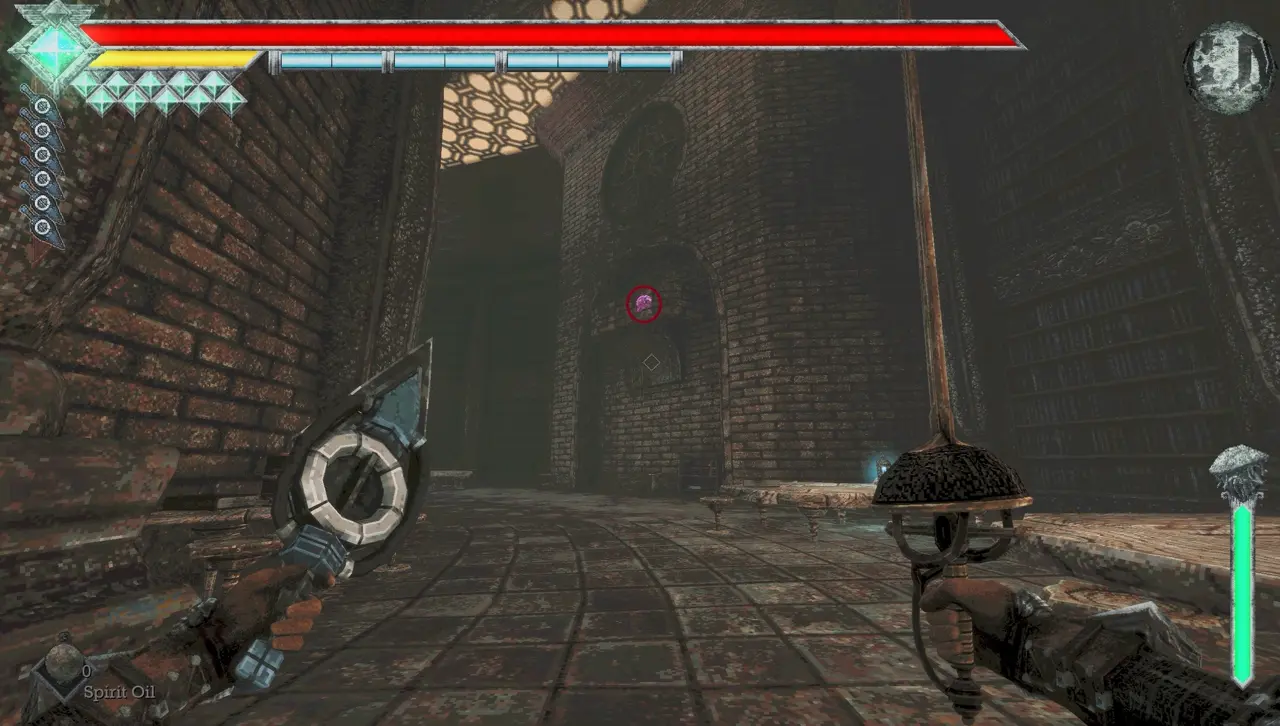
Skull #67: Crystal Branch After the Area Boss
Requirements: Flying.
After defeating the area boss, I search the crystal branches and fly up to the one holding the skull.
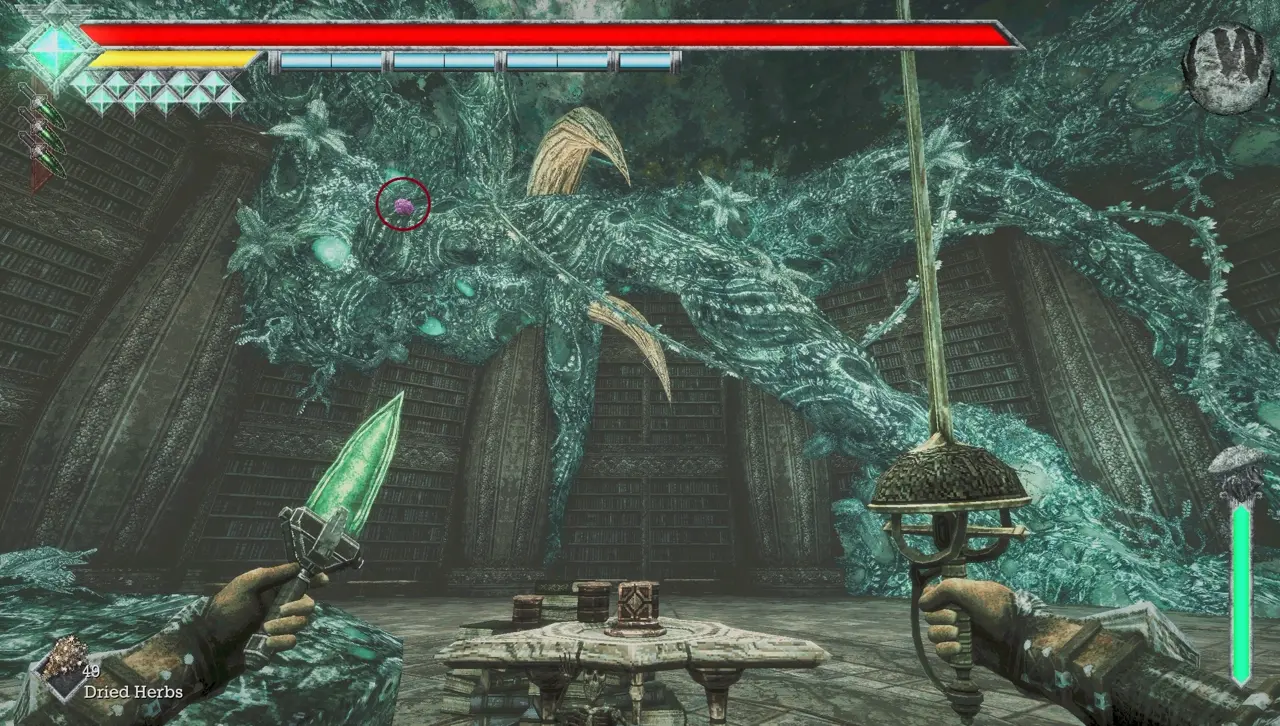
Skull #68: Crystal Branch Outside the Boss Elevator
Requirements: Flying.
After the boss fight, I return to the elevator that connects to the boss room. I find the skull on a crystal branch just outside it.
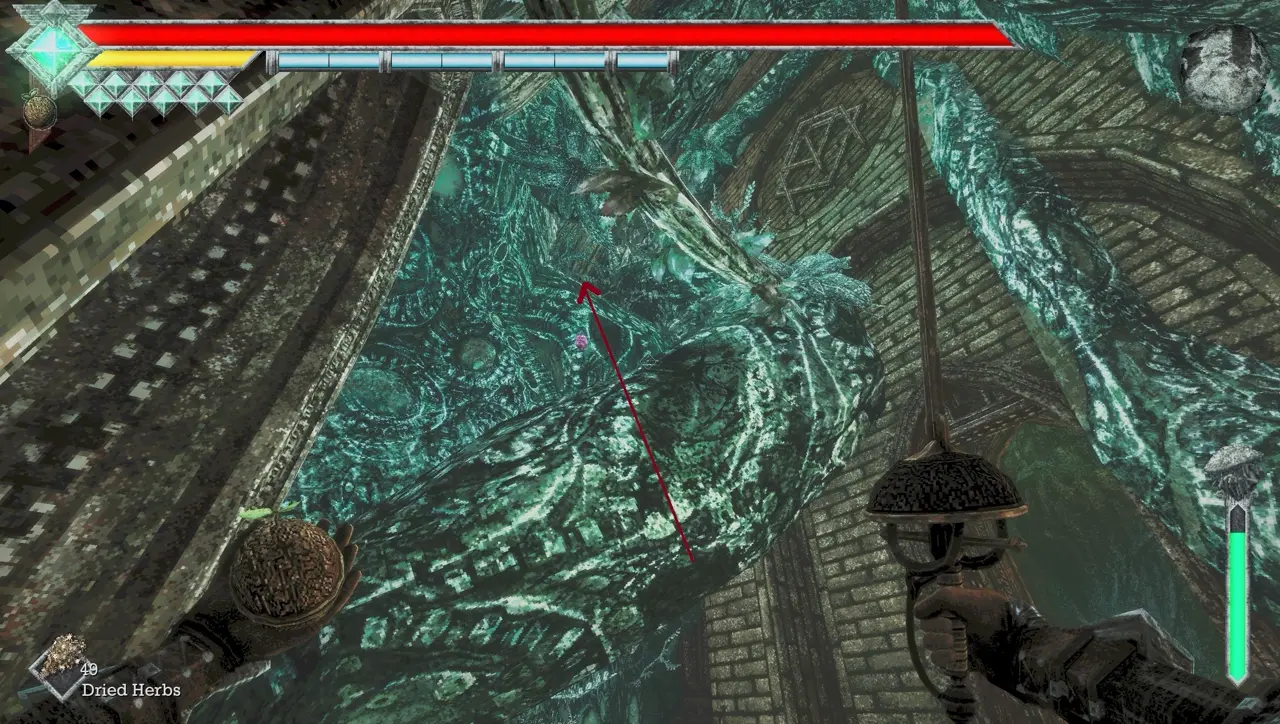
Petrified Garden (Flying)
Skull #69: Pillar Above the Trident Puzzle
Requirements: Flying.
At the center of Petrified Garden, I look above the trident puzzle. I fly up until I reach a gap large enough to pass through, then collect the skull on top of the pillar.
How I Find Skulls I Am Missing
If I have collected most of the skulls but cannot work out which ones are left, I use the save-file checker linked in the original guide. It does not identify each missing skull number, but it shows the areas where I still have skulls to find.
I download the save-file tool from GitHub, follow the instructions in its README, and run it against my save file. Once the report is ready, I open the Skulls Key tab to see which areas are still missing skulls. The tool is made by someone else.
For example, the report shown here indicates missing skulls in Deimpo Mausoleum and Ancient World. In that case, they were Skull #13 and Skull #23.
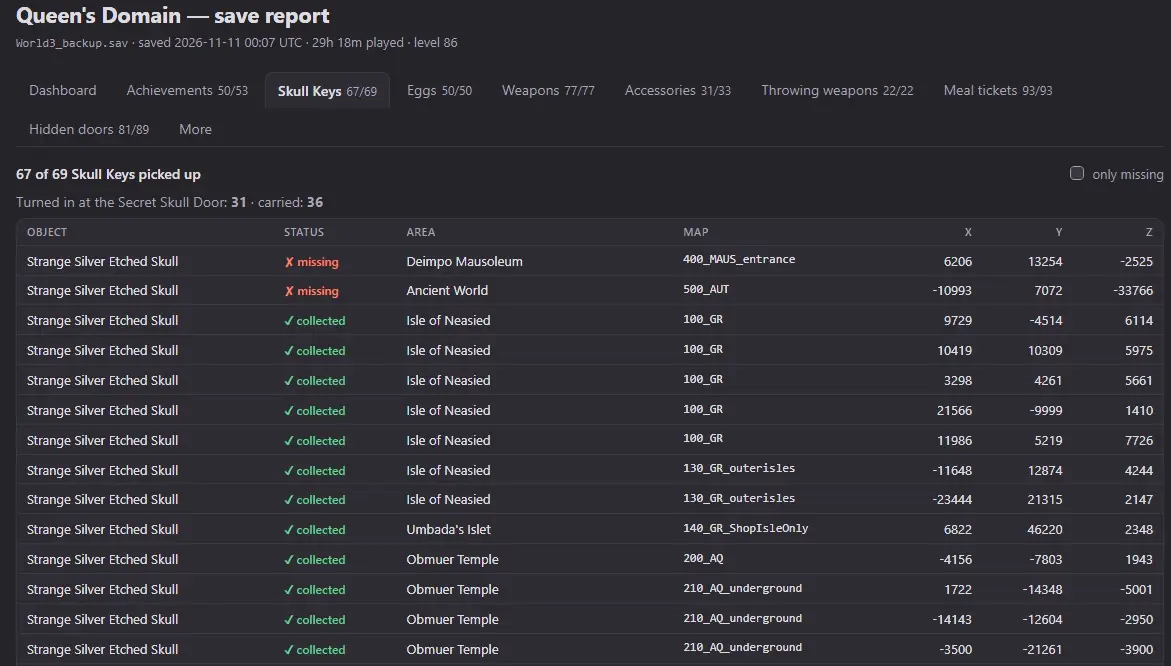
There is one important detail when reading that report: Verdant Hollow and the connecting tunnels are grouped under Underworld. An Underworld result may therefore refer to the tunnels leading to Verdant Hollow or to the forest itself. Forsaken Dungeon and Rotting Cavern are not affected by this grouping.
Closing Words
Thanks for reading my Queen’s Domain skull guide. If anything is unclear or you have a suggestion, feel free to leave a comment so I can improve it.