In Shift at Midnight, I work the night shift at an isolated gas station while checking customers for doppelgängers, completing timed tasks, preparing traps, and surviving the monsters that appear when something goes wrong. In this guide, I explain how I handle the main enemies, the fake bus driver, random employer tasks, and the most dangerous parts of each shift.
Doppelgängers, Monsters & Bosses
This guide covers the main mechanics and creatures I have encountered in Shift at Midnight. I explain what each threat does, which mistakes I avoid, and which survival methods I use during a shift.
What Is Shift at Midnight?
Shift at Midnight is a cooperative horror game for one to three players. I work at a lonely gas station in the middle of an empty highway, where my normal responsibilities include stocking shelves, accepting deliveries, cleaning the store, and serving customers.
The job becomes dangerous because not every visitor is human. During each shift, I carefully inspect customers for signs that they may be doppelgängers disguised as ordinary people.
When I fail to identify a doppelgänger, it can return later as a real monster. A quiet night can quickly turn into a survival situation where I need to reinforce the store, prepare traps, hide, escape, or fight.
Each shift is generated differently, and new creatures can appear as the game progresses. Because of this, I cannot rely on exactly the same strategy every night.
The game combines gas station work, customer inspection, and survival horror. Sometimes fighting is the best option, but in other situations I survive by staying hidden and waiting for the danger to pass.
Why I Identify Doppelgängers as Early as Possible
One of the biggest mistakes I can make is assuming that a single missed doppelgänger will not affect the shift.
Every doppelgänger I fail to identify makes the later stages of the night more dangerous. It may initially leave without causing an obvious problem, but it can eventually stop pretending to be human and return as a monster.
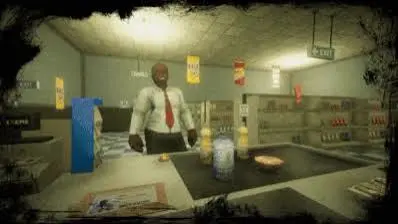
Near the end of the shift, a missed doppelgänger can force me to spend my time running, hiding, checking corners, and searching for a safe position.
For that reason, I treat identifying doppelgängers as my main objective. Completing tasks and earning money are important, but allowing even one fake customer through can turn the rest of the night into a much more difficult encounter.
Random Employer Tasks and Rewards
During a shift, my employer can give me an additional random task. Every random task has a 60-second timer, so I need to begin as soon as it appears.
Successfully completing one of these tasks gives me a bonus between $10 and $30. If the timer expires, I lose the task.
Cockroach Extermination
During this task, cockroaches spread throughout the store and I must eliminate all of them before the timer ends.
- I use the Water Cleaner because it works well against cockroaches.
- I move through the store quickly so I do not leave any behind.
Mouse Extermination
This task works in a similar way, but mice run through the store and can appear in different rooms.
- I can pick up a mouse with the right mouse button and throw it against a wall.
- I can also eliminate mice with a pistol.
- I check every room carefully because mice can appear almost anywhere.
- I avoid becoming distracted by other work while the timer is active.
Store Cleaning
When the store-cleaning task begins, dirt appears throughout the building and I must clear every dirty spot within the time limit.
- I start cleaning immediately after receiving the task.
- I move through the store methodically instead of cleaning in a random order.
- I check each area so I do not miss a remaining dirty spot.
Collecting Meat in the Forest
For this task, I leave the store and enter the forest to collect 15 pieces of meat scattered around the area.
- I avoid travelling farther into the forest than necessary.
- I continuously watch my surroundings while collecting the meat.
- After collecting the final piece, I return to the store as quickly as possible.
While I complete a random task, the store continues to operate. I still need to pay attention to customers and changes in the environment instead of focusing only on the timer.
How Ventilation Works in Shift at Midnight
I use the ventilation system as a temporary hiding place or as a route for changing position. I do not treat it as a permanent safe zone.
If I remain inside the ventilation for approximately 20 to 30 seconds, a large mass of living flesh begins moving through the shaft. It fills the passage, approaches my position, and eventually forces me back outside.
- I do not remain inside the ventilation longer than necessary.
- I decide where I will move before leaving the shaft.
- I use the ventilation to escape a pursuit or reposition myself.
- If I notice the flesh mass approaching, I immediately move toward the nearest exit.
Leaving voluntarily gives me more control over my position. Waiting until the flesh forces me out may place me directly in front of another monster.
How I Survive the Main Boss
The main boss is one of the most dangerous enemies I can encounter. It moves quickly, breaks boarded-up doors, and is vulnerable to fire.
- It moves quickly.
- It can destroy boarded-up doors.
- It is vulnerable to fire.
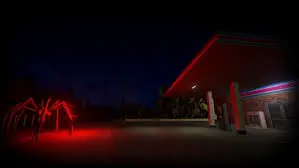
Avoiding the Main Boss
When I do not have enough equipment or do not want to risk a direct fight, I try to avoid being detected.
- I move quietly and avoid making unnecessary noise.
- If I hear the boss nearby, I do not run toward its location.
- I use walls, rooms, and furniture to break its line of sight.
- I use the ventilation to escape or change position.
- I avoid staying in open areas for too long.
Patience is often safer than trying to escape at the last possible moment.
Fighting the Main Boss
If my team has enough weapons and ammunition, I can attempt to fight the boss directly.
- I avoid standing in the same place as the rest of my team.
- I continue moving while fighting.
- I do not allow the boss to trap me in a corner.
- I keep an escape route available while shooting.
- If the fight becomes unmanageable, I retreat and regroup.
I do not fight the boss simply because it is nearby. When avoiding it is possible, escaping allows me to protect my earnings and continue the shift.
How to Defeat the Fast Red Creature
The fast red creature appears when I attempt to escape with a fake bus driver. It behaves differently from the standard monsters and removes most of my normal defensive options.
Red Creature Abilities
- It has a bright red, glowing appearance.
- It moves extremely quickly.
- It disables my pistol, shotgun, bat, and other weapons.
- It ignores or breaks through boarded-up doors.
- It can be destroyed with a bear trap.
Because my weapons are disabled and doors do not stop it, I rely on movement, positioning, and traps instead of direct combat.
Using a Bear Trap Against the Red Creature
- I place bear traps near the exit area before attempting to leave.
- When the creature appears, I immediately run toward the prepared trap.
- I position myself so the creature follows the same route.
- I lure it directly onto the bear trap.
A well-positioned bear trap completely destroys the creature. Preparing the trap before interacting with the bus gives me a clear route when the attack begins.
How to Identify the Fake Bus Driver
The bus that arrives at the end of a shift is not always safe. Like the customers inside the store, the bus driver can also be a doppelgänger.
Before boarding, I inspect the driver’s seat through the window or open door.
- If the driver’s seat is empty, the bus is safe.
- If someone is sitting behind the wheel, I do not board the bus or press the button.
If two players press the button to leave while the fake driver is present, the red creature immediately rushes out of the bus and disables their weapons.
When this happens, I run immediately or lure the creature into a bear trap that I placed in advance. I always inspect the bus before ending the shift because the final escape can still be a trap.
How I Survive the Phantom
The Phantom moves extremely quickly, deals high damage, and can close the distance as soon as I stop looking at it.
Its main weakness is direct observation. As long as I keep looking directly at the Phantom, it cannot move closer to me.
If I turn away or lose sight of it, even briefly, it immediately begins approaching and can kill me in only a few hits.
Bear Trap Method
The bear trap is the most reliable method I use against the Phantom.
- I prepare a route and place a bear trap before the encounter.
- I keep the Phantom in the centre of my screen.
- I slowly walk backwards without looking away.
- I guide it directly onto the prepared bear trap.
- When the trap activates, the Phantom is destroyed.
Restroom Door Method
The version of the game described in this guide also contains a restroom-door method that can destroy the Phantom.
- I lead the Phantom toward the restroom.
- One player boards up both the restroom entrance and exit doors.
- I lead the Phantom toward the first stall door.
- The player inside the restroom turns away, allowing the Phantom to break the door and shatter.
This method depends on the current game behaviour described by the original guide and may be changed in a future update.
I avoid instinctively turning around and running. Instead, I remain calm, keep looking at the Phantom, and move backwards toward a trap or another prepared position.
How to Stop the Gnome
The Gnome does not directly focus on killing me, but it can disrupt the store and create increasing amounts of chaos. Each appearance is more disruptive than the previous one.
First Gnome Appearance
During its first appearance, the Gnome enters the store and runs unpredictably between the shelves.
- I shoot it as soon as I see it.
- If I have a firearm, I do not waste time chasing it with a bat.
Second Gnome Appearance
During its second appearance, the Gnome arrives in a car and blocks the store entrance.
- I attack as soon as the car stops.
- I eliminate the Gnome quickly so it causes fewer problems during the shift.
Third Gnome Appearance
During its third appearance, the Gnome rides a motorcycle through the store at high speed and knocks down objects in its path.
- I do not try to outrun it through the store.
- I shoot as soon as I have a clear opportunity.
- I eliminate it quickly to prevent further disruption.
My rule for all three appearances is simple: when I see the Gnome, I deal with it immediately instead of allowing it to continue disrupting the store.
How the Demon Works
The Demon behaves differently from the other creatures, and the original guide does not provide a fully tested method for defeating it.
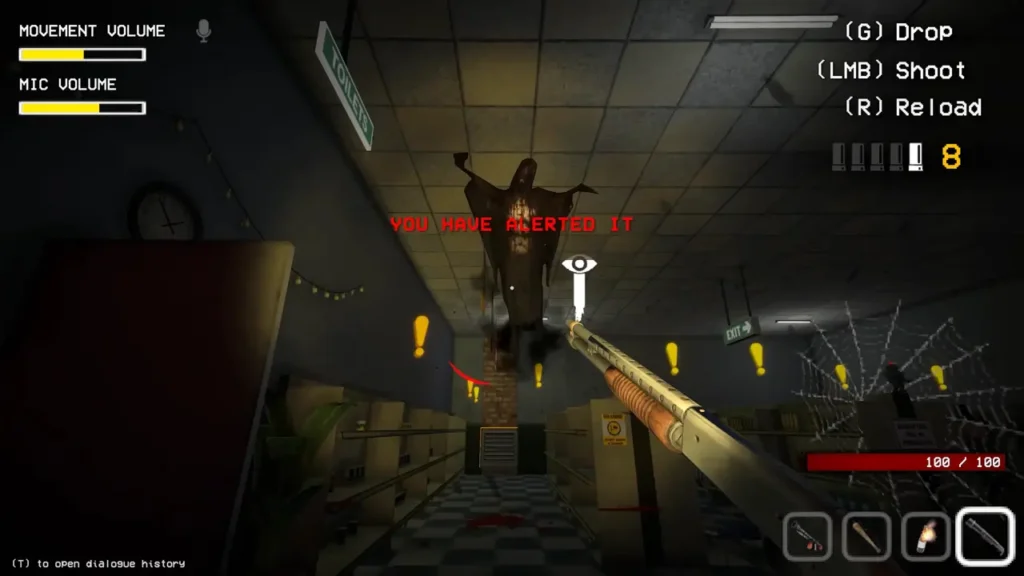
Demon Abilities and Spawn Warning
- It can pass through walls.
- It flies toward a player in the session.
- It kills slowly.
- Dealing damage to it makes it stronger and faster.
Before the Demon appears, a chest spawns and plays for approximately 10 to 15 seconds. Confetti then explodes from the chest, and the creature appears.
Because there is no confirmed universal strategy in the source guide, I follow a few general precautions.
- I do not attack it without a clear reason because damage makes it stronger.
- I keep an escape route open.
- When I can avoid contact, I choose to stay away from it.
Different routes, traps, distractions, and elimination methods were still being tested in the original guide. For now, avoiding unnecessary engagement is the only general approach it confirms.
How I Survive the Screaming Creatures
The small screaming creatures apply a slowing effect when they detect me. A few seconds later, they jump directly forward and can remove a large amount of health if the attack connects.
They become especially dangerous when several appear together or when they interrupt an encounter with a stronger monster.
Destroying Them Before They Attack
- I use a firearm before the creature reaches me.
- If it gets close, I finish it with a bat.
- I do not extend the fight because it enters its attack sequence shortly after screaming.
Dodging the Forward Jump
Moving directly backwards is not reliable because the creature jumps straight toward my position.
- When it begins preparing its jump, I move left or right.
- At the correct moment, my character performs a sideways dash.
- The creature misses and moves past me.
- I use the following few seconds to eliminate it with a weapon or bat.
I prioritise these creatures when several enemies are present. Allowing them to surround me can keep me slowed and make it harder to avoid attacks from more dangerous monsters.
Final Shift at Midnight Survival Tips
These are the creatures and mechanics covered by this guide. The most important lesson I follow is to prepare before a threat appears rather than reacting after I have already been trapped.
- I inspect every customer carefully and identify doppelgängers early.
- I prepare bear traps before approaching the bus or facing certain creatures.
- I use ventilation only as a temporary escape route.
- I keep an escape path available during dangerous encounters.
- I avoid unnecessary fights when hiding or retreating is safer.
Shift at Midnight can change quickly after a single mistake. By checking customers, preparing traps, and understanding how each creature behaves, I give myself a better chance of surviving the shift and keeping my earnings.