In this Romestead Guardian of Minerva guide, I explain how I prepare for the first boss fight, where I find the Guardian’s nest, how I handle both battle phases, and what rewards I get after defeating it. This walkthrough covers the right armor, ranged weapon choices, healing items, attack patterns, and the final step of offering the Guardian’s Eye to complete “The Giant Owl” quest.

Guardian of Minerva Guide: How to Beat the First Boss
The Guardian of Minerva is one of the first major challenges I faced in Romestead, and it can feel brutal if I am still getting used to the game. This boss is tied to “The Giant Owl” quest, which begins after building an altar and receiving the task to defeat a creature and bring back its Eye. Beating the Guardian is important because offering the Eye unlocks key progression rewards, including access to the Material Storage, the Carpenter, and the Blacksmith.
How Do I Get Ready for This?
At the beginning of Romestead, my equipment options are not exactly great. Still, this is the gear I need to work with, because better tools and buildings are locked behind defeating the Guardian of Minerva.
The first thing I need is a full set of leather armor. If I followed the tutorial, I should already have the Leatherworker as one of my early buildings. I need to assign a citizen to the Leatherworker and bring 8 Leather so they can craft the Leather Hood, Leather Armor, and Leather Sandals. The protection boost is small, but it can easily be the difference between surviving and dying during the fight.
For my weapon, I could try using a sword or spear, but the Guardian has several close-range attacks, so staying at range is much safer. If I chose Scholar as my starting profession, I already have the Scroll of the Novice, which lets me throw magic blasts. If I did not choose Scholar, or if I do not want to ask the Leatherworker to make one, I should use a bow or a crossbow, also called an arcuballista.
The bow is a two-handed weapon and only requires 2 Sticks and 1 Leather. The crossbow needs 1 Stick, 1 Leather, and 1 Wood Plank, and it can be used with the off-hand.
For ammunition, my only early option is flint arrows. Since I can carry up to 999 arrows of the same type in the quiver, I should not be afraid to stockpile them. I will need plenty for this fight, and any leftovers can still be useful later.
The most important preparation is healing. If I have explored already, I may have found potions, which can restore about a third of my full HP bar. I should place them in the first slot of my belt. I should also bring Cooked Game, because it heals me and gives healing over time, which can help a lot during the boss fight. Finally, I should carry smaller food items like Olives or Nuts, so I can heal a little without using my stronger healing items.
Where’s the Guardian?
Once I feel ready, I need to find the Guardian. The map can be large, but the game gives hints because defeating this boss is part of the main progression.
The most obvious hint is the message, “You feel a presence in the skies above.” After this, I will see the shadow of a large bird pointing in one direction. If I follow that direction, I will eventually find a large nest with several eggs. In the demo, there was only one egg.
There is also a less obvious hint involving a large marble statue. If I check the statue, the game tells me that it has an image of a fire at its feet. To use this clue, I need to craft a Campfire and place it at the feet of the statue. After doing that, my map will update and mark the location of the Guardian’s nest.
However I reach the nest, the Guardian will not be there at first.
Before starting the fight, I should clear possible obstacles in the area. The Guardian only really cares about mountains, but I need open space so I can move freely and dodge its attacks.
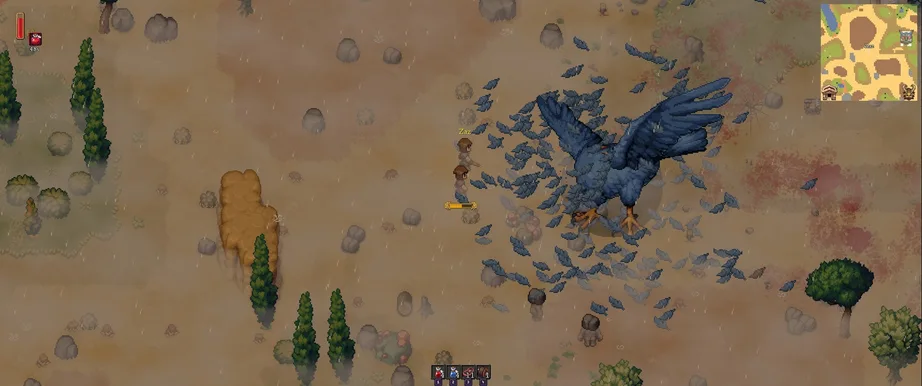
When the area is prepared, I need to attack the nest several times. The eggs will break, and the Guardian will appear, ready to fight the one who destroyed them.
Defeating the Guardian, Part I
The first phase of the Guardian fight tests whether I have enough battle awareness to survive in Romestead.
The best strategy in this phase is to keep my distance and shoot arrows at the Guardian. I need to remember that arrows have limited range, so standing too far away will not help. If possible, I can try to charge my attacks for a bit of extra damage, but this can be risky if I do not time it correctly.
I should only eat food when I have created enough distance between myself and the Guardian. Healing too close to the boss can easily get me hit.
During the first phase, the Guardian has three main attacks, and any of them can take a huge amount of health if they connect.
- Peck: This is the Guardian’s short-range attack. If I get too close, it will stop moving and strike with its beak. The easiest way to avoid this is to stay away. If the Guardian gets close and I see it lower its head, I need to move away quickly before the attack lands.
- Low Flight: Sometimes the Guardian stops moving, which means it is about to jump and fly low across the ground. Anything in its path will take damage. I need to watch carefully and jump to the side once it starts flying. Running straight away may not help much.
- Dive Bombing: If the Guardian disappears from the screen and I see a round shadow around me, it is preparing a dive bomb. As soon as I see this shadow, I should start moving away. When the shadow grows larger, I need to run, using the MAYUS key for a burst of speed, because the shockwave also deals damage.
Once the Guardian’s health drops to about half, the second phase begins. The sky darkens, and electricity starts surging across the Guardian’s body.
Defeating the Guardian, Part II
Even though the Guardian changes in the second phase, my main strategy stays mostly the same. I need to keep my distance and keep hitting it with arrows. It can take time, but this approach is the safest way to win.
In this phase, the Guardian gains more attacks, and they can be even more dangerous.
- Peck: This works almost the same as in the first phase, but now the peck creates a crack in the direction of the attack. Because of this, simply being slightly away is no longer enough. I need to avoid both the beak and the crack that follows.
- Lightning Bolt: If I see a spark forming where I am standing, I need to move immediately. A lightning bolt is about to hit that spot. If other creatures, such as zombies, appear during the fight, they can also be targeted by lightning. Unlike me, they usually will not move fast enough to dodge it.
- Wing Strike: The Guardian performs an arc-shaped strike in front of itself. Since this attack has short reach, I can avoid it by staying away.
- Low Flight: This attack works like it did in the first phase, but it is slightly faster.
- Dive Bomb: This is also similar to the first phase, but the shockwave is bigger.
- Storm: The Guardian releases a lot of electricity around itself. If I continue keeping my distance and following the same ranged strategy, I should be able to stay safe.
One useful thing to remember is that when the Guardian uses Lightning Bolt or Wing Strike, it will almost always follow up with the other attack. This gives me a short window where I can be fairly sure the Guardian will not move. During that moment, I can fire several arrows safely or heal myself if I took damage.
The fight takes some patience, but eventually the Guardian’s health will drop to zero, and the battle will be over.
End of the Beginning
After defeating the Guardian, a chest magically appears where it last stood. This chest contains several useful items that help with the next part of the game.
- Coal: I can find more coal easily later, but it is still useful to have early.
- Copper Bars: I can save these for when I build the Blacksmith, or I can use them to start completing Vulcan’s first quest if I have already roused him.
- Money: The chest includes some money. 1 Denarius is needed for Mercury’s first quest, which unlocks the Market.
- Feathered Armor, Boots, or Hood: This armor is quite decent and also boosts Magic a bit, making it especially useful if I use a Scroll. I only get one piece from the chest, but the other pieces can be found by farming the Guardian or crafting them at the Leatherworker.
- Guardian’s Feathers: These are needed if I want to get the Feathered Armor, Boots, or Hood without fighting the Guardian again. They can also be used to craft the Feathered Bow, which is a strong upgrade from the starting Wooden Bow, or to craft an item that lets me summon the Guardian whenever I want.
- Guardian’s Talon: This is used to craft the Feathered Bow.
- Guardian’s Eye: This is the quest item I was sent to find.
After collecting everything, I should also take the chest itself. I can place it in my house and use it for storage.
Once I have the Guardian’s Eye, I need to return to the Altar and offer it. Minerva will be roused, and “The Giant Owl” quest will be completed.