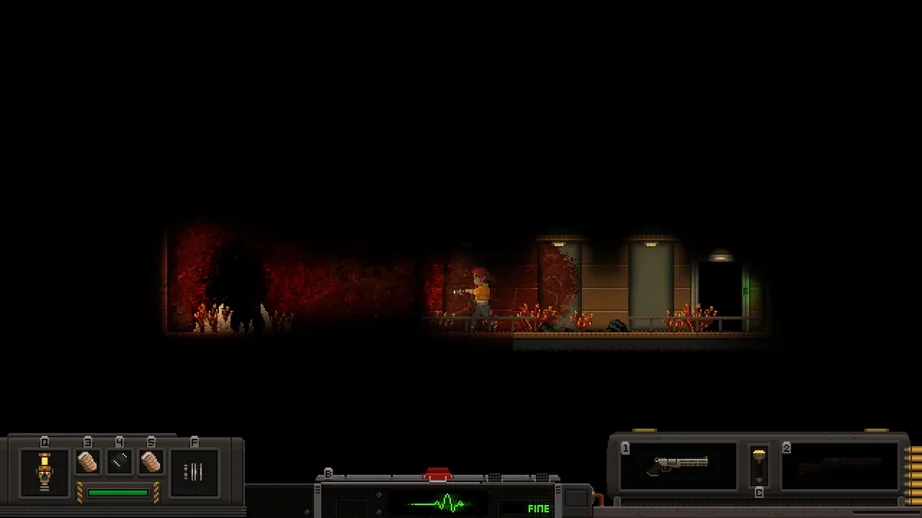
This HOPE 01 enemy guide covers the Slimes, Robots, other enemies, and bosses I have encountered so far. I explain how each enemy behaves, what I use against them, where I look for weak points, and how I handle the Chirurgeon Overseer and Honeyed Mother boss fights.
HOPE 01 Enemy Guide
This guide is still a major work in progress. I am learning about many of these enemies as I play, and some of the names I use are simply my own descriptions for now. If you have seen something different from what I describe here, feel free to correct me. I also hope to get the scanner gadget eventually so I can document enemy weak points more accurately. For now, I am focusing on the enemy behavior, weaknesses, combat strategies, and bosses I have encountered.
Basic Tips
- I make good use of the knife or bayonet whenever possible. Most enemies in the first few rooms only need a few melee hits, which lets me save ammunition for more dangerous encounters.
- Cover is extremely useful. When I get close to an object such as a barrel, a blue arrow can appear. If I crouch there, I can hide behind the object and stay out of sight from enemies on the other side. Cover also blocks incoming projectiles and gives me opportunities to move or attack when enemies turn away. These objects seem to have durability, though, so I do not expect them to protect me forever.


- Luxury Fabricks are very difficult to find and are needed for permanent upgrades. When I find an item marked as a Luxury Item in purple text at the bottom of its description, I feed it into the recycler at my base.
- When I mention different types of rounds, I am usually referring to penetration. The weapon itself actually determines bullet penetration, so the ammunition type is only a general indicator. Some guns behave differently than I would expect. The Piper, for example, uses light rounds but can match or outperform the penetration of many guns that use heavy rounds. I check weapon penetration and other stats at the firing range by seeing how far the bullets travel through the ballistic gel.
- Most enemies have a weak point. Hitting that area deals additional damage and ignores armor. If an enemy has a head, I usually start by testing that as its weak point. Once I get the scanner gadget, I hope to document these more accurately.
Tips for Fighting Bosses
- I keep MB1 Injectors, Med-Sprays, or other important consumables in my quick-use bar so I can heal without wasting time.
- Bosses tend to have armor, attacks, and minions similar to the enemies found near their location, so I prepare my weapons and items around what I have already encountered in the area.
- Every boss I have encountered so far has had a weak spot, so I always look for one.
- Magazine-fed weapons can make reloading much faster, but only if I bring enough magazines and ammunition. If I plan to rely on one as my main weapon, I bring at least four magazines.
- I leave enough inventory space for whatever loot drops after the boss fight. I do not want to survive the encounter only to discover that I cannot carry the rewards.
- If I am unsure about a boss or my own ability to handle it, I do not mind doing a scouting run with lower-level equipment and expecting to die. It gives me a chance to learn the encounter before risking better gear.
Slimes
Slimes are some of the most common enemies I encounter. They appear to be made from blood, guts, bones, and similar organic material, and they come in several different forms. Most of them do not have armor and only need a few hits to kill, so I avoid wasting medium, heavy, or scatter rounds on basic slimes whenever possible. A knife or bayonet is often enough.
Baby

Baby Slimes are tiny, which can make them surprisingly difficult to hit, but they have very little health. I usually see them approach, pause, and then jump. That pause gives me a good opportunity to run in and use my knife before they attack. After jumping, they can perform a piercing attack that deals much more damage than I initially expected, so I do not underestimate them. They can also hide behind foreground objects.
Chunky
These look like they have been around for a while, with chunks of bone sticking out of their bodies.


Chunkies are very common, and I actually find them easier to deal with than Baby Slimes because they are larger targets. When one spots me or takes damage, it rises up and starts moving toward me. It moves faster than my normal walk but slower than my run. With one melee upgrade, I can usually kill one in one or two hits. On rare occasions, I have also seen one enter and possess a corpse, creating a Skinless.
Dropper
The hanging form reminds me quite a bit of the barnacles from Half-Life 2.


A Dropper is not especially dangerous by itself, but it can make a crowded fight much worse. It hangs from the ceiling and spits out a Baby every few seconds, so I try to destroy it quickly before the room fills up. They can be difficult to notice because they hide between lights, so I sweep dark rooms with my flashlight. They also seem slightly tougher than Chunkies and can sometimes take a few extra shots depending on the weapon I am using.
Entangler


The Entangler throws out tentacles and grabs me. Fortunately, it does no damage regardless of how long I stay trapped. It does slow my movement, restrict my range of motion, and drain stamina, but I can roll free if I react quickly. When I am only dealing with close-range enemies, it is not much of a threat. One or two knife attacks at my feet are usually enough to free me.
Runaway Heart
It looks a bit like a heart with legs to me.

I always like finding a Runaway Heart because damaging it causes it to drop plenty of Fabricks, totaling in the hundreds by the time it dies. The problem is catching it. It is rare, extremely fast, and constantly tries to escape, sometimes running through several rooms. I keep chasing it, maintain my aim, and try not to lose sight of it for too long if I want the reward.
Skinless



Skinless enemies begin appearing as I travel deeper into hospital and industrial-looking areas, and one can also form when a Chunky possesses a corpse. When a Skinless notices me, it pauses to scream and then charges. It does not have armor, so a few shots to the head can bring it down quickly.
Evolved Skinless

Evolved Skinless look intimidating, but I find them surprisingly manageable when I fight them alone. As one charges me, I watch for the moment it pulls back to swing its club. I then roll behind it and attack from the rear. It usually continues beating the ground a few times before realizing I have moved and turning around.
Armored Slime


The Armored Slime can take a lot more punishment. Its frontal armor calls for strong penetration, although I can also roll past it and fire into the softer exposed section instead. It has a decent amount of health, so I balance my weapon’s penetration against its rate of fire. The armor also functions as a weapon when the slime fires, so I make sure to time my dodge carefully.
Blood Spitter


The Blood Spitter looks worse than it actually is. When it spots me, it moves into range, rises up, and spits a glob of blood. The attack leaves a red area on the floor that does not damage me, but it slows me to walking speed. The creature also likes to keep its distance. If I move too close, it starts running away and stops attacking. It has no armor, and I can kill it quickly by aiming for the head.
Honeyed Lady


The Honeyed Lady behaves similarly to the Blood Spitter, but I consider her slightly more dangerous. Her honey projectiles do not create the same ground zone, and she attacks much more frequently. I otherwise deal with her in much the same way.
Spiked Slime

I treat the Spiked Slime as a serious threat. It fires the spike on its forehead at me, and that attack can cause bleeding and injure a limb, so I prefer to keep my distance. The material covering its upper body resembles the armor on an Armored Slime, although I did not notice the same resistance when I killed one.
Robots
Robots are generally harder for me to deal with than slimes. Many of them have armor, which means light and mini rounds often stop being effective. Even medium rounds can sometimes be blocked, which I can see from the white text popup that appears on the target. Melee attacks can still deal damage, but getting close to most of these enemies is usually not something I want to do.
Enforcer

The Enforcer is one of the first enemies I encounter that can deal serious damage. It has an armored plate on the front and a ranged weapon, so I have to use enough penetration while also avoiding its shots. When it notices me, it sounds an alarm, lights up, and follows me until I am within range of its built-in gun. I think it only fires once before needing to reload. If I fight it from the front, I use at least medium rounds. Otherwise, I can get behind it and use a lower caliber. Cover, well-timed dodges, and the reload window all make the fight easier.
UFO


UFOs are quick, difficult targets and can become annoying fast. Their green glow makes them easy to notice in dark areas, and their armor is light enough that I can use light rounds against them. Once one spots me, it flies into range and attacks with a laser that deals damage quickly.
Med-bot


A Med-bot normally moves slowly across the room until it notices me. It then rises up and starts firing syringes that I assume can inflict bleeding. The section exposed when it takes aim may be a weak point. Med-bots have some armor and a decent amount of health, so I approach them carefully.
Mini Med-bot

Mini Med-bots tend to arrive in groups and can overwhelm me quickly, especially when another enemy is already in the room. Once they get close, they launch syringes at me. I do not think an individual hit deals much damage, but there can be many projectiles and they can cause bleeding. Shotguns work well for me because the bots are small, unarmored, and often clustered together.
Wheeler Mines

Wheeler Mines are not usually a major threat as long as I stay alert. They rush me and try to explode, but their attack is fairly easy to avoid. Because they move so quickly, they often reach me before the other enemies in the room, which lets me deal with them first. They also make plenty of noise when they notice me. Shooting one can set off its explosives and sometimes destroys the rest of the group as well, although I am not sure whether that is the explosion or my bullets penetrating through them. I have not noticed any armor, so almost anything works.
Turret
The Turret is probably my least favorite enemy so far. I can see when it detects me and where it is aiming, and I can hear the warning before it shoots. It also has to reload after every three shots.
The problem is everything else. It hides in dark areas much like Dropper Slimes, has enough armor that I prefer heavy rounds, and has more health than I expected. It also waits until I am still enough to have a chance of hitting me before starting its volley. The spacing between shots can be awkward as well; after dodging the first bullet, I can easily roll into the third. I use cover, bring heavy rounds, and hope I do not have too many other enemies to manage at the same time.
Zapper UFO

The Zapper UFO is very similar to the regular UFO. The main difference I have noticed is that it attacks with a single zap instead of a continuous beam. I have not fought enough of them yet to say much more.
Other Enemies
Possessed Robe

Against a Possessed Robe, I simply unload as much ammunition as I can as quickly as possible. It does not have armor, but it has an unusually large amount of health, so I prefer my fastest-firing weapon. To attack, it opens its robe and starts spitting projectiles. One surprised me immediately after I entered a new room, and I died because I tried using my heavy rifle instead of a faster weapon. Sustained fire works much better for me.
Bat

The Bat is surprisingly relaxed. It normally hangs above me out of reach and does not become aggressive unless I start firing at it or other enemies nearby. Shining my flashlight at it does nothing. Even jumping into one does not make it chase me, although touching it still causes contact damage. For the most part, I simply leave it alone.
Mushroom Grunt

I do not know much about the Mushroom Grunt yet because I did not have enough health to experiment with its attacks. What I have seen is that it runs directly toward me and presumably attacks once it gets close.
Mushroom Impaler


The Mushroom Impaler stays in one place, but that does not stop it from attacking at range. When I enter its line of sight, it rises up before striking. Grey particles appear to show the attack area, and a moment later it slams down and creates a stalagmite where I was standing. The attack can both cause bleeding and break a limb, so I move as soon as I see the warning.
Hospitek Boss – Chirurgeon Overseer
The Chirurgeon Overseer is an armored boss with a weak point around its base. During the fight, it summons short-range turrets and dispensers that produce Mini Med-bots.

What to Bring
I bring an accurate weapon with strong penetration and plenty of ammunition. Two full stacks should be enough for the fight, but I prefer having more rather than running short. My second weapon is more flexible. I can use a shotgun for Mini Med-bots, another high-penetration weapon as backup, or whatever suits my setup.
The boss hovers high near the ceiling, which makes precise aiming difficult. I find the laser sight gadget particularly useful here. It is not essential, but it can help me waste fewer rounds.
Boss Attacks

One of its basic attacks is a wave of projectiles that I find fairly easy to dodge. The boss can use it from different parts of the room. Although the wave covers a large area, I can avoid it entirely when the boss and I are on opposite sides of the room. That briefly gives me room to reload or heal, although the opportunity does not last very long.

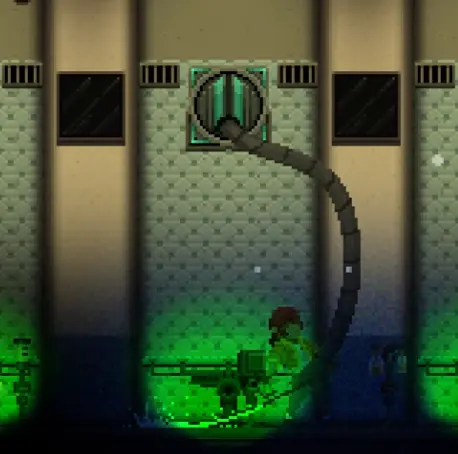
The stationary turret can only hurt me when I get too close. It quickly lashes out with a mechanical arm, but I can dodge the attack if I react in time. Around three to five shots from my main weapon are usually enough to destroy one.

The Mini Med-bot dispenser caused me more trouble than anything else during this fight. If I leave it alive, it releases another Mini Med-bot roughly every ten seconds. That is not quite fast enough for them to immediately overwhelm me, but they become a constant distraction while I am trying to hit the boss’s weak point or avoid the mechanical turret attacks.
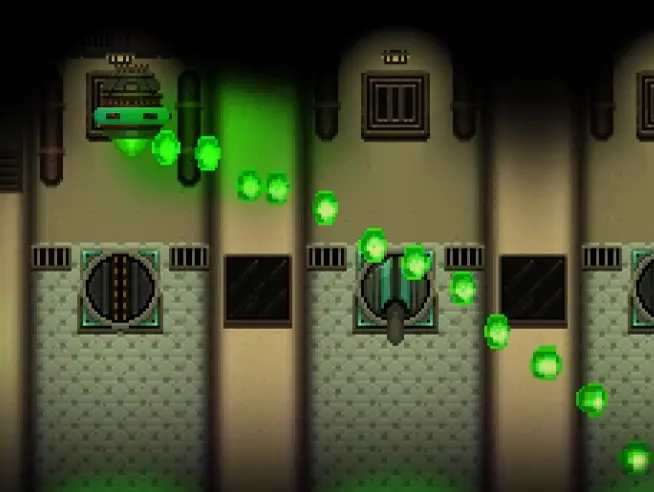
Another attack rains projectiles across the entire room. When this happens, I focus on dodging until the attack ends.

This appears to be a second phase, although it seems to have much less health than the previous one. After I deal enough damage, the boss moves down toward the door and summons three orbiting panels one at a time. I believe these panels act as armor. It then rises back toward the ceiling and continues fighting. I have not noticed any new attacks during this phase.
After I defeat the Chirurgeon Overseer, the locations where the turrets appeared open and drop hundreds of Medical Fabricks. I received roughly 300 from the fight. Since I consider this the easiest boss, repeating it can be a way for me to stock up on Medical Fabricks.
Chirurgeon Overseer Summary
- I bring a weapon with high penetration.
- I keep an eye on the summoned turrets, especially the ones that produce Mini Med-bots.
- I dodge the boss’s projectile attacks.
- I aim for the weak point at the base of the boss.
Aquatek Boss – Honeyed Mother
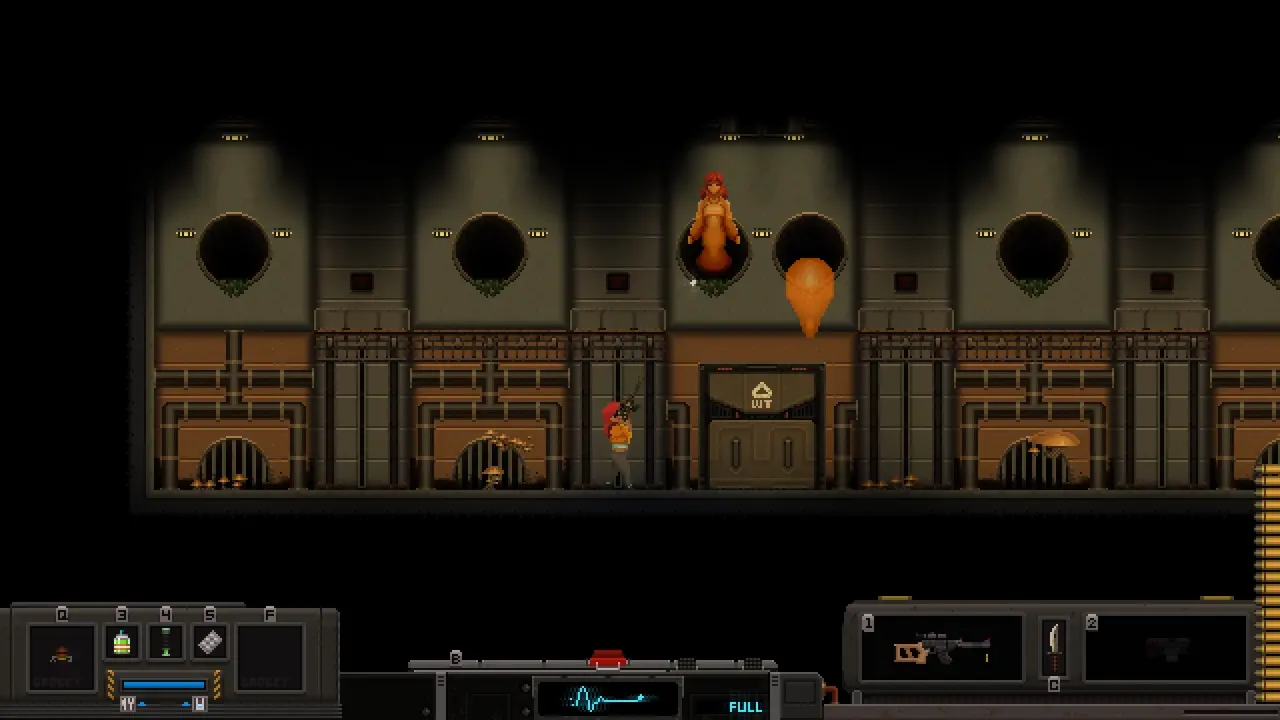
The Honeyed Mother is an unarmored poisonous boss that summons large numbers of enemies and can flood the arena with toxic sludge.
What to Bring
I bring two inhalers in case I need to counter the poison applied by the enemies in this room. I keep one inhaler in a quick-use slot so I do not have to search through my inventory while fighting.
For my weapon, I use a mini or light gun with a high rate of fire. Unlike the Hospitek boss, the Honeyed Mother has no armor, and neither do the enemies she summons. A magazine-fed weapon with a fast reload and strong fire rate can potentially let me finish the fight before the extra enemies become too difficult to manage.
How Poison Works
When I take poison damage, such as from Med-bots, Honeyed Ladies, or the other poison sources in this room apart from the boss’s projectiles, a translucent orange splatter begins appearing around the edge of my screen. As I take more poison stacks, the border becomes increasingly opaque. At around five stacks, I receive the poison debuff. Poison can continue stacking beyond that point, which makes it take longer to disappear. If I avoid taking additional poison stacks for a second or so, the stacks begin decreasing.
Boss Attacks
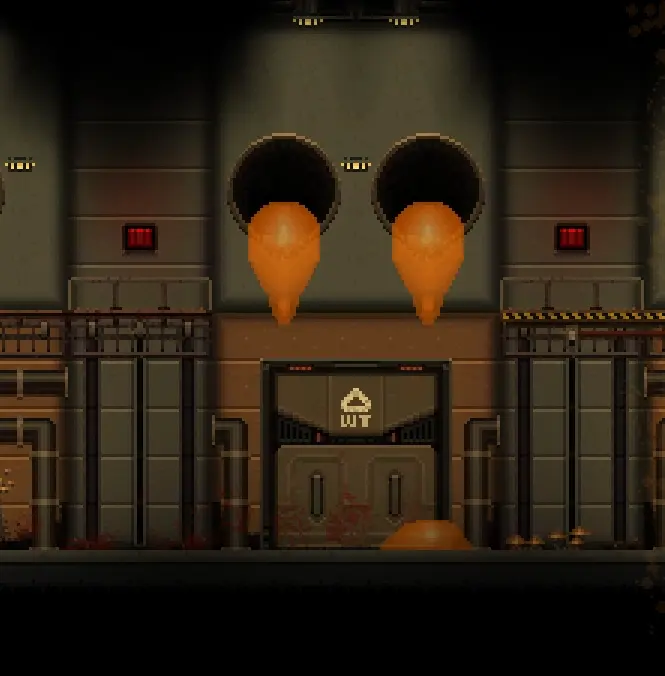

I keep a close eye on the blobs hanging from the pipes. They drop goo onto the floor, and that goo eventually bursts into roughly five slimes or a Honeyed Lady. This happens shortly after the Honeyed Mother “sings,” which I can identify from her animation and the sound she makes. Whenever possible, I destroy the hanging blob before it drops anything, or destroy the goo before it can burst and create more enemies.

She also uses a standard projectile wave similar to the Hospitek boss. I dodge or jump over it to avoid taking damage. She did not use this attack very often during my fight, but if I am caught off guard it can hit me two or three times.

I am not completely sure what this ability does. In my recording, I could see the summoned slimes gain a green particle effect matching the color of the effect around the Honeyed Mother when she appeared to “pray.” My weapon bar blocked most of the slimes, so I could not see exactly what changed. It may heal them or affect their speed, maximum health, or damage, but I have not confirmed the effect.
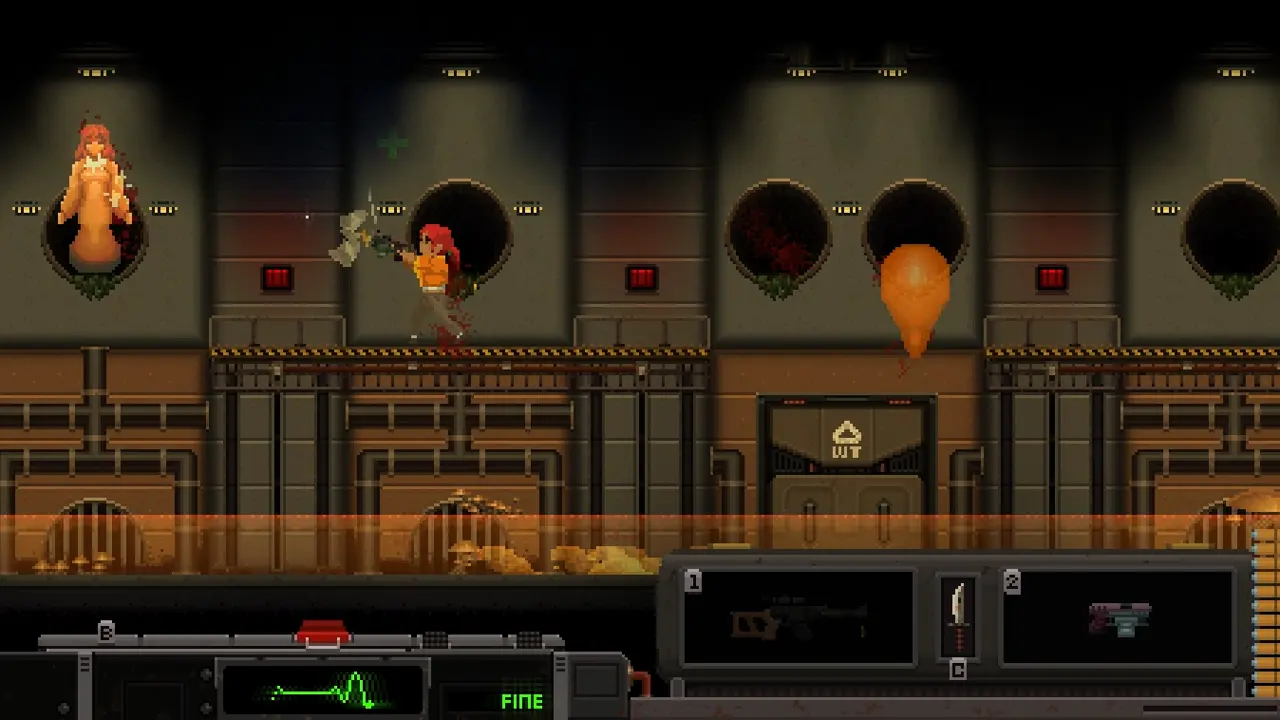
The flood attack makes everything else in the fight harder to handle. Whenever the Honeyed Mother appears from a new pipe, the floor fills with several feet of slime. The sludge slowly poisons me and reduces my movement speed, and I counted it lasting for about eight seconds.
There are two platforms that rise above the poisonous sludge. When I see the boss appear from a new position, I have roughly three seconds to move beneath the area of one of these platforms before it lifts me to safety. If I miss it, I prepare my inhaler. While I am standing on the raised platform, the summoned enemies below temporarily cannot reach me. It is tempting to focus entirely on the boss while she is close, but I still keep track of the slimes below so they do not overwhelm me once the platform lowers again.
After defeating the Honeyed Mother, I receive some loot and a strange gadget that lets me place orange slime at my feet for a few raids. I have not found it particularly useful yet. Once the water system is cleared, I can return to Kio with the news and receive Luxury Fabricks as a reward.
Honeyed Mother Summary
- I bring inhalers to deal with poison.
- I use a high-rate-of-fire weapon because penetration is not important here.
- I destroy the slime hanging from the pipes or the goo on the floor before it creates more enemies.
- I move into the platform areas before the poisonous slime floods the room.