In this beginner guide, I explain the main UI screens, menu buttons, stage screen, battle screen, card controls, relics, blessings, stamps, notes, and basic card-related terms. I keep the explanations simple so I can understand what each screen and button does while progressing through the game.
Complete Guide: Stage, Cards, Relics, Terms
I do not explain the same UI twice when the same button appears on multiple screens, because those buttons usually keep the same meaning everywhere. For example, the stamp button uses the same icon and function no matter where it appears.
I try to avoid spoilers as much as possible, but if you are very sensitive to even small spoilers, you may want to avoid looking too closely at the images. Some screenshots may also look like they were taken in the middle of a playthrough, and they may or may not be replaced later. The meaning should still be clear.
Also, as the screenshots may suggest, I wrote this guide while progressing through the game myself, so there are still a few parts I am not completely sure about. I will update those sections as needed.
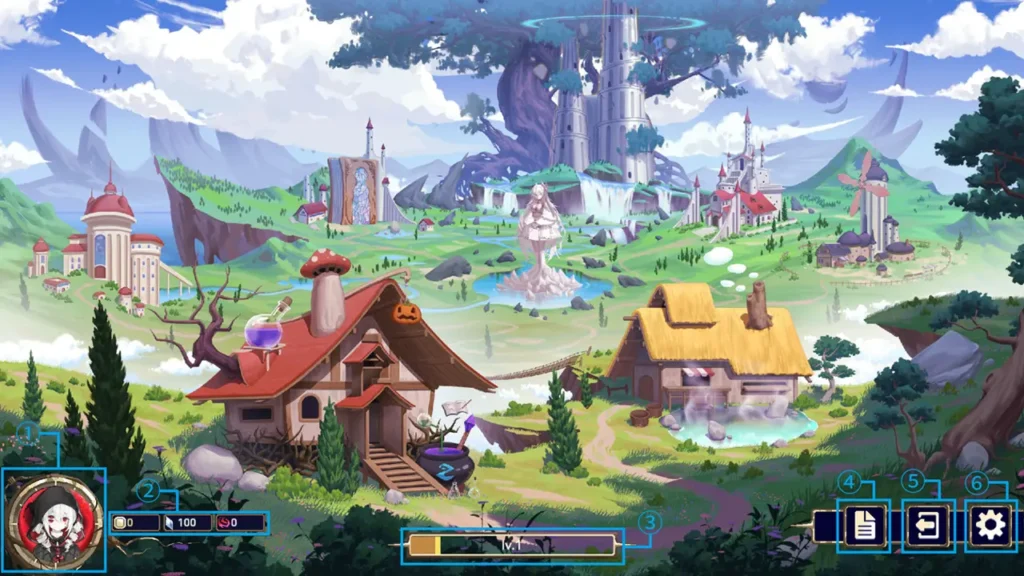
Main Menu

1. Icon
This displays the Steam icon.
2. Currency
These are the currencies used for different upgrades and unlockable elements. This is basically the roguelite part of the game. I can obtain them by progressing through stages.
From left to right, the currencies are:
- Coin, temporary name: I can use this in shops during the game. It can be spent to buy relics, blessings, and cards.
- Psychology Crystal: From what I can see, this seems like the currency I will probably use the most.
- Flow of Time: It looks like this is used to unlock some elements.
3. Level
This shows my level. When it goes up, it seems to unlock modes in the main game.
4. Achievements
These are the game’s achievements. By clearing them, I can also obtain the currencies mentioned above.
5. Return to Title
This button takes me back to the title screen.
6. Settings
This opens the settings menu.
Facility Screens in the Main Menu
Library
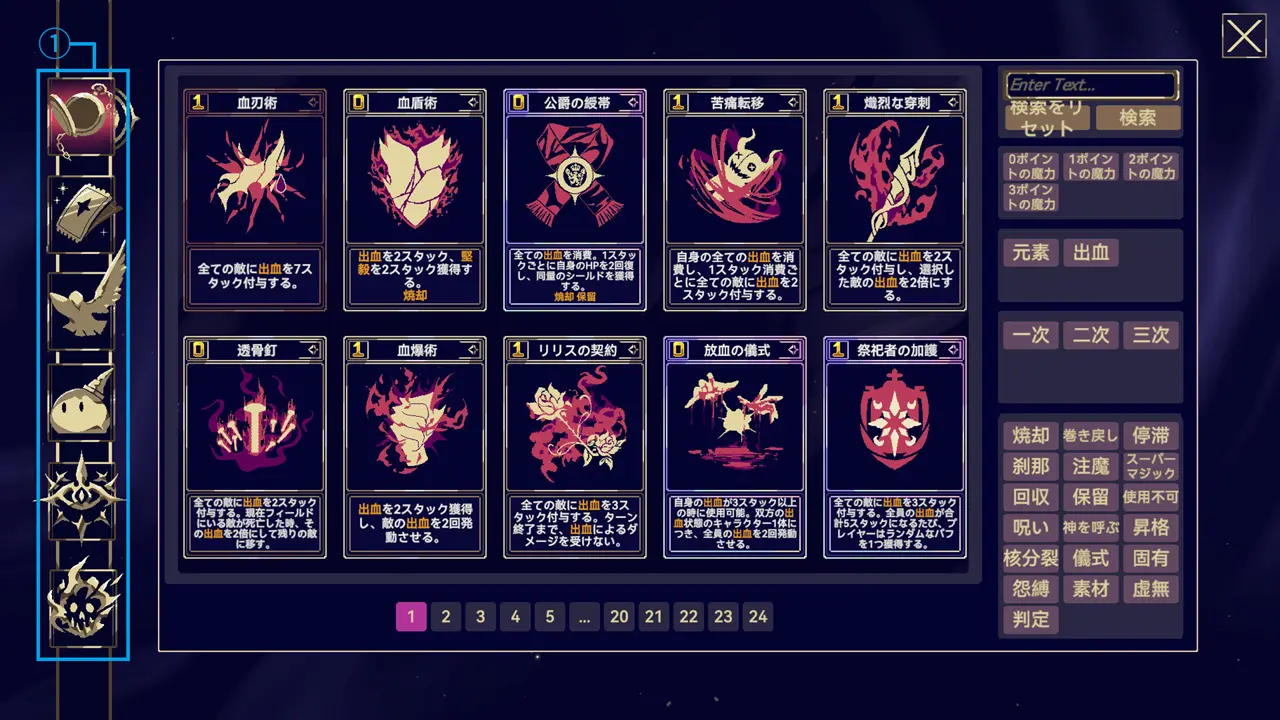
1. Table of Contents
From top to bottom, the categories are:
- Cards: This literally refers to cards.
- Relics: These are items that provide various effects during the game and can be equipped in limited slots.
- Blessings: These also provide various effects like relics, but they are different because they work without being equipped, the same type can be stacked multiple times, and once I receive them, I cannot disable them by removing or deleting them.
- Enemies: This refers to the enemies that appear during stages.
- Buffs: These are buffs obtained in various ways. The list also includes debuffs.
- Sealing Wax: These are special effects added to cards.
As a note, sealing wax is the melted wax used to seal letters or envelopes.
Tower

1. Scroll Bar
This screen can be scrolled downward.
Warehouse
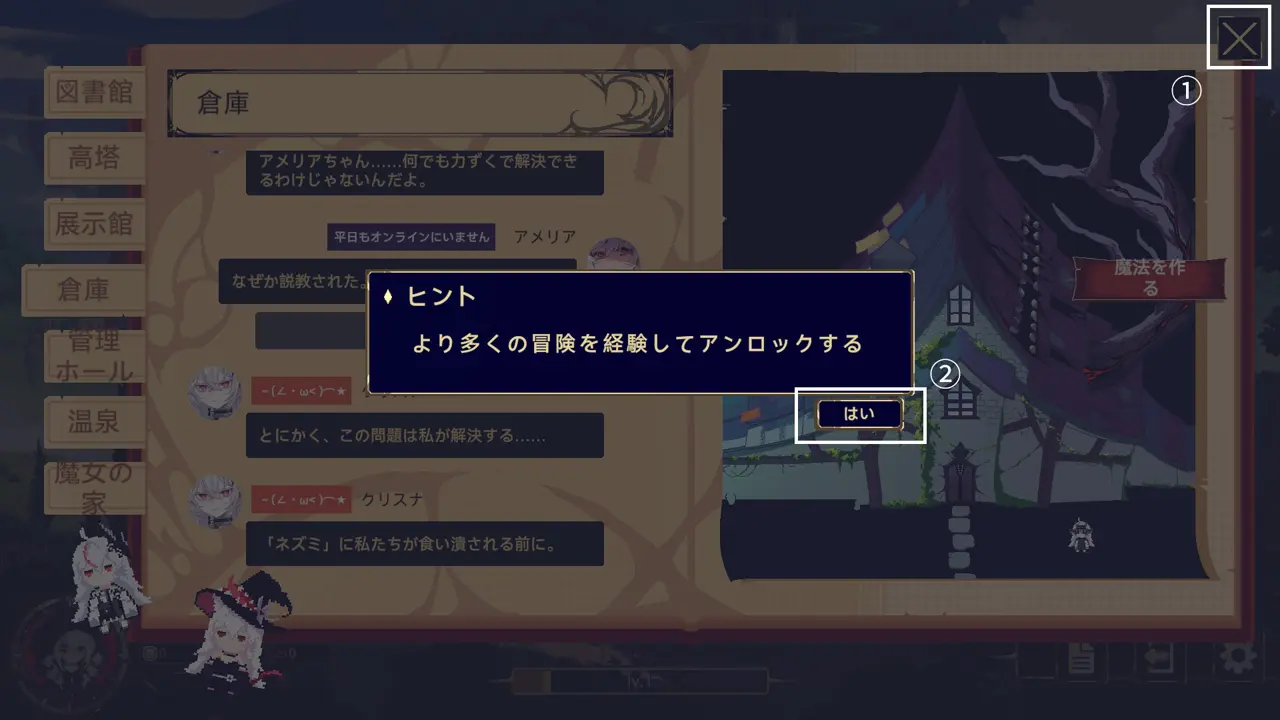
This is slightly different information, but when a popup appeared like in the image, there used to be cases where I could not press the OK button.
In that case, closing the menus in the order shown in the image made it possible to press the popup button again. It seems that this bug has now been fixed.
Stage Selection Screen
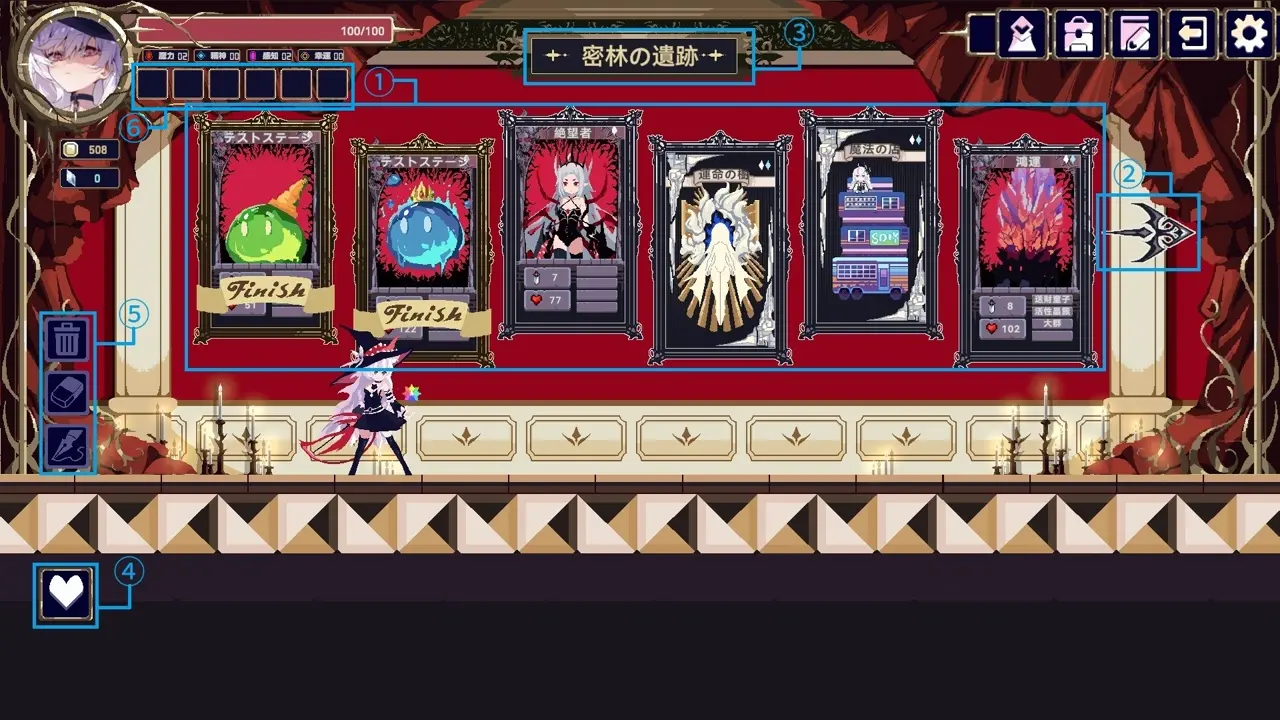
1. Stage List
This is the stage list for the dungeon or route I am currently progressing through. When I hover over each card, the details are displayed.
2. Arrow
This moves me to the next stage.
3. Stage Name
This shows the name of the stage.
4. Stamp
This is the stamp or emote button for multiplayer. It opens a menu like the one shown below.

5. Notes
This lets me make notes on the stage list. From top to bottom, the buttons are clear all, eraser, and pen.
Each tool only affects what I have written myself. The eraser and pen can be turned off by clicking them again.
6. Relics
Relics are placed here.
Also, depending on the situation, cards may appear at the bottom of the screen as shown in the image below.
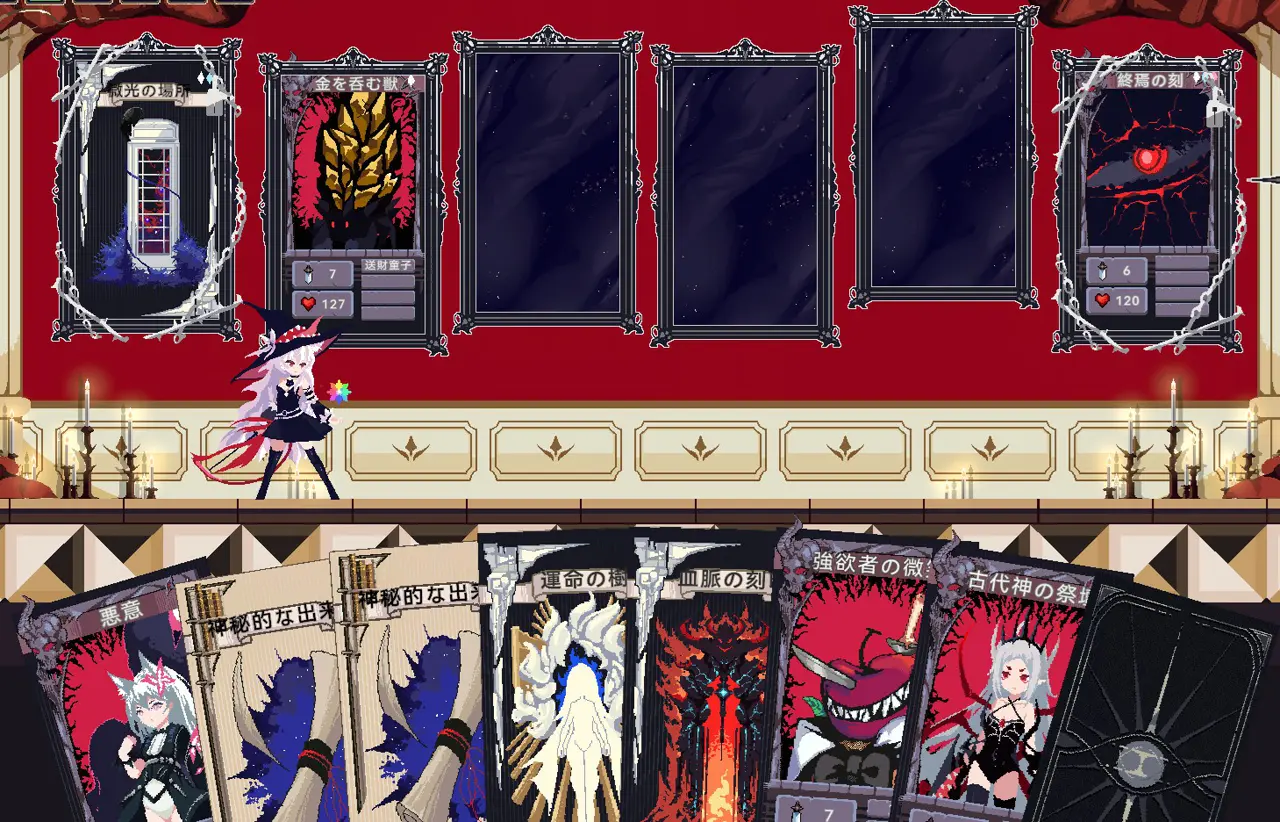
In this case, I can drag and drop a card into the empty frame in the center of the screen to place it into that frame. After placing it into the frame, I can also remove it by moving it back down to the cards at the bottom again.
Battle Screen
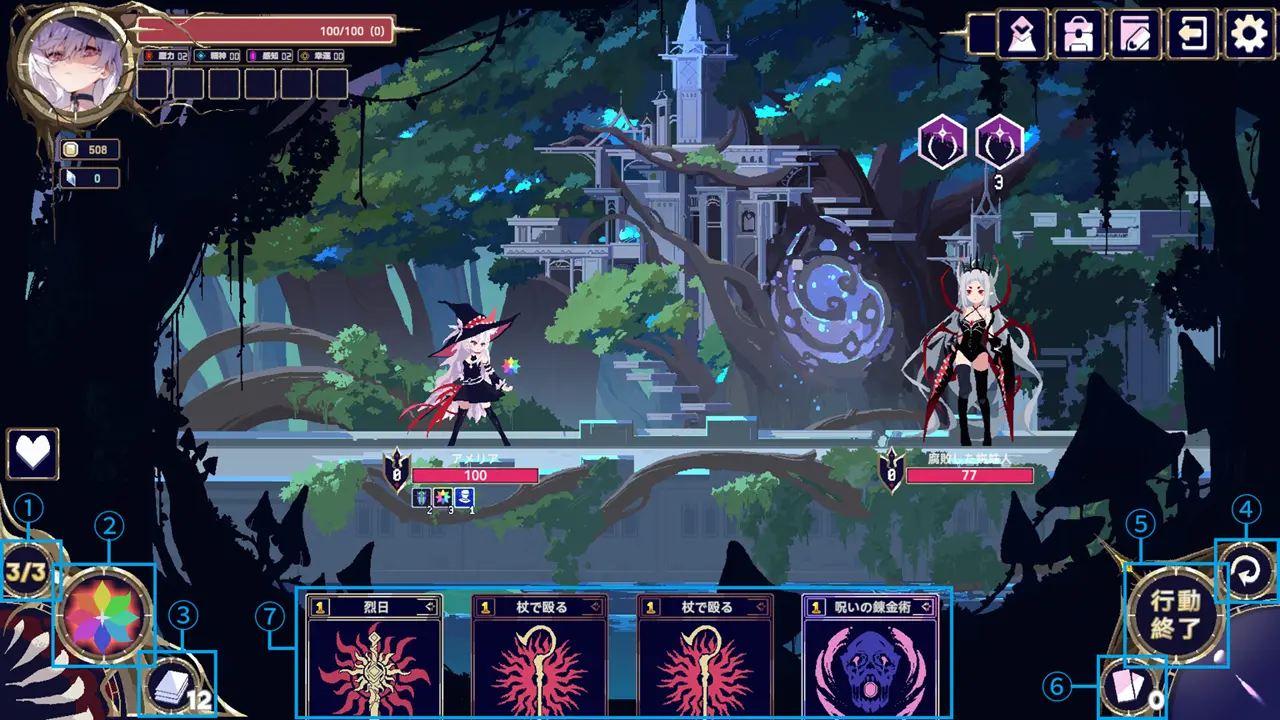
1. Remaining Mana
This shows my remaining mana. When I use a card, the mana cost set for that card is subtracted from this value.
2. Skill
This is the skill assigned to each witch or character. When I hover over it, the details are displayed.
Depending on the witch, there may be two active skills, and the skill area may be split between the left and right sides.
3. Deck
Clicking this lets me view the deck list. The number in the lower-right corner shows how many cards remain. When it reaches 0, cards from the discard pile return to the deck.
4. Restart
This restarts the current battle from the beginning. It does not restart only the current turn. Enemy HP, my HP, and other battle values all return to their values from the start of the battle.
5. End Turn
This ends my turn.
6. Discard Pile
Clicking this lets me view the discard pile list. The number in the lower-right corner shows how many cards are in the discard pile.
7. Hand
This is my hand. Cards that require me to select a target, such as normal attack cards, can be used by dragging the card and aiming the arrow at the target.
Cards that always affect the same target or do not require target selection can be used by double-clicking them, or by dragging and dropping them upward.
Attack cards and other cards that require a target can also be aimed at myself or allies, and the effect will activate as usual.
Basic Term Explanations
Card-Related Terms
Target Selection Cards
These are the cards explained in the battle screen section as cards that can be used by dragging and dropping. I can identify them because an arrow extends from the card when I drag it.
These cards always require a target, regardless of whether the target is an enemy or an ally.
Non-Target Selection Cards
These are the cards explained in the battle screen section as cards that can be used by double-clicking or by dragging and dropping. I can identify them because the card itself moves when I drag it.
These cards cannot select a target.
These two types of cards may sometimes be used as conditions for relic effects, such as effects written in the form of “each time you use…”
There also seems to be a case where the current effect description and the actual effect do not match. For example, even if a card says “to all enemies,” if an arrow extends from it, meaning it is a target selection card, the effect may only apply to the selected enemy. This still needs verification.