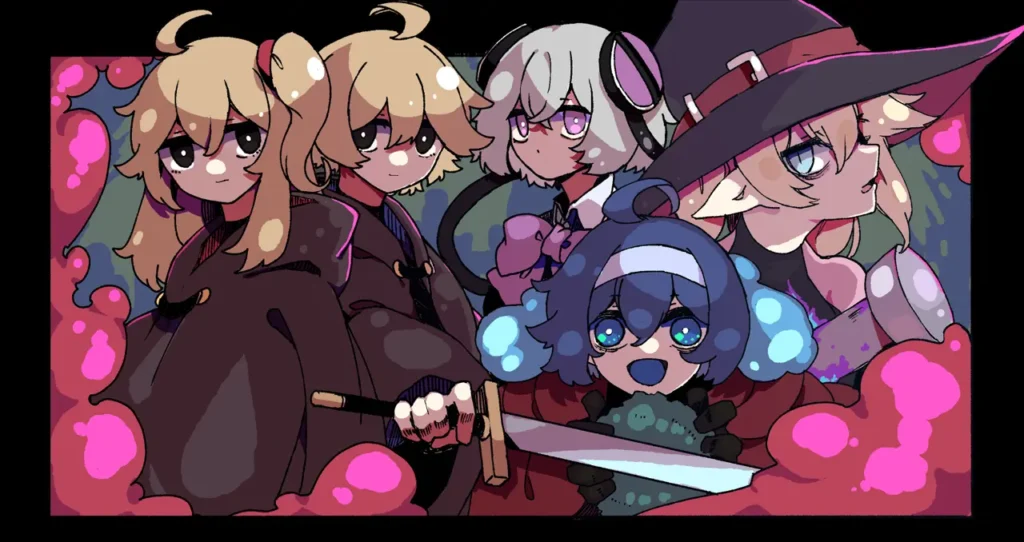
In Annihilated, the choices I make across the Hero, Warrior, Mage, and Priest routes determine which endings I can reach. I use this guide to keep track of every available ending, the important save points, and the conditions for the secret Priest ending.
All Endings & Routes Guide
The game data contains 22 endings, but one Warrior ending cannot be obtained through normal gameplay. That leaves 21 obtainable endings. I have organized them by route so I can follow the choices shown in each image without mixing up different paths.
Table of Contents:
Gameplay Tips
Annihilated uses two kinds of attack mechanics. In Resolve and Will, I time my attacks manually. In Choice and Destiny, attacks use a chance to hit, such as 60%.
Enemies have a Break Gauge. When I reduce it to zero, an orange timing bar appears. Landing the timed hit can seize an enemy weapon. Ordinary enemies are defeated immediately, while elites and bosses enter CHANCE: they lose one turn and take double damage until their next turn.
I often use the protagonist’s Dreak for breaks. It works only when I am carrying a limited number of items, and that limit scales with DEX. Another method is Item Break, which switches a weapon from “Normal Use” to “Break After Next Use” rather than using all of its remaining Uses. I use this to activate a break effect or deal extra damage. If the orange timing bar appears in the preview, the weapon can seize, although some weapons do not have that ability.
I can also improve my weapons through the Grey, Yellow, and Purple enhancement tiers, with Purple at the top. Enhancing normally requires a campfire and curse, the currency I earn by breaking weapons or defeating bosses. The game also has events that add to its roguelike structure.
When a run ends, I resume from a route checkpoint with the curse I have collected. From there, I can redistribute stats or spend curse to craft cursed weapons whose memories I have obtained. Once I acquire a weapon, its memory becomes available in the crafting inventory.
Hero Route – 3 Endings
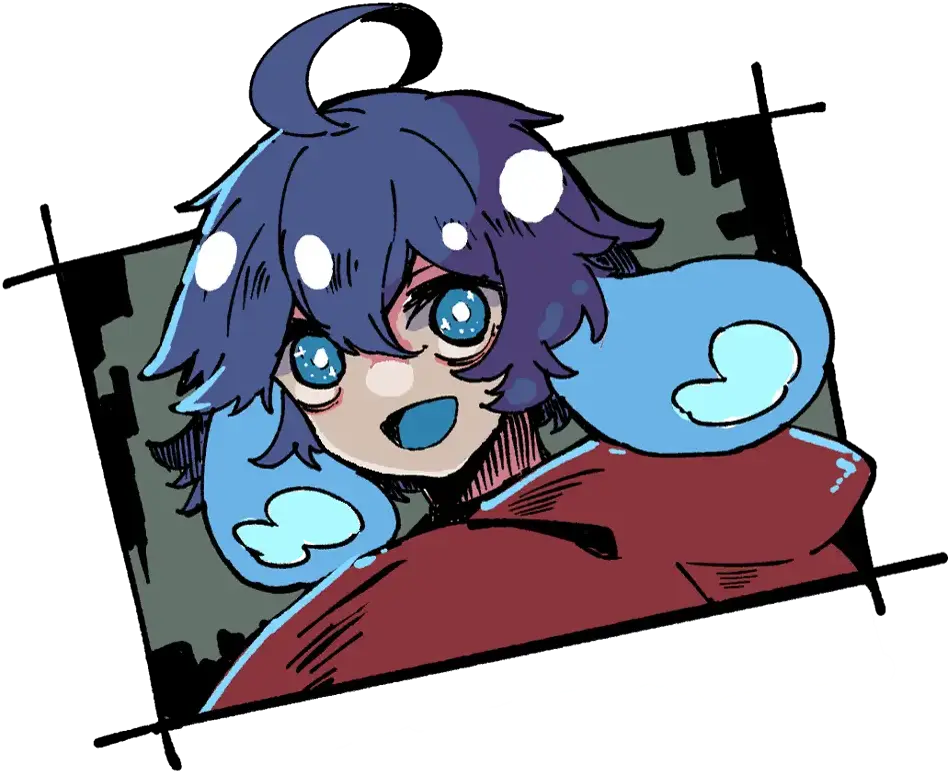
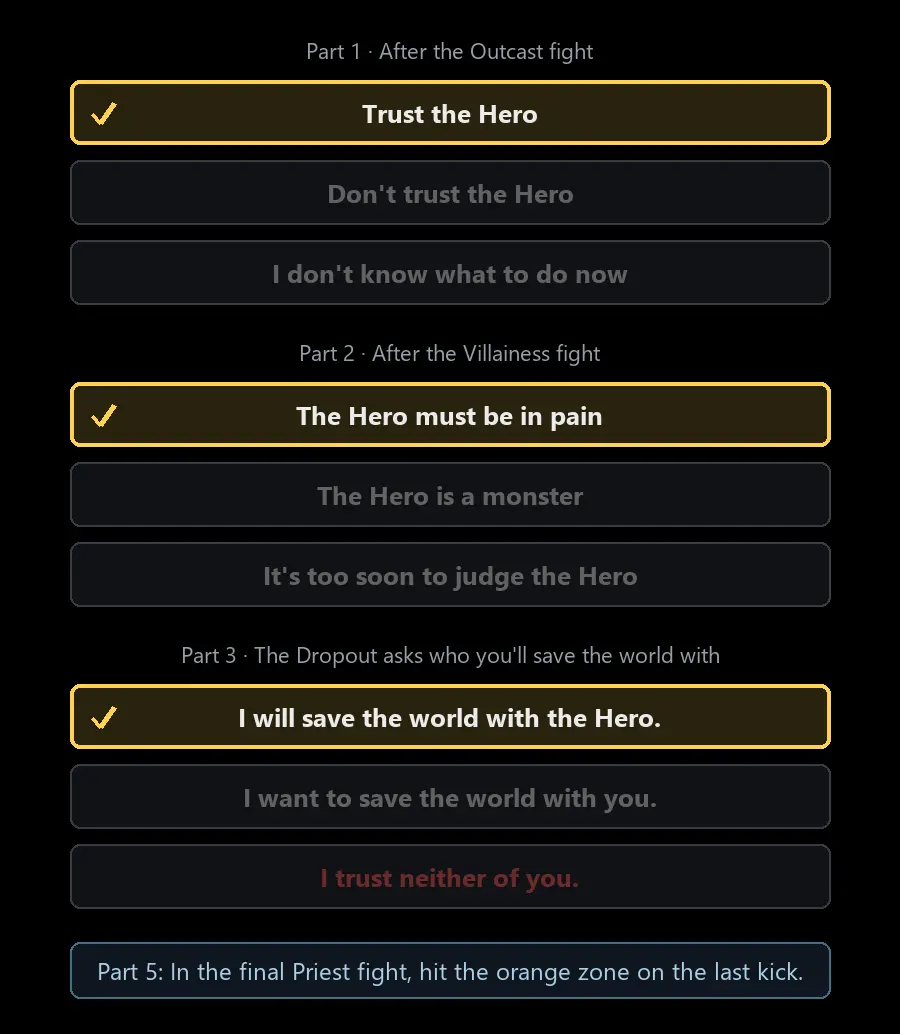
The image above shows the choices for the Hero route. Story spoiler: The Hero is actually a slime. After the original hero stabbed themself in the head with the Hero’s Sword, a weak blue slime took control of the body.
Where I save: Part 3, immediately before the boss fight.
Ending 1: Hero
I make sure to land the final kick. If I miss, the fight restarts, but the game still records a game over and increases the hidden loop count.
Ending 2: Dropout
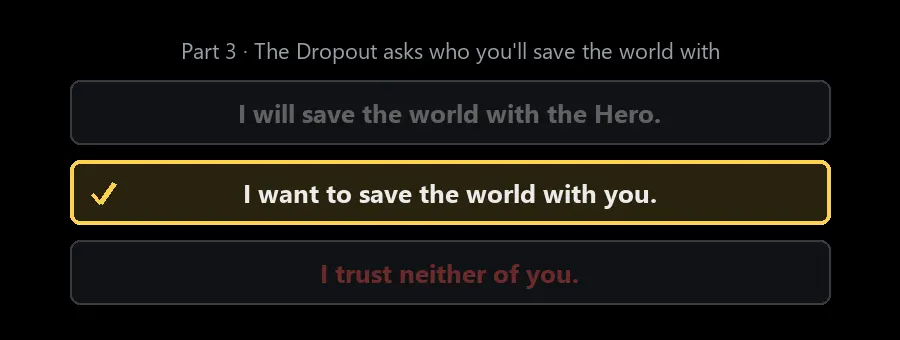
Ending 3: Distrust
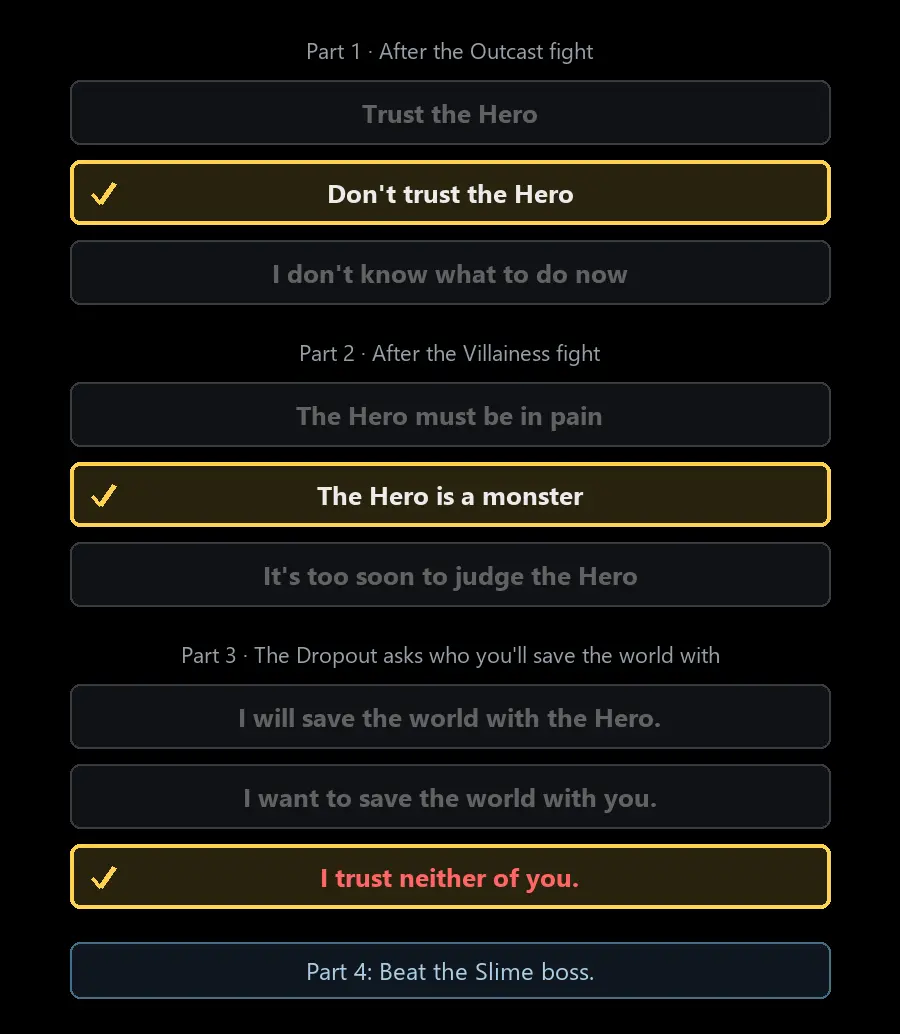
How Distrust Works in the Hero Route
The Hero route tracks a hidden distrust value. It controls the dialogue choices I can select in part 3; unavailable options appear greyed out.
| Distrust | Choices available in part 3 |
|---|---|
| 1 or less | “I will save the world with the Hero.” or “I want to save the world with you.” The red choice is unavailable. |
| 2 to 4 | All three choices. |
| 5 or more | “I want to save the world with you.” or the red “I trust neither of you.” The Hero choice is unavailable. |
Two earlier decisions move the distrust value up or down:
| When | Distrust -1 | Distrust +1 |
|---|---|---|
| Part 1, after the Outcast fight | “Trust the Hero” | “Don’t trust the Hero” |
| Part 2, after the Villainess fight | “The Hero must be in pain” | “The Hero is a monster” |
Answers that say I do not know add 0 distrust. I also keep my sanity above 40 before the part 3 boss fight, because lower sanity adds extra distrust.
Warrior Route – 7 Endings, 6 Obtainable
The image above covers the Warrior route choices. Story spoiler: The Warrior is the Villainess’s former fiancé, and she was his sickly childhood friend. After the Priest warned that both would die, he ended the engagement. She cursed him into a doll, but he likes his new form because he wants to be an idol.
Where I save: Part 1 after the Outcast fight, part 2 after the Villainess fight, and at the major choice in part 5.
Sanity: Neither my sanity nor the Warrior’s determines the ending here. Sanity only changes some dialogue.
Ending 1: Idol
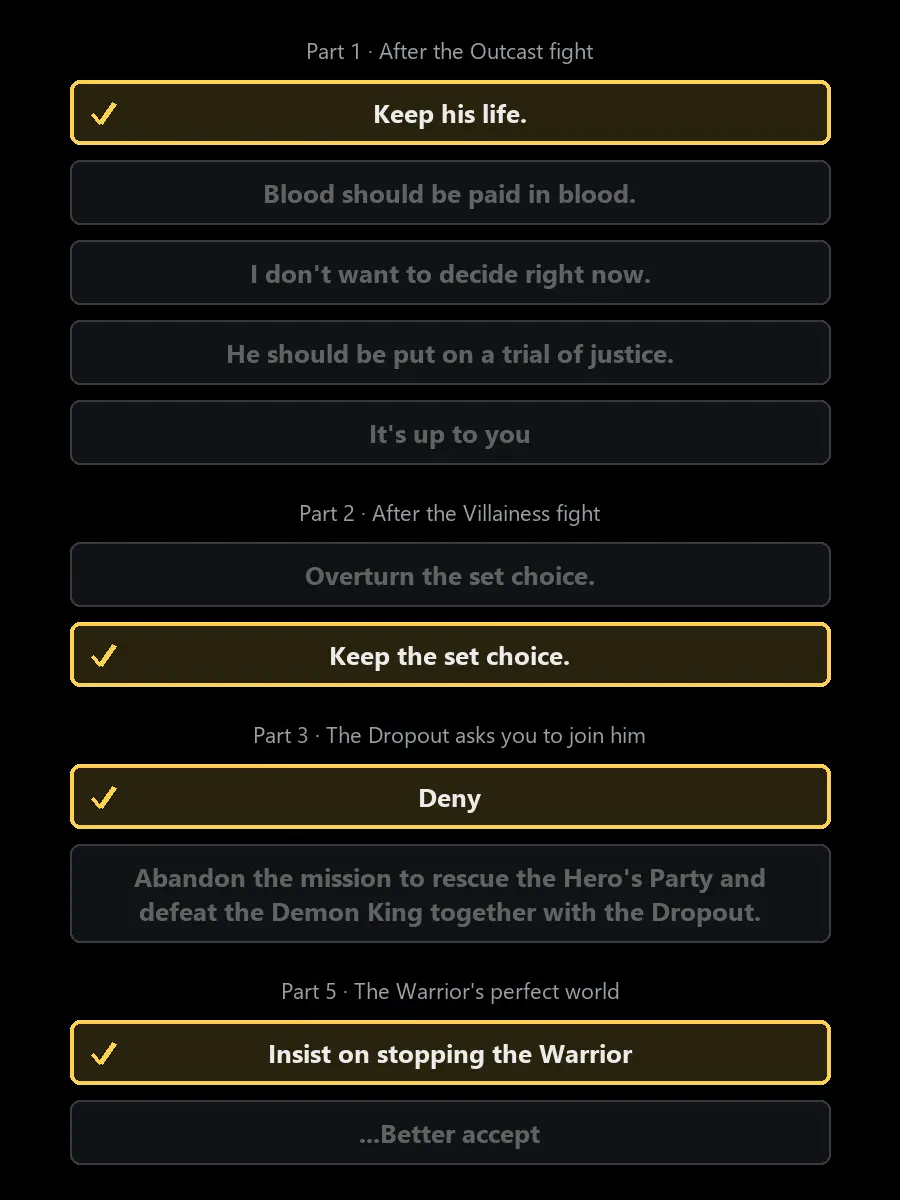
Ending 2: Miniature Garden
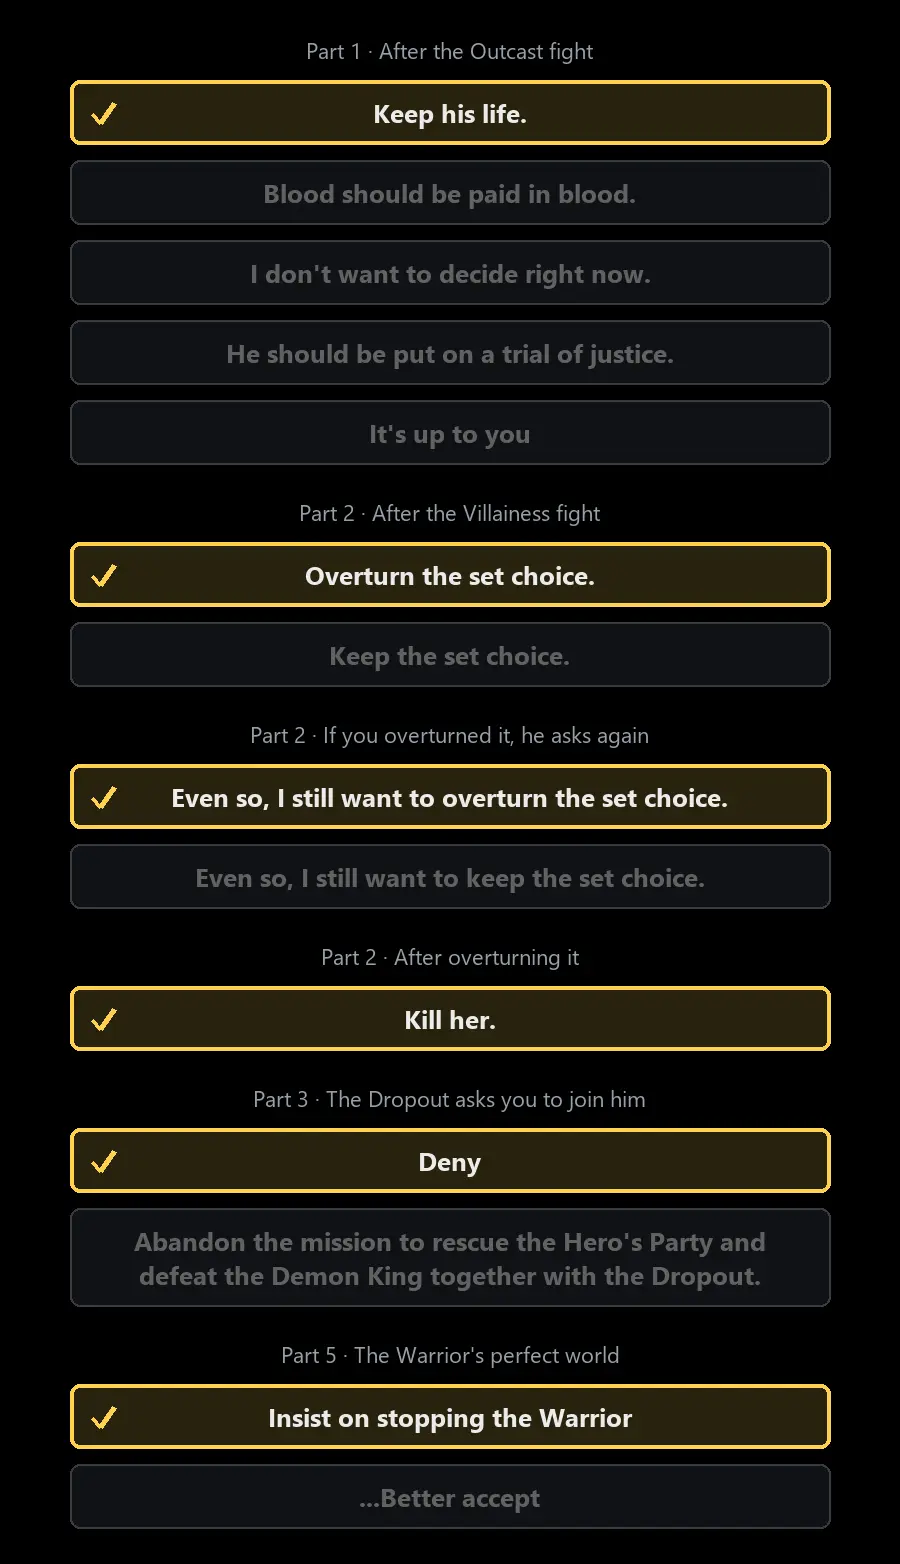
Ending 3: Burden
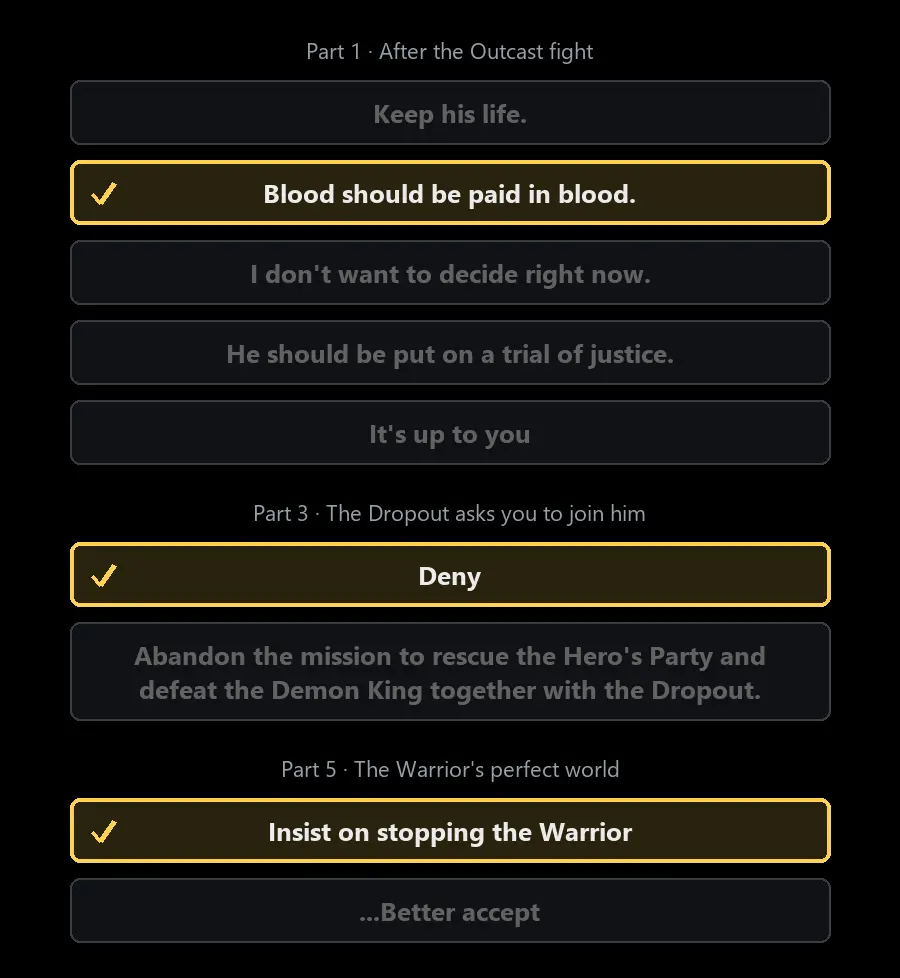
Ending 4: Glitched World
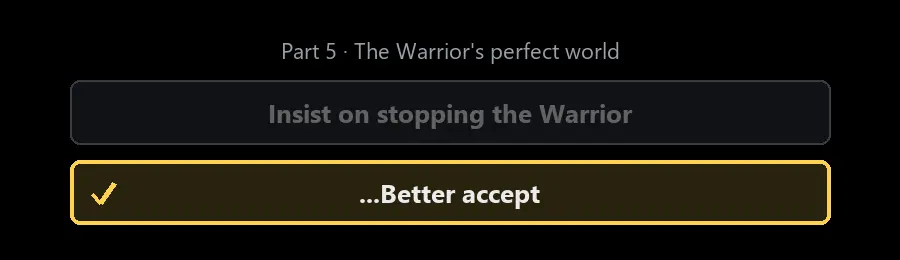
After this ending, the game automatically returns me to the same decision. This is intentional, and I continue from there to work toward Ending 5.
Ending 5: Glitched Idol
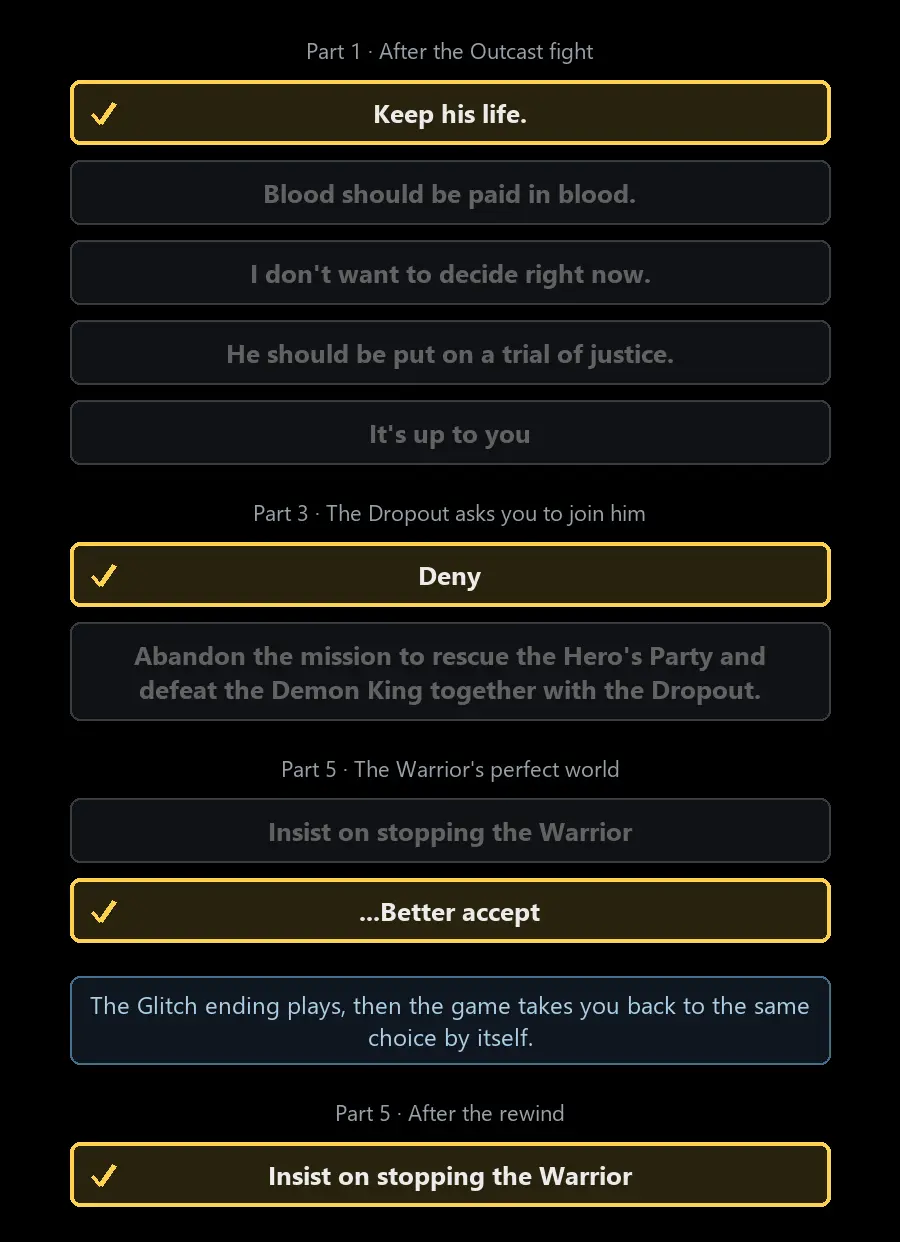
If I selected “Blood should be paid in blood.” in part 1, step 5 leads to the Burden ending (Ending 3) instead.
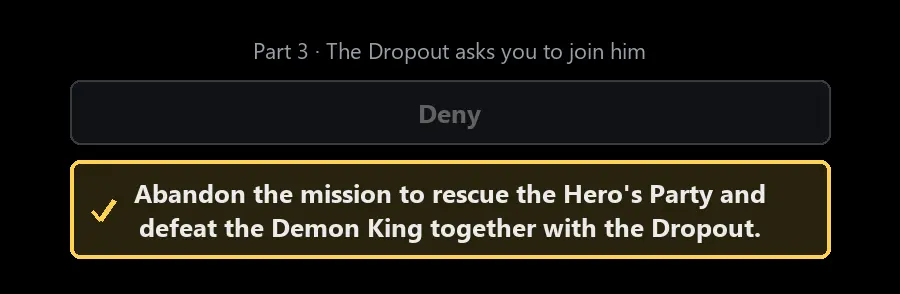
Ending 6: Dropout
Ending 7: Glitched Miniature Garden (Unobtainable)
This ending appears in the game data, but I cannot reach it in a normal playthrough. It requires both the Miniature Garden epilogue (Ending 2) and the Glitch (Ending 4) during the same run. Once the glitch occurs, the game skips the Miniature Garden epilogue.
Loop count note: The duels near the end make me retry rather than lose outright. A scripted game over also occurs near the end. These events increase the loop count, which matters when aiming for the secret ending.
Mage Route – 5 Endings
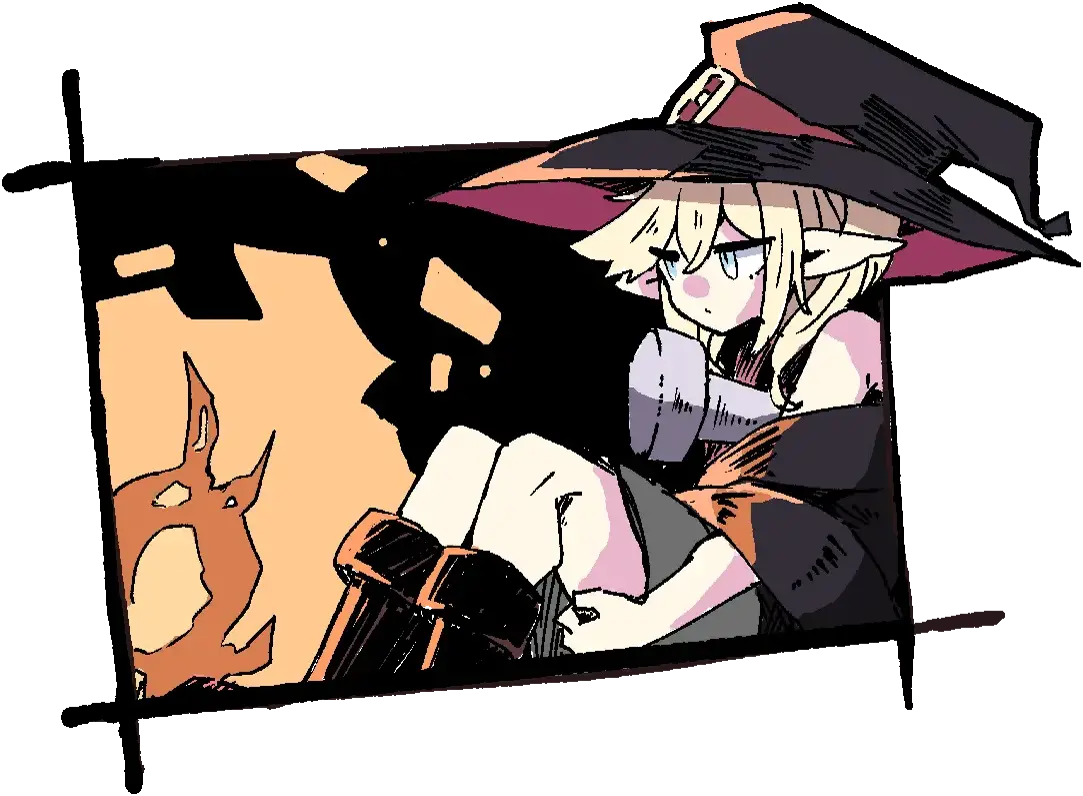
The Mage route is my favorite. Story spoiler: The Mage is an elf who never quite fit into her village. The Dropout was her rival and classmate at magic school. Despite their hard work, the Dropout always came second to the Mage and ultimately stole her magic.
Where I save: Part 3, after defeating the Dropout. The next choice determines which branch of the route I follow.
Sanity: My sanity and the Mage’s only affect some dialogue, not the ending. Part 1 warning: The red responses “So be it, let’s head back” and “Understood.” return me to the title screen.
Ending 1: Magic
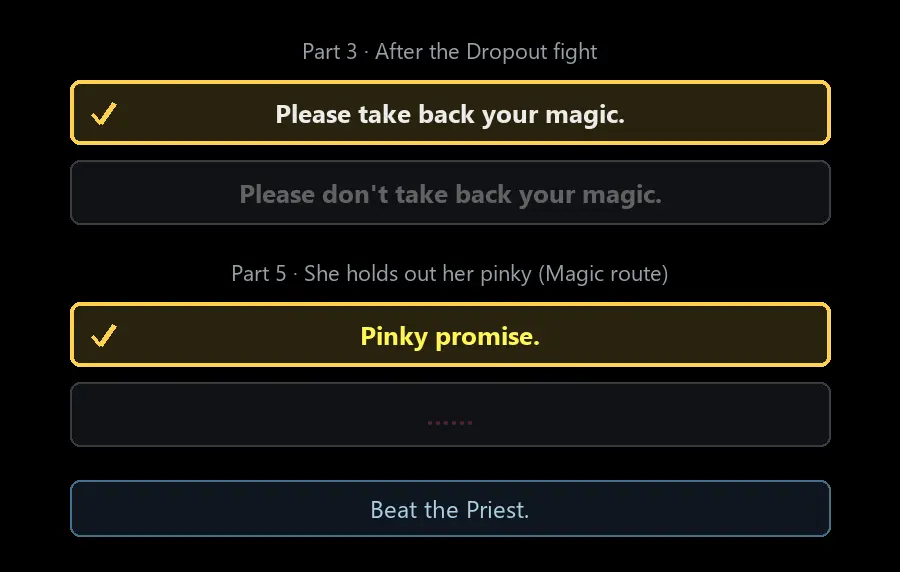
This ending counts as a Mage route clear, so I avoid it until after unlocking the secret Low Loop ending.
Ending 2: Unspoken
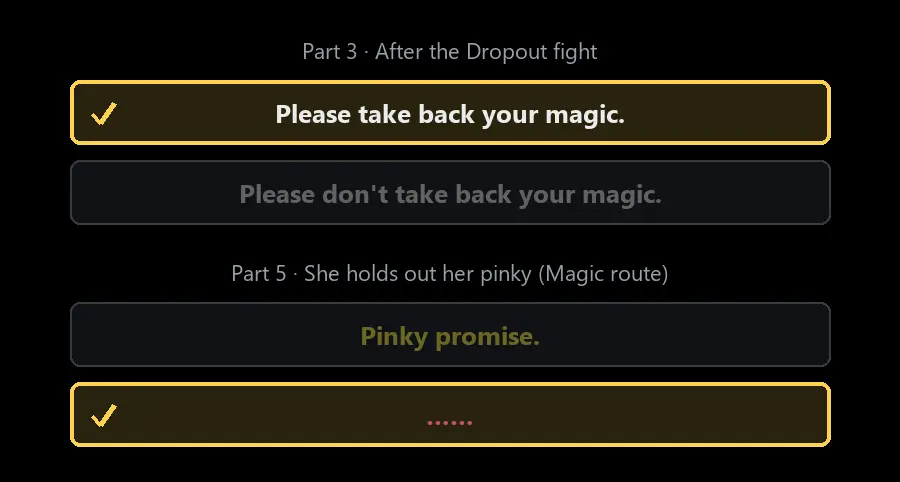
Ending 3: Love
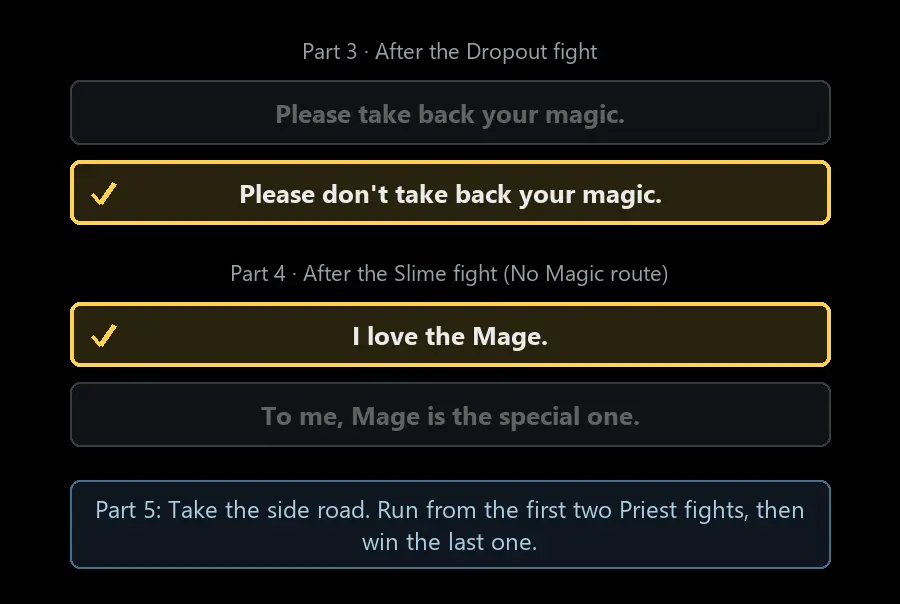
Ending 4: Friendship
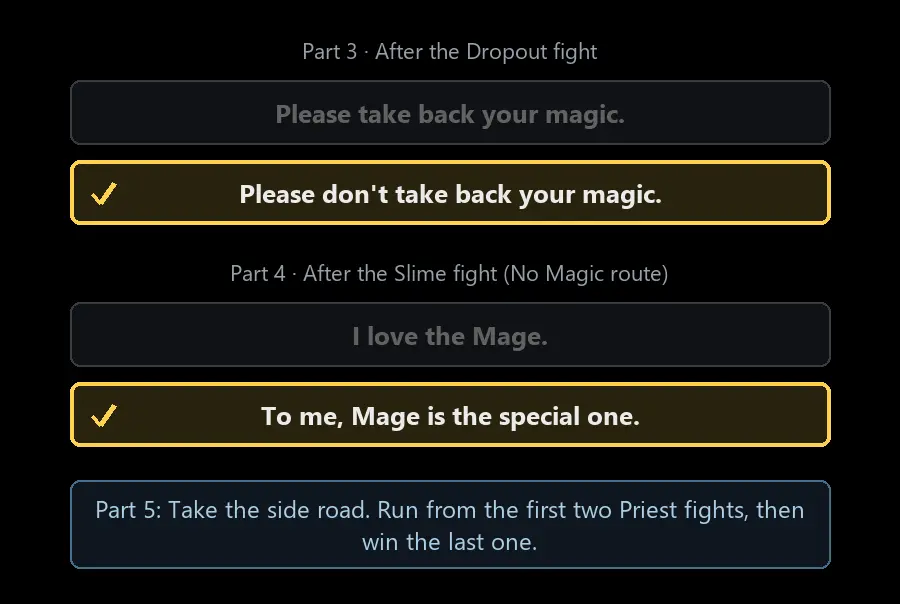
Ending 5: Sheer Guts
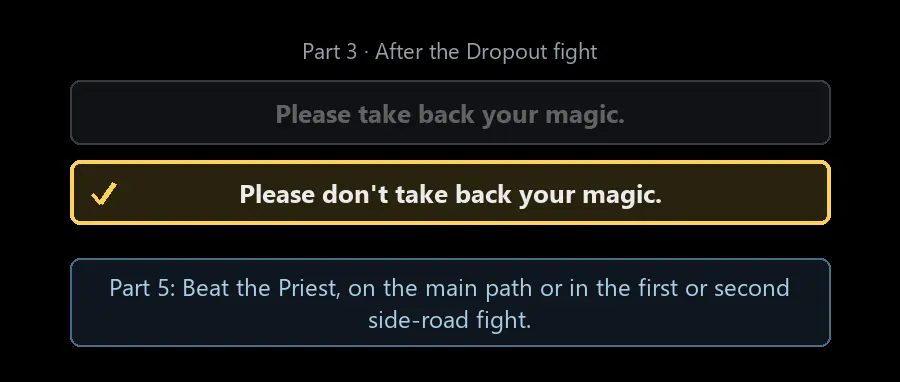
When I use the game’s retry after dying in this fight, the opponent becomes weaker each time. I leave this ending until after completing the secret ending.
Priest Route – 7 Endings
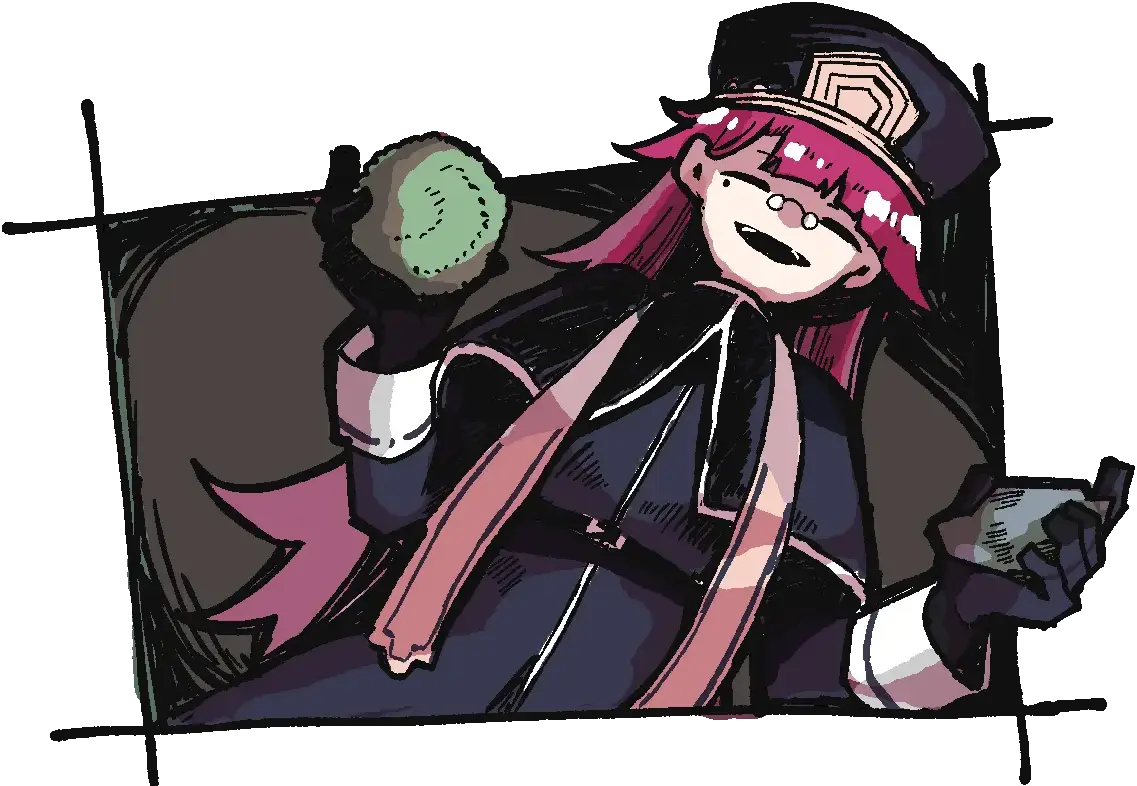
Story spoiler: The Priest never abandoned his faith. The “great god” he prays to is the player, whose name is obscured in the game, and he calls them “my god.” He describes himself as a “reincarnator.” In the original, or 0th, world, he was the protagonist’s childhood friend from the same village and lost them. In this loop, he deliberately left the village before they could meet.
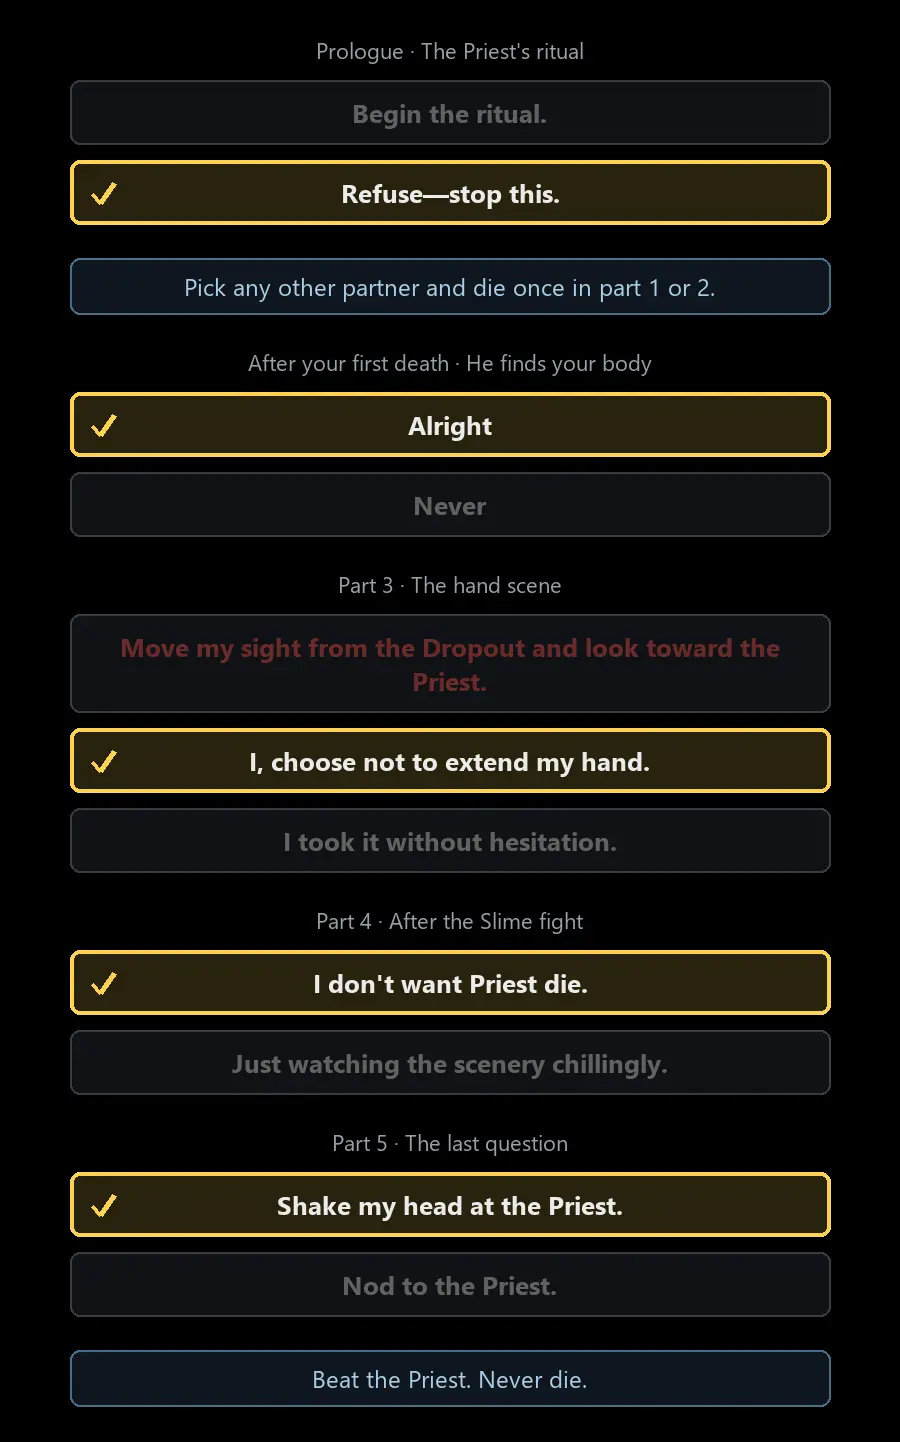
How I unlock the Priest: I die in part 1 or 2 of another route. He appears at my body, and either response unlocks him. “Alright” sends me back to the partner selection menu with him selected.
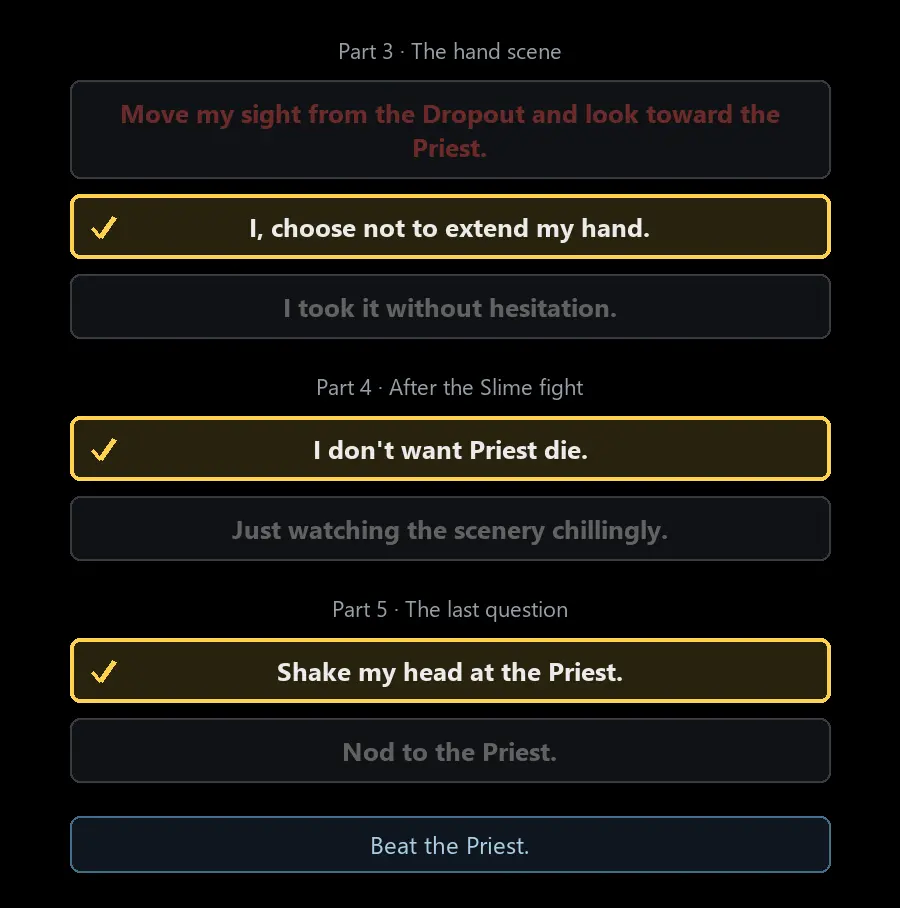
Where I save: The hand scene in part 3, after the Slime fight in part 4, and at the final question in part 5.
Ending 1: Dropout
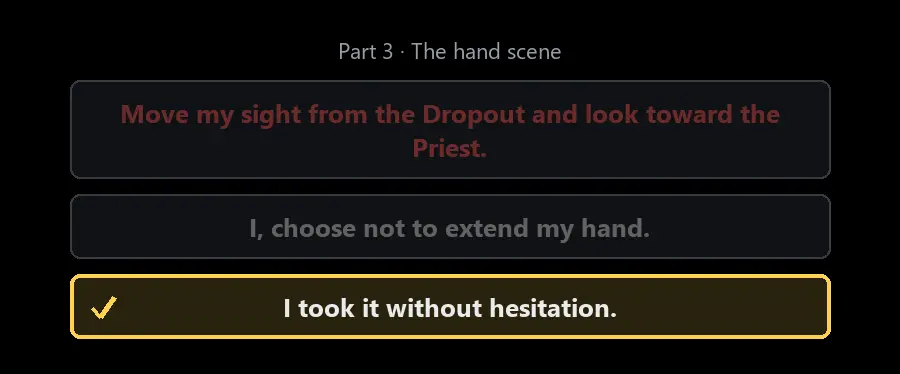
Ending 2: Abandoned
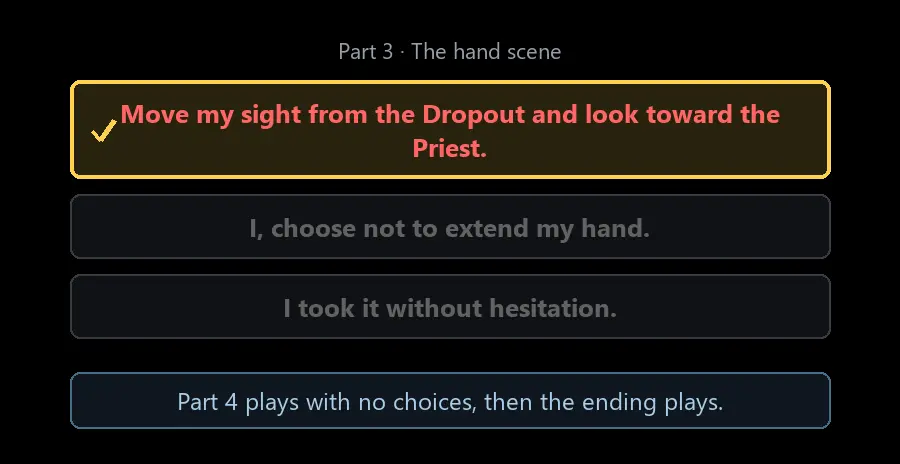
After this ending, the game returns me to the hand scene automatically. I continue from there to reach Ending 3.
Ending 3: Dark Slow Life
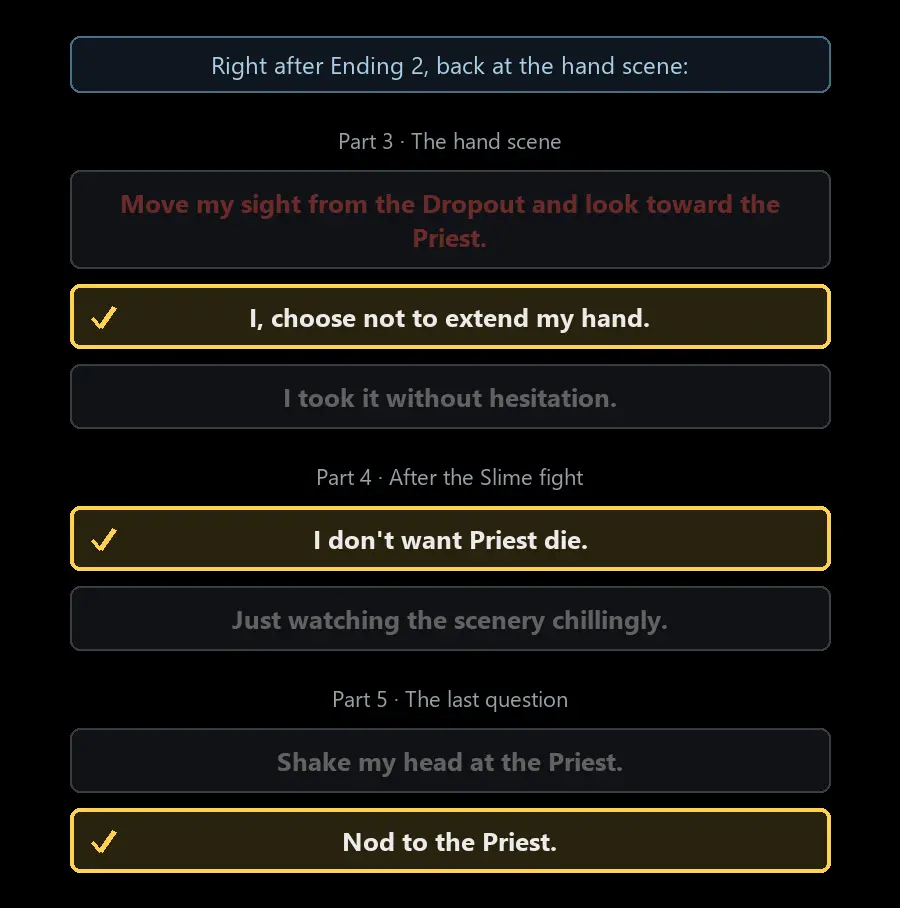
On this run, the other responses lead me back into a loop, so nodding is the only way to continue.
Ending 4: Left Alone
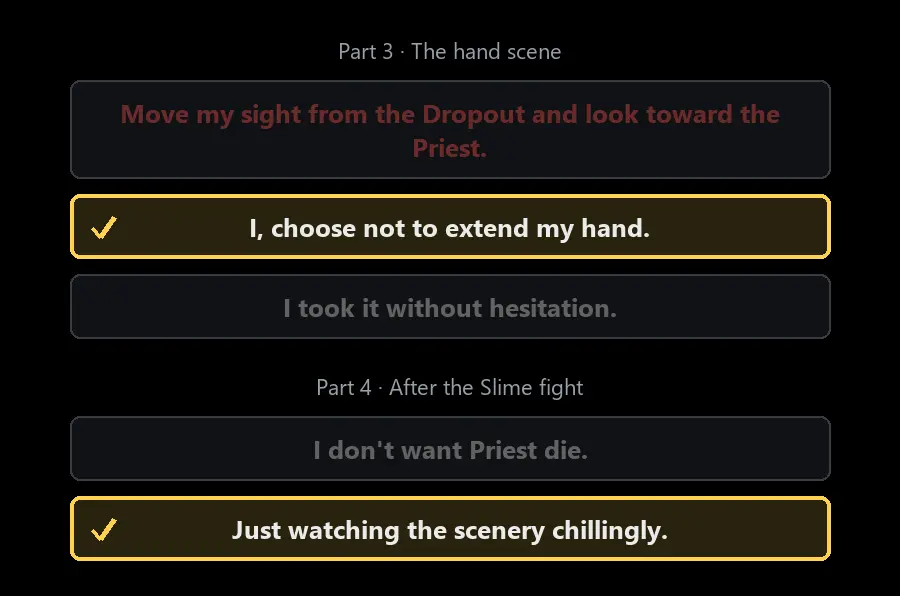
Ending 5: Slow Life
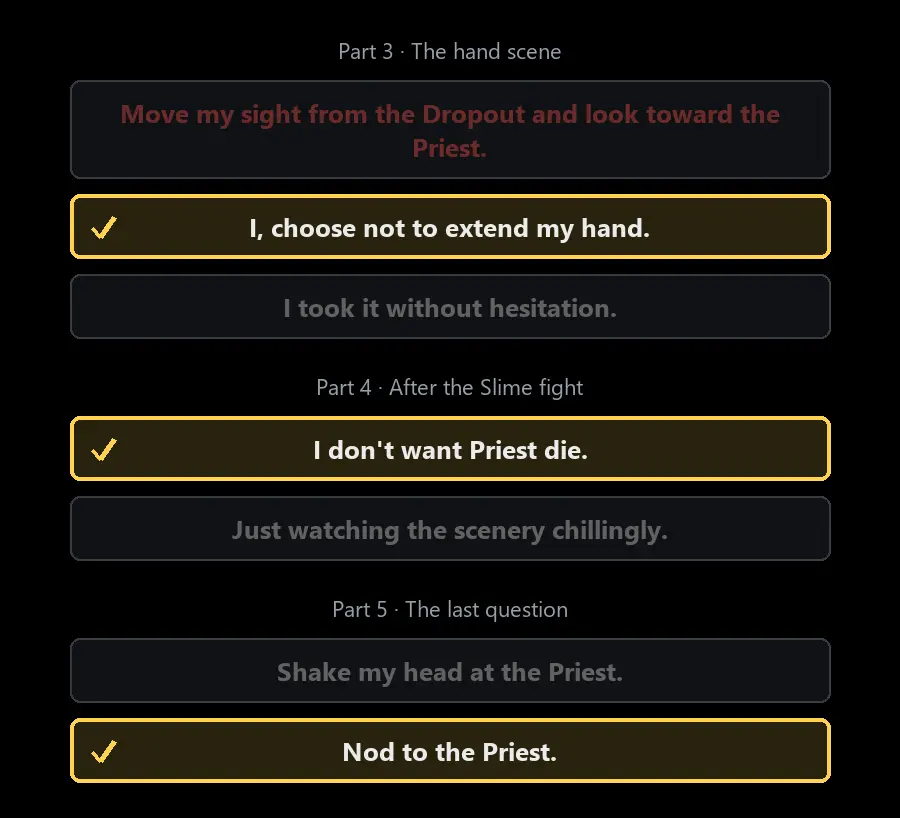
Ending 6: High Loop
I reach this ending if my loop count is above 8 or if I have cleared another route.
Ending 7: Low Loop (Secret Ending)
For the Low Loop ending, I follow the dedicated Secret Ending section below.
How Priest Points Work
The game tracks hidden Priest points on this route. At the part 3 hand scene, my total determines which choices are available; the others are greyed out.
| Priest points | Choices available at the hand scene |
|---|---|
| 0 or 1 | Refuse the hand or take it. The red choice is unavailable. |
| 2 to 4 | All three choices. |
| 5 or more | Only the red choice. Both other choices are unavailable. |
I use this list to keep track of the Priest points and sanity changes caused by dialogue choices:
| Choice | Priest points | Sanity |
|---|---|---|
| Part 1: That is to say, I cursed someone? | 0 | -5 |
| Part 1: Has my fate been changed by someone’s curse? | 0 | +5 |
| Part 1: There’s no such thing as fate! | 0 | 0 |
| Part 1: Indeed, this might be the miracle from the god above | +1 | -7 |
| Part 1: This isn’t the miracle from the god at all | 0 | +2 |
| Part 1: Even so, I have to kill him | -1 | 0 |
| Part 1: I need first to hear what he has to say | 0 | 0 |
| Part 1: Trust the Priest | 0 | -20 |
| Part 1: Don’t trust the Priest | 0 | +2 |
| Part 2: Open mouth. | +1 | -3 |
| Part 2: I’m afraid I’ll have to turn down your good will | 0 | +2 |
| Part 2: What’s the meaning of hearing all these? | -1 | +2 |
| Part 2: Just listen quietly. | 0 | 0 |
| Part 2: I can’t | 0 | +3 |
| Part 2: Give up on all partners except the Priest | +10 | Huge loss |
| Part 2: That’s only a skull, a thing, nothing more | 0 | +2 |
| Part 2: If you treasure it so much, then I’ll leave it to you. | 0 | +3 |
| Part 2: (Silent) | 0 | 0 |
| Part 3: Don’t even think about it. | 0 | +3 |
| Part 3: …Just a little, maybe. | +1 | -5 |
Sanity changes my total too: At the hand scene, sanity of 50 or less gives +1 Priest point, 40 or less gives +3, 30 or less gives +6, and 20 or less gives +11. Sanity above 50 adds nothing. Some scenes reduce sanity automatically, so I avoid choices with major penalties.
My save strategy: I arrive at the hand scene with 2–4 Priest points and save. That gives me access to all three choices and allows me to work toward every Priest ending from the same save.
Secret Ending – Priest Low Loop Route
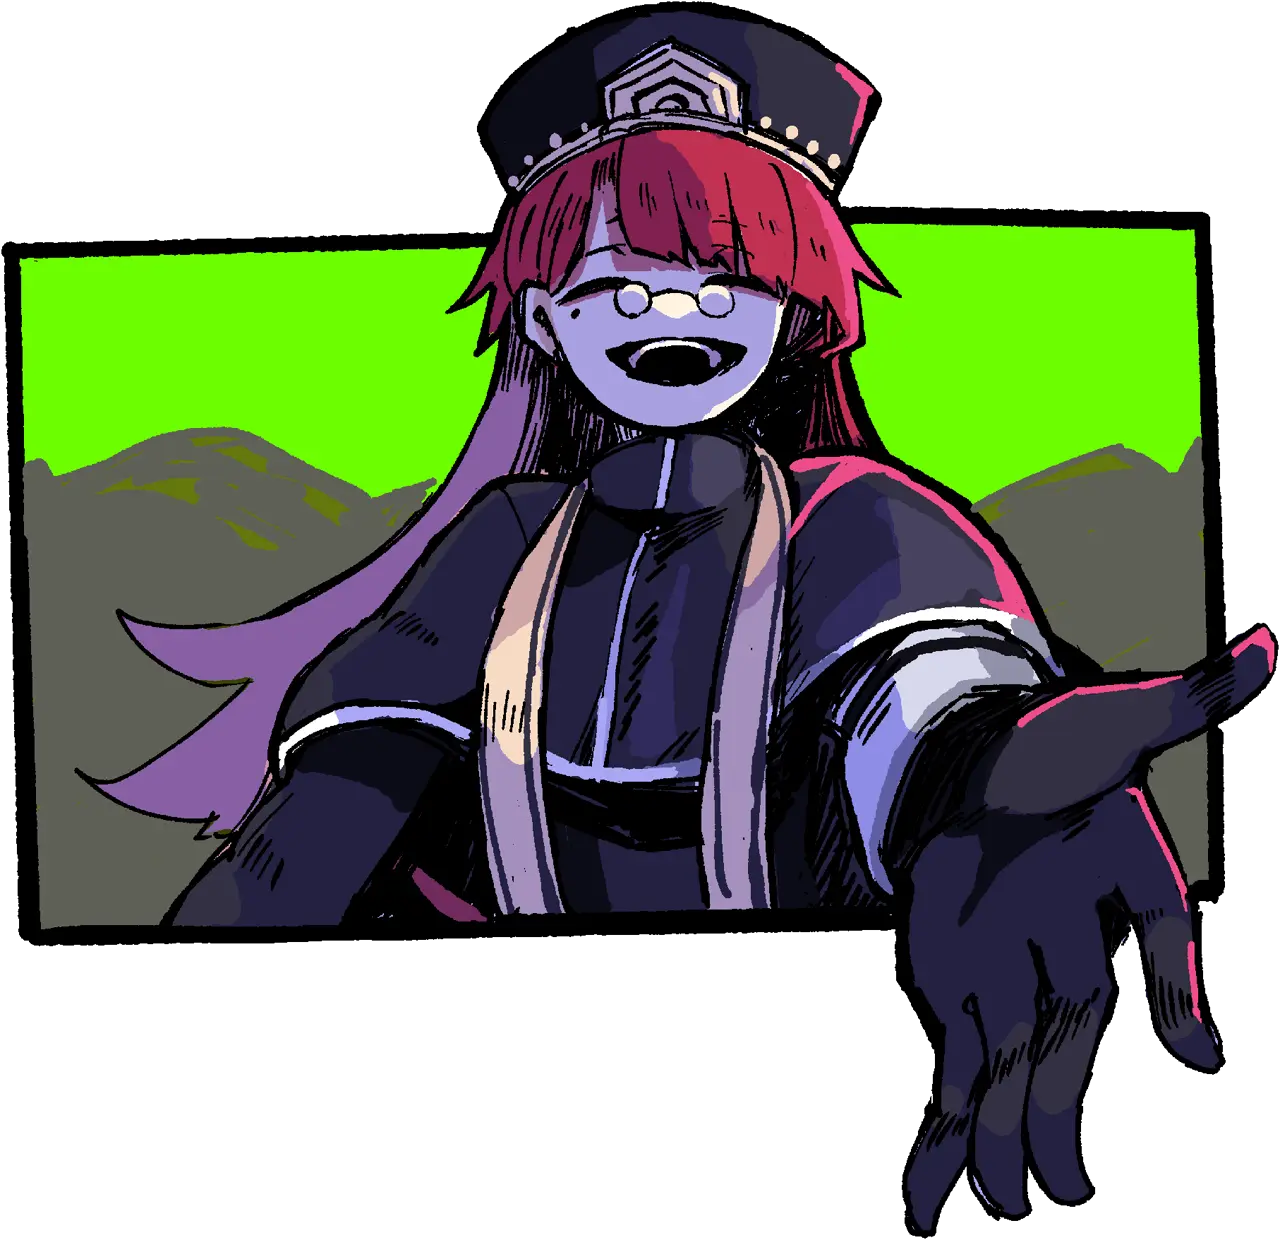
The Priest’s only good ending is also the one with the strictest requirements. I aim for this route first so other clears and deaths do not get in the way.
Secret Ending Requirements
- Loop count of 8 or less: I must have this when I defeat the Priest. A new game begins at 7 loops. Each game over adds 1, and so does the prologue ritual.
- No disqualifying route clears: I cannot have the Hero ending, the Mage Magic ending, or the Warrior Idol or Miniature Garden endings. I avoid finishing the Warrior route before this.
- Priest points: I need 4 or fewer points at the part 3 hand scene.
Before Starting the Secret Ending
- I turn off Steam Cloud for Annihilated, erase the existing save data, and begin a new game.
- In the prologue, I ask the Hero, Warrior, and Mage every available question to boost my starting sanity.
Rules I Follow During the Run
After the Priest finds my body, I avoid any further real game overs. If defeat is coming, I reload before the death scene begins. The following revival methods are safe for the loop count:
- The Immortality Potion (Undying).
- Items with the effect “When you would die, break this item instead and survive with 1 HP”. This effect does not activate in the final Priest battle, where curse saves me instead.
- The Priest’s Resurrection: Curse.
- Curse reviving me in the final Priest fight.
Before the hand scene, I prevent my sanity from reaching 30 or below, because that adds too many Priest points. In particular, I avoid the major sanity loss from “Trust the Priest” (-20).
I also bring plenty of curse to the final Priest fight. When my HP reaches zero, curse brings me back; if I run out, it becomes a real game over.
Other Endings I Can Try Before Low Loop
Important: This part is based on the game files and has not been verified in a playthrough. These endings do not appear to count as route clears or add loops, so they should not block Low Loop. For the safest route, I still complete the secret ending first on a fresh save, avoiding any death beyond the one needed to unlock the Priest.
- Hero: Dropout and Distrust.
- Warrior: Glitched World and Dropout.
- Mage: Unspoken, Love, Friendship, and Sheer Guts.
- Priest: All endings.
I avoid the Hero ending and the Mage’s Magic ending before Low Loop because they count as clears. I also avoid the Warrior’s Idol, Miniature Garden, Burden, and Glitched Idol endings: they always add a loop, and Idol and Miniature Garden count as clears as well.
If I meet every condition, the secret ending plays and the title screen changes to show the entire party together in the tavern.