This Deep Rock Galactic Rogue Core guide gives a clear first-run overview for players who want to understand how Rogue Core differs from regular DRG. I cover the main priorities of a solo run, including Exponite, the Workbench, Bio-Pod, swarm pressure, elevator defense, floor modifiers, and the final Gatekeeper boss fight.
DRG Rogue Core Complete Guide
This Deep Rock Galactic Rogue Core guide is meant to give a clear first-run overview for solo players. I focus on what to prioritize, when to keep moving, how swarms work, what happens between floors, and what to expect from the final Gatekeeper fight.
Deep Rock Galactic Rogue Core may take place in the Deep Rock Galactic setting, but it does not play the same way. The gameplay loop is faster, more hostile, and much more punishing.
You should expect to fail runs, especially early on. This is part of learning how Rogue Core works.
What I Prioritize on Every Floor
The main things I always try to grab on each level are the Workbench and the Bio-Pod.
Everything else is extra. Upgrade resources are useful, but they are not worth risking the entire run for. If the timer is getting low, I do not chase one more stat boost just because it is nearby. Leaving things behind is often the smarter choice.
Starting Your First Real Run
After finishing the tutorial, I go into my first actual mission. This guide is written with solo players in mind, so when I mention Chooper, you can think of it like Bosco’s role in regular Deep Rock Galactic.
At the start, I go through the greyed-out barrier and pick my weapon. There is also an equipment pod for grenades, but it cannot be opened on the first run. I simply ignore it because that is expected.
As I move through the cave, I look for the Bio-Pod and Workbench while collecting any Exponite I can. Chooper helps during fights, and when upgrades appear, I get a choice for myself as well as a version Chooper can use.
I pay attention here because anything I choose gets locked out for Chooper. An Epic upgrade is not always better if it does not fit my build as well as a Common or Uncommon stat boost.
Watching the Swarm Marker
In the top-left corner, there is a triangle with a marker along the side. That marker shows when a swarm is coming, similar to DRG.
Before it hits, I try to gather accessible Exponite. Early on, that usually means mining veins and kicking buckets while exploring around abandoned hardware, stairwells, lifts, and similar areas.
The swarm icons may show what type of swarm is coming, but I cannot fully confirm that, so I treat it with caution.
Combat Is Faster Than Deep Rock Galactic

This is where Rogue Core feels very different from DRG.
In regular Deep Rock Galactic, I might bunker down, hold my ground, clear a swarm, and then move on. In Rogue Core, that mindset can get me killed.
If I am not shooting, I should be mining, moving toward something useful, or running. The swarm can be beaten, but ammo is limited. Eventually, I will run out if I waste too much.
The smart approach is to keep an eye on the objective at the lowest floor and avoid overextending. If I let the timer fill completely, that usually means I mismanaged my time or pushed too far into the cave.
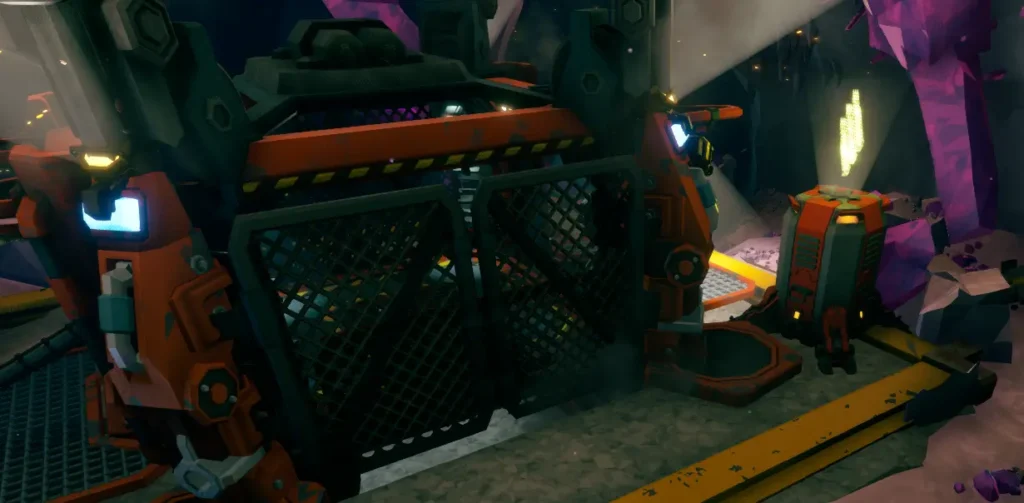
Defending the Elevator
The elevator section brings a larger, unending swarm. It feels similar to taking too long during Point Extraction, where enemies just keep spawning.
In Rogue Core, this is standard. I need to defend the elevator generator with my ammo and whatever tools my build gives me. The Corespawn will attack it directly, and if they break it, I must repair it before moving on.
I do not waste bullets, but I also do not hesitate when survival is at stake. From floor two onward, a free ammo pod spawns when I land, so I use what I have if it keeps me alive.
Once the elevator doors open, I get inside immediately. I do not stop for extra hits or small pickups. Even if I take damage, I will be healing anyway.
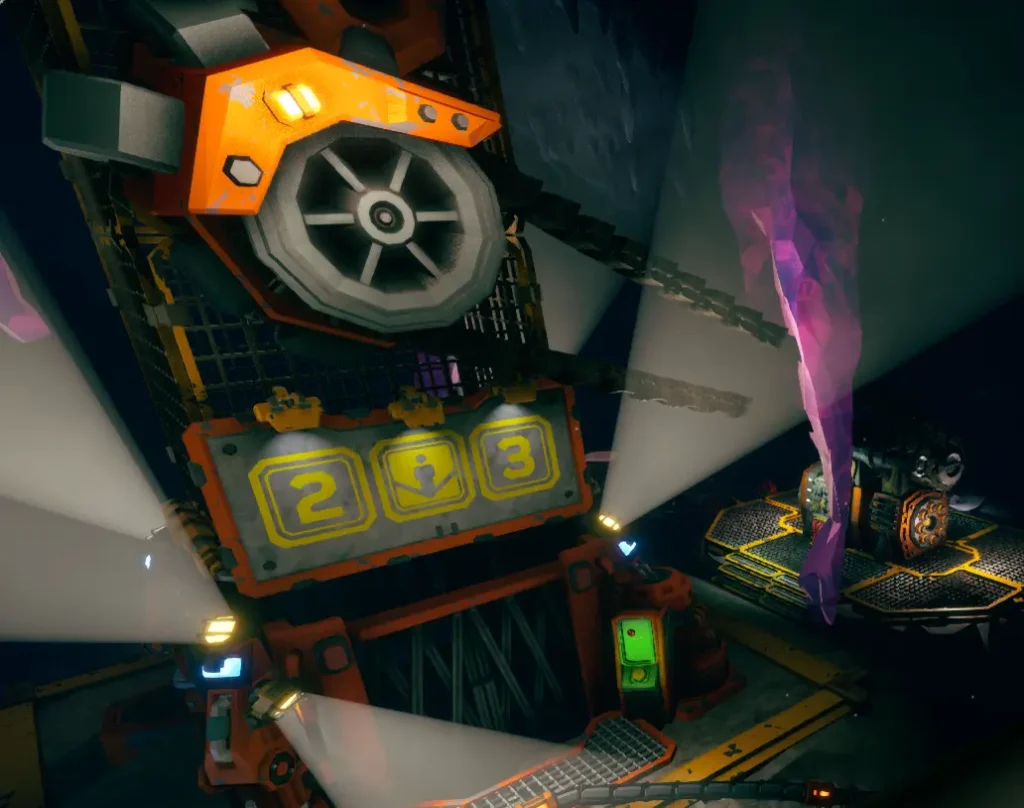
Choosing Between Floors
After finishing a floor, I get two options to choose from. I think of these like DRG hazards, but in Rogue Core, I must pick one before moving on.
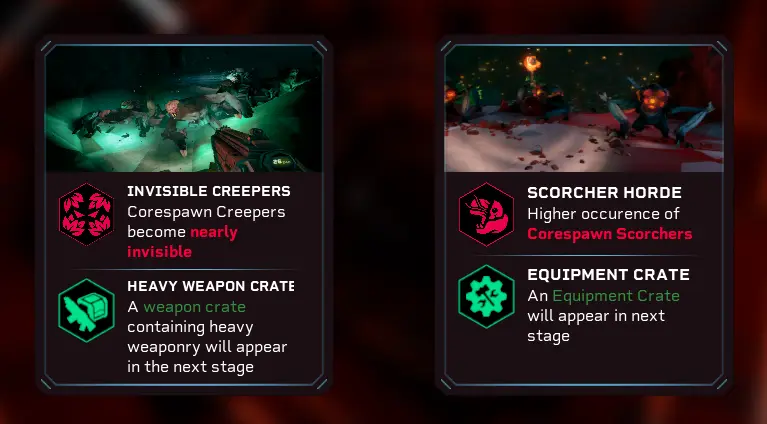
The caves might fill with ranged Corespawn. Enemies might become lethal and deal more melee damage. Something worse, like Cave Leech Cluster, might appear.
Each choice also brings a benefit for me. I might find an Exponite Gem buried in the wall, similar to Bittergem or Compressed Gold. I can dig it out, feed it to the Hovercar, and choose from Epic upgrades.
Another option might guarantee a crate with heavier weapons, such as the Minigun or Grenade Launcher. I might also get an equipment crate with tools similar to Engineer turrets or Driller C4.
I always think carefully here. The benefit usually helps me for that floor, but the Corespawn modifier can affect the rest of the mission. If my build is weak against armor, making armored enemies more common can make the run much harder.
I also avoid choosing upgrade rarity boosts too late if I will only get one useful boosted selection out of several remaining choices.
What Happens If I Waste Too Much Time
The timer is one of the biggest dangers in Rogue Core.
Glyphids usually swarm because mining operations disturb them or because eggs are taken. The Corespawn feel different. They hate me, act like a hivemind, and the swarms feel more like scouting parties for a larger army.

If the timer fills up, I take it as a warning that I made a mistake. The swarm will not stop, and it can grow into a horde I cannot fully kill.
This is also when Reaper Worms become a major problem. They spawn from the terrain, either floors or walls, and slowly snake toward me. Shooting them makes them back off, but I do not know if they can actually be killed.
If I fail to deal with them, they can charge, grab me, and drag me back to their den until someone frees me. They are like Cave Leeches, but worse because they pull me farther away from the elevator.

The worst part is that I still need to start and defend the elevator while Corespawn are already everywhere. If I survive and move down, great. If not, it is a learning experience for the next run.
Reaching the Final Floor
The last floor is where the run either succeeds or ends.
Unlike the previous floors, there is no more elevator and no powerline to guide me. The timer is still active, so I need to explore quickly.
I grab the last buffs and collect Exponite on the way when I can. My goal is to find a giant pit surrounded by several totemic orbs.
Before activating the orbs, I check the arena. I look for ammo pods, activate them, and make paths if I have time with my traversal tool. Once I am prepared and every orb is activated, the boss fight begins.
Fighting the Gatekeeper Boss
At the Early Access start, there is one of three Gatekeepers to fight. These bosses absorb a huge amount of bullets.
The health bar feels like Dreadnought armor. I need to break through it, and it can feel like the boss has too much health.
That is the point where I remind myself that Rogue Core is not just an extraction shooter. It is a roguelite, and early runs are meant to teach knowledge through failure.
It is possible to kill the Gatekeeper on the first run, but I expect most first attempts to end through attrition or running out of ammo. My own first attempt ended just after reaching Phase 3.
Gatekeeper Boss Mechanics
The fight is about wearing the Gatekeeper down until it retreats to the pit at the end of its health.
When that happens, it breaks one of the totems and sends the orb flying away, then regains health. I need to find the orb, pick it up, and carry it back to the pit.
While I carry it, the Gatekeeper keeps attacking. It fires blasts and sometimes sends out a concussive wave from the pit. If the orb is not in my hands, it can get shot into the far corners of the arena.
Because of that, I do not throw the orb too often. I walk it over, wait for a blast to pass, then toss it into the pit. Doing this removes one of the lower HP notches.
After that, I repeat the process and see how far I can push the fight.
Co-Op Upgrade Notes
In co-op, the biggest difference is upgrade selection.
There are five upgrades to choose from, and up to four players may be picking. Every time someone takes an upgrade, the turn order moves forward by one line. For example, if I picked a weapon third, then I may get a traversal tool second and my first upgrade first.
If there is something I really want for my build, I use the heart icon to show it. There is no reason not to communicate that in a co-op game.
Ideally, I also grab occasional cameras along the way. If I complete the basics and pick up the first two 1 Point Intel missions, I can unlock the grenades that were skipped in early runs, along with a few other things I will learn later.