In this walkthrough guide I will explain the achievements in monoch room and how to get them.
monoch room Walkthrough and Achievements
Monoch Room combines the usual Lu gameplay with some puzzle-solving and I encourage you to try it on your own, however I am providing you this guide if you are interested in completing this game as quickly as possible.
The game is divided in 10 rooms, each with an achievement plus an additional achievement for completing the game. Some rooms don’t really feature a puzzle, a few of them require trying out different solutions until you find the correct answer. The trial and error doesn’t involve a huge number of combinations, alas this walkthrough will lay out the answers for you.
Start
Begin the game in a room that may feel familiar if you’ve played Lu’s previous games.
- Walk towards the dog twice.
- Walk towards the bathroom, and you’ll enter the tub.
You wake up next to a strange pod with a HUGE AWOOGA MOMMY in the room.
- Walk towards her and then through the door.
MLG Pro Tip: At any time, you can interact with the radio to change the background music.
Room 1
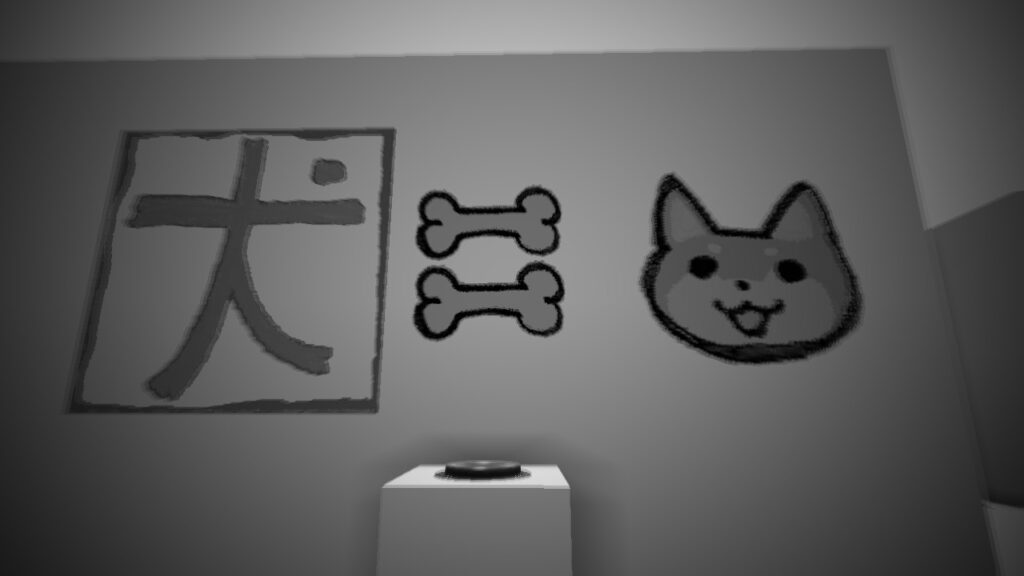
You need to set up a symbol on each wall by clicking on either the symbol or the nearby button.
From the door you entered, the symbols, in order from front to back, are:
- Diamond
- 1
- Gray X
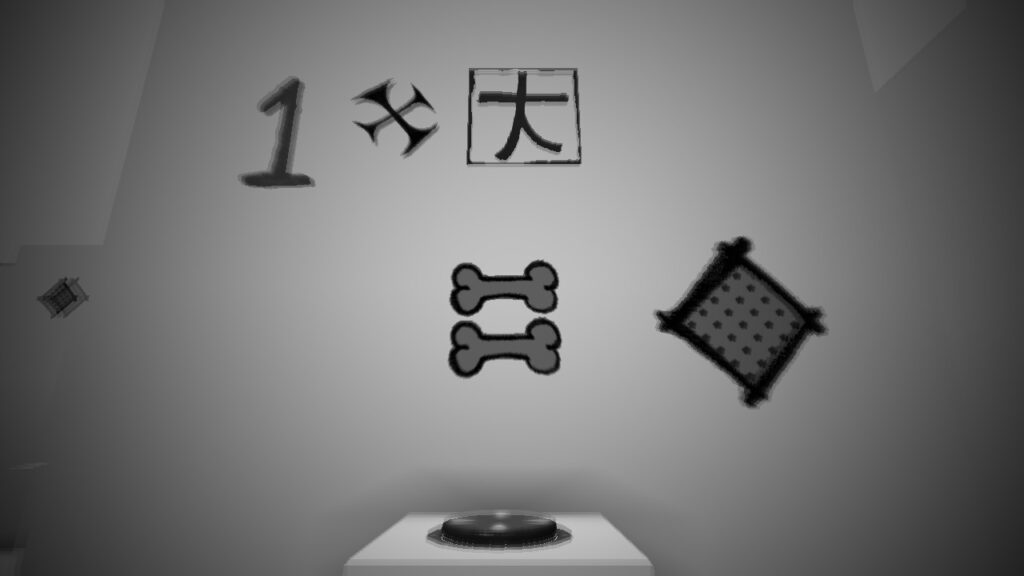
The door at the back will open. Head through it to reach…
Room 2
This room is a short maze, so follow these directions carefully:
- Head through the right opening, then right again.
- Follow the right wall until the next opening and turn left.
- Immediately turn right into the next opening, then left, and immediately right again, then left and straight ahead.
If you see a dog in the corner, you’re on track.
- Walk past the dog, turn right, then left, and you’ll see a few halls—two to the left and two to the right.
- Walk straight to the back wall, then turn right and walk straight until you can turn left into an opening.
- Head straight, ignore the right path, and go left, then right.
You should see a long hall with four openings on the left and four on the right.
- Go into the third opening on the right, and the room will open up, signaling the exit. Head straight (you’ll almost bump into Awooga Mommy’s rear around the corner). Follow her to the end of the room.
Room 3
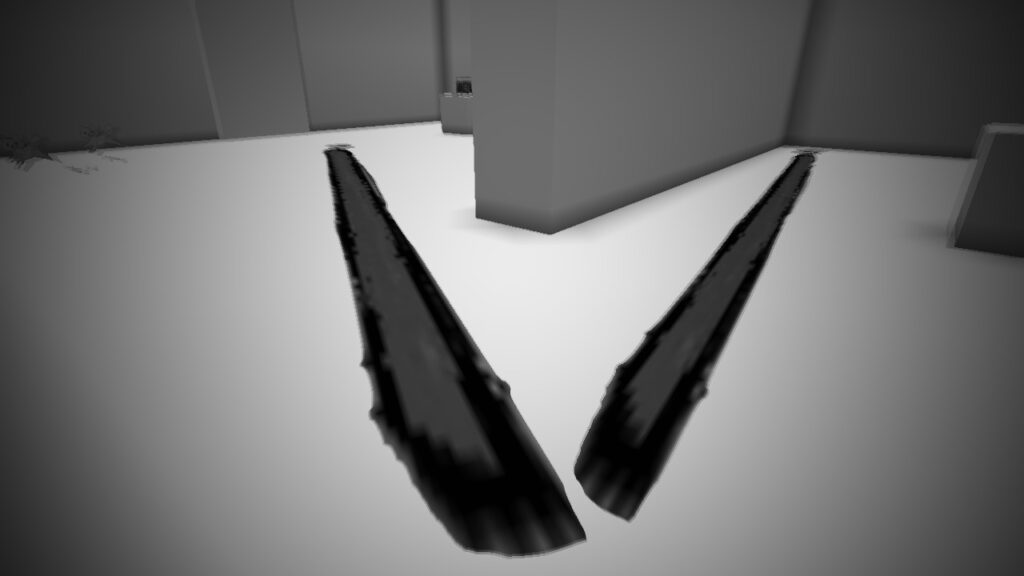
This is a ‘connect the dots’ room. Immediately to your left, on the floor, you’ll see a symbol (we’ll call it a disc). The switches cause lines to appear, and the objective is to connect both disc symbols by adjusting the lines with the buttons.
Since this is the first ‘connect the dots’ room, it acts as a tutorial. Keep hitting the buttons until you see the lines. Once all the lines connect from the first disc to the one on the wall, the door will open. Remember this mechanic for later.
Room 4
This is a ‘museum’ room. The side you start on has items on pedestals that you can click to turn around. The opposite side of the room has the same items in the positions they need to be in.
Go to the far side, pay attention to the alarm clocks and the bull. Then, adjust the items on the first side to mirror the back:
- The bull should face right.
- The digital clock should be 3/4 left (facing the door you entered).
- The alarm clock should face left (towards the back).
Once aligned, the door will open.
Room 5
No puzzle here—just enjoy the cutscene and the food made by Awooga Mommy. Walk towards her, and puppies will appear. Head towards the kitchen counter to proceed to the next room.
Electric Boogaloo
Room 6
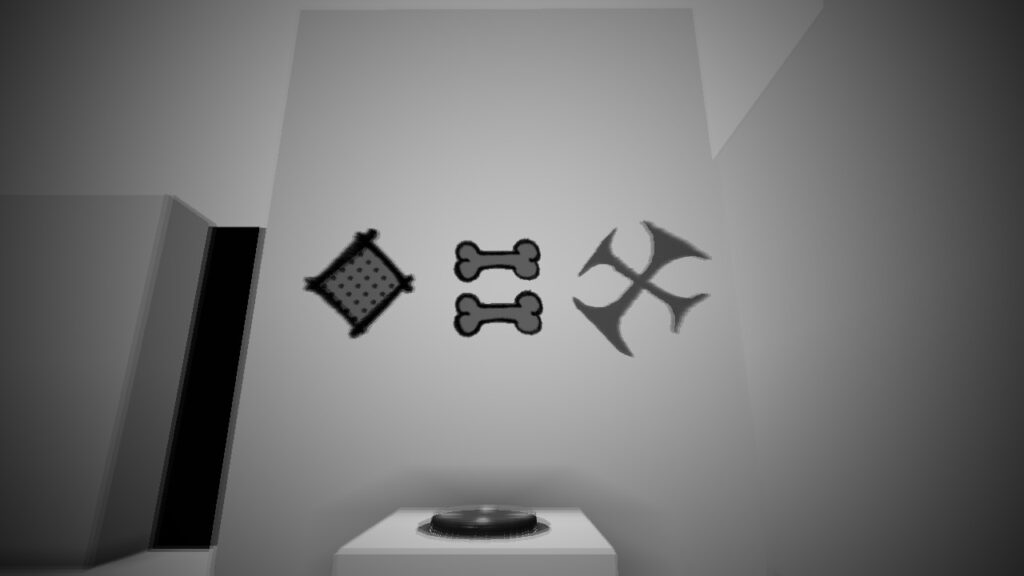
This is the first ‘trial and error’ room, where you need to step on the symbols in a specific order, indicated by a chime. If you mess up, you’ll hear a whistle. There are only three symbols, and you must step on each to move forward.
From the entrance:
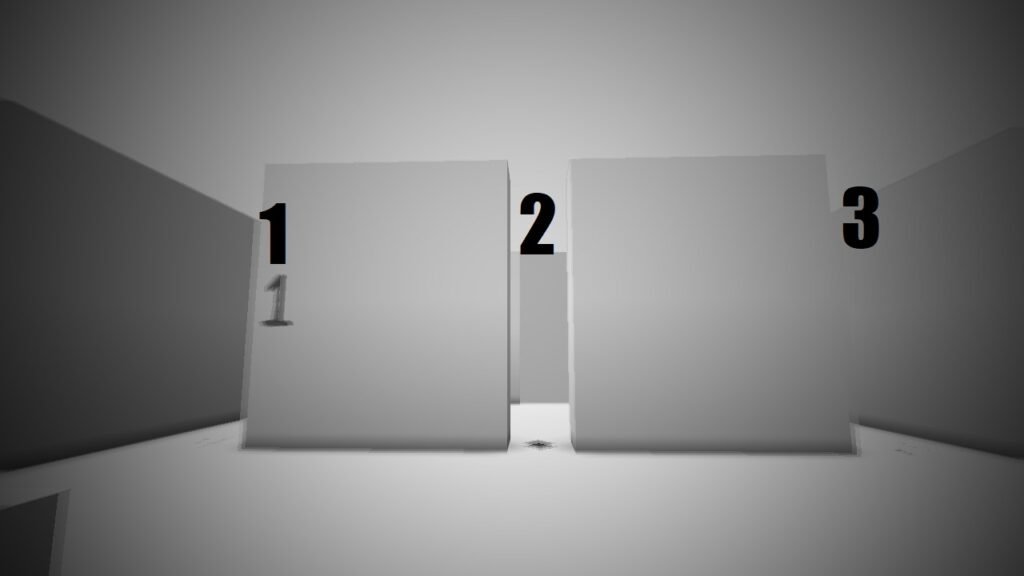
- 1 has a character (possibly katakana, but I might be mistaken).
- 2 is a diamond.
- 3 is an X.
Sequence:
Step on 1, then 3, 1, 2, 1, and finally 2. The chime will play faster each time, and the door will eventually open.
Room 7
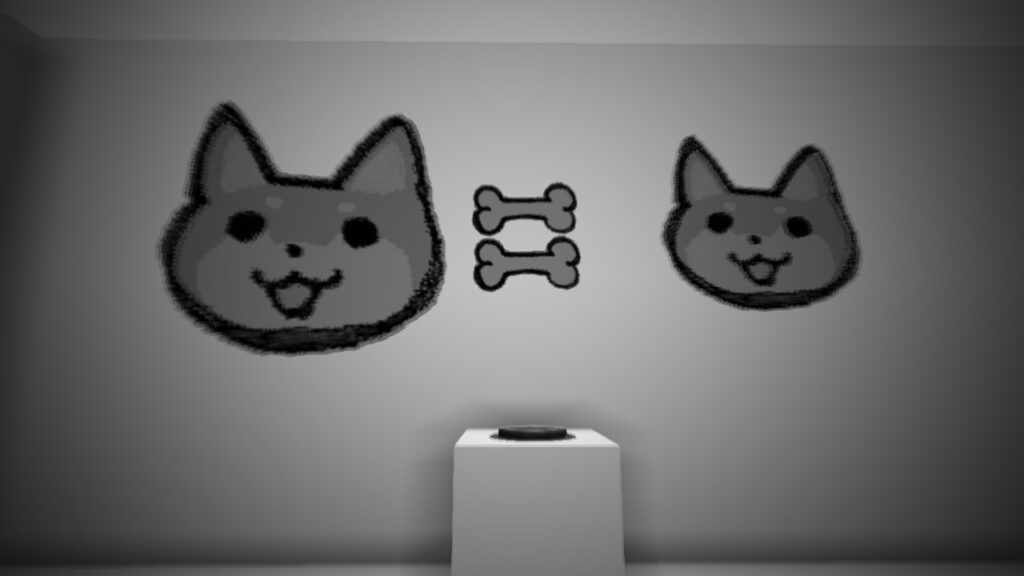
Another ‘connect the dots’ room. Here, you need to ensure two lines connect the first disc symbol to the one around the corner. The first two buttons should achieve this. (Ignore the ‘lighter’ disc symbol.)
The remaining two buttons will change the symbols on the wall. Make them puppy faces, and the door will open.
Room 8
No puzzle yet. Awooga Mommy will Sparta kick you.
- In the next room, walk towards the black wall at the back.
- In the next room, walk towards the cross gravestone at the back to find a note.
- A door will open; head through it.
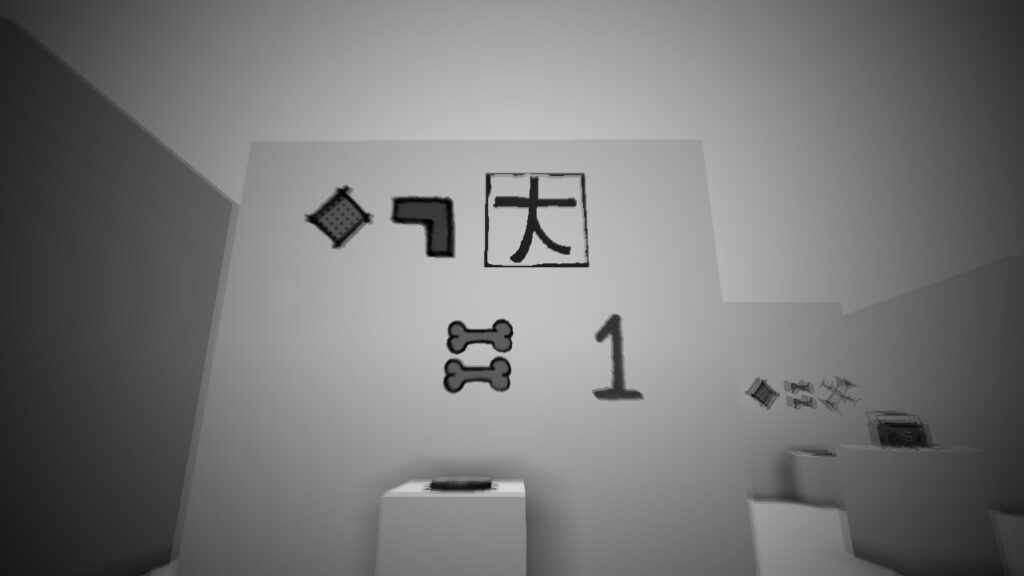
This leads to another ‘trial and error’ room with more symbols, but each is only used once.
Sequence:
- Step on 1.
- Step on the disc symbol near 1.
- Step on the small ‘L’ shape.
- Step on the character (the one I called katakana).
- Step on the diamond.
- Step on the ‘T’ shape.
- Step on the ‘X’.
- Step on the white disc.
The back wall will open; head through it.
Room 9
Another ‘connect the dots’ puzzle. Play around with the switches until all the dots connect. Keep in mind the lines can’t intersect. The final shape should look something like this:
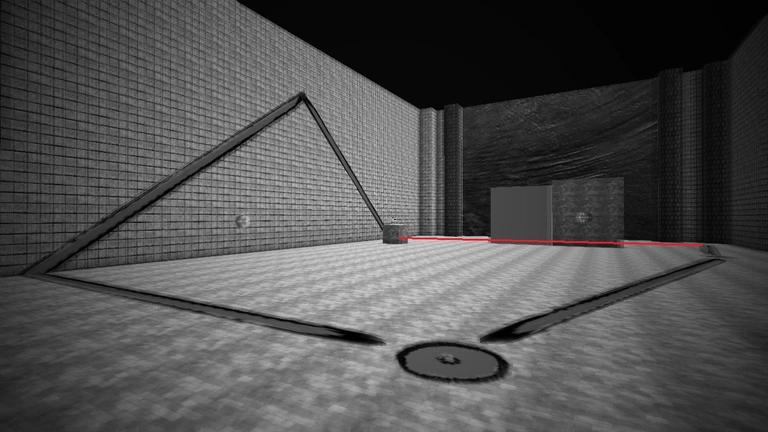
The red line runs through the floor from a disc symbol, behind the bookcases, and up the wall, giving you an idea of the final path.
Once completed, the back wall will open. Head through it to reach…
Room 10
Another ‘museum’ room. This one is simple: walk around and click the statues to make sure all are standing. The four small statues must match the big ones in the center of each group. For example, if the big bull is facing backward, the four surrounding it should also face backward.
Once you’ve adjusted all the groups, the back wall will open.
The next room is full of gravestones. Walk towards the back wall to find a note, then enter the final room, which has three symbol puzzles similar to Room 1.
Hit the buttons to make all the symbols small ‘L’ shapes. Follow Awooga Mommy through the back wall. Walk through the final puppy-filled room to enjoy what I consider to be the best ending in a Lu game so far and your final achievement!