If you’re trying to decide which crew members to recruit and how to build your team in SteamWorld Heist 2, this guide breaks down every class and recruitable character you’ll encounter throughout the Carribea. I’ll explain how crew recruitment works, what makes each class unique, and which characters naturally fit certain playstyles.

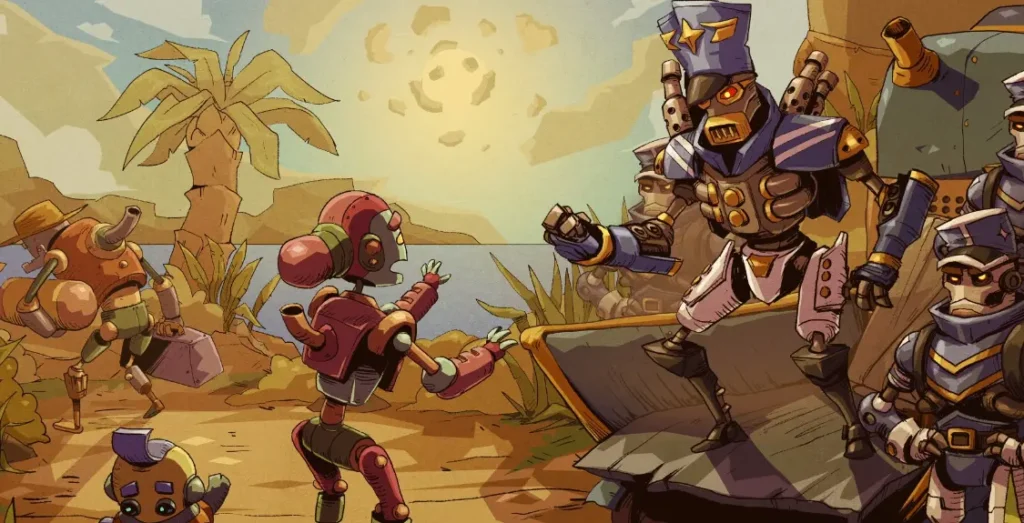
SteamWorld Heist 2 Crew & Class Guide
A collection of all the classes and crew members you will come across during your chronicles in the Carribea.
Recruiting Crew Members
- You start each save file with your initial two members, Daisy and Wesley – a Sniper and Reaper respectively.
- As you progress throughout the game, you will encounter the remaining crew members RANDOMLY at the various bars around the map. The members available will change each time you visit, and all are available from the onset. Yet, you will only have a limited number of spaces available in your crew, and you cannot remove a member once they have joined you.
- Therefore, you will not be able to take on everyone initially. As you progress in the story you will gradually unlock more crew slots, and eventually be able to carry everyone.
As you progress through the game, the characters who you don’t pick will automatically level up their primary job in the background, up to the maximum of five. So it’s not a big deal picking up a character later (you don’t really have to do much, if any grinding to bring them up to speed).
They will however not progress in secondary jobs, so by the late game, the last few members you pick up may feel a bit weaker than the rest of your crew.
Recruitment costs also increase with each member you add. With the final member costing 2000 gallons respectively.
Why you want to pick up crew members ASAP
A central system to the game is the fatigue mechanic. Crew members can go on a maximum of one successful mission before they need to rest at a bar. Any equipment they have on will be inaccessible until the crew member rests too (so you can’t just rotate your best items onto the rest of your crew and take on missions that way).
Completing a mission gains you not just EXP, but also bounty points too. These bounty points can be exchanged for various rewards when you go to rest for the day, such as gallons (used for buying gear and recruiting crew members), fragments (used for upgrading your ship and crew) and even rare weapons/items.
Earned bounty points do not carry over between days and instead convert to gallons at a fixed rate.
So you see? The more crew members you have, the more missions you can do, and the more bounty points you can obtain in one go. Allowing you to select rarer and higher quality rewards from the list.
So who’s the best?
In practice, the members of your crew will start to feel increasingly similar as you progress in the game due to the proliferation of the various job skills they gain from job switching. The fatigue system means you WILL be using every member at some point too if you want to get the good bounty rewards.
For the most part, just use whatever jobs on whatever characters you like, but if you increase the difficulty beyond Experienced, it may be worth considering in greater detail what your jobs are bringing to your characters and vice versa.
Also be cautious of the late game (final zone), where the limitations of the Brawler job become more readily apparent due to the sharp increase in flying enemies.
In my personal opinion, the tier list sorta looks like this on Normal (“Experienced”) once you get the second skills for your characters:
| S-Tier (Superior) | A-Tier (Always Useful) | B-Tier (Mostly Useful) | C-Tier (Situational) |
|---|---|---|---|
| Daisy | Wesley | Chimney | Crowbar |
| Poe | Tristan | Beacon | Sola |
| Cornelius | Dame |
Crew Pt. 1
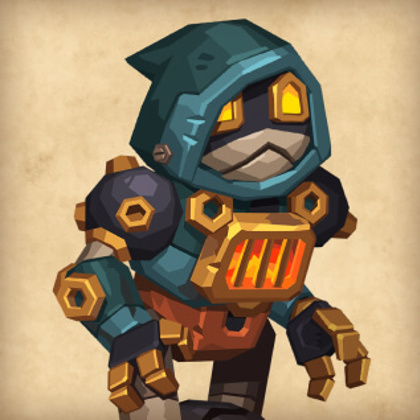
Daisy Clutch
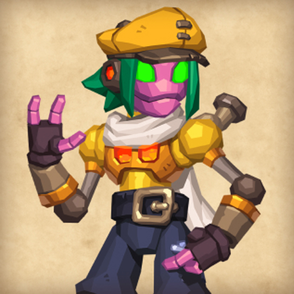
She may not have had many turns around the Core, but what she lacks in experience, she makes up for in adventurous spirit, and her stunning gunslinging.
Skill 1 – Stun Gun
An auxiliary sidearm type weapon. 1 Damage. 2 Charges. Stuns most enemies on hit.
Skill 2 – Studious
Cog costs for job skills are reduced by 1 (to a minimum of 1).
Notes
Daisy starts out as pretty unremarkable, but when she gets her second skill she will start to become one of the strongest, if not the strongest and most versatile character in your crew. As she can mix and match job skills to a degree that nobody else can.
Wesley Hotchkiss
His strange obsession with dying an honorable death is perhaps somewhat morbid, but he’s the most loyal bot you’ll ever meet. His precision-flinging of explosives is unmatched.
Skill 1 – Grenadier
The first Grenade-type utility item used each turn is a free action.
Skill 2 – Veteran Wardog
On Kill: Gain +1 damage for the remainder of the turn. Stacks up to 3 times to a total of +3 damage.
Notes
Wesley is an offensive powerhouse who functions best as either a Reaper or Boomer, as their attributes and passives are much more conductive to his second skill. The free grenade throw is also a nice little boon.
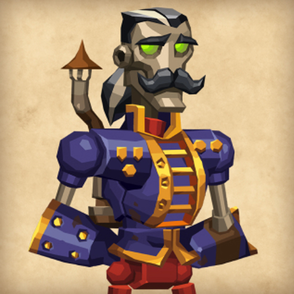
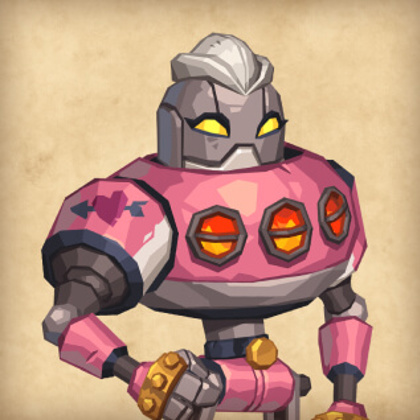
Dame Judy Wench
Both electrifying and accomplished, yet the Shard’s greater mythos seems to have mostly ignored her inspiring feats. What’s a Dame gotta do to get some recognition on this sea?
Skill 1 – Harsh Language
Instantly deal true damage (ignores armor) any target on the map. 3 Damage. 1 AP cost. 3 turn cooldown.
Skill 2 – Sick Burn
Upgrades Harsh Language. +1 Damage. Free action. Inflicts Burn. Hits all grounded targets within 2 tiles of the primary target (range affected by Aura stat).
Notes
Dame’s damaging skill supplements Engineers well, as any Aura boosts she has will apply to it as well. Boomers and Brawlers may also appreciate it for the gaps it fills in their kit (Boomer doesn’t like shooting things too close to it, Brawler can’t hit stuff too far away). It also makes her an asset on large or split maps as she can contribute to a fight regardless of where she is.
Poe Phroggi
A quick and nimble tirebot who can spot an opportunity for a con a mile away. But really she’s looking for is the quickest escape route out of her legacy.
Skill 1 – Hasty
Unconditional +2 Move.
Skill 2 – Slippery
Poe has a 50% chance to evade any enemy projectile that touches her. If successful, the projectile continues flying as if she were never there.
Notes
Poe’s passives are simple yet incredibly powerful and a boon to any class you assign to her. You really can’t pick wrong. She’s arguably the most versatile and powerful character next to late-game Daisy.
Cornelius Column
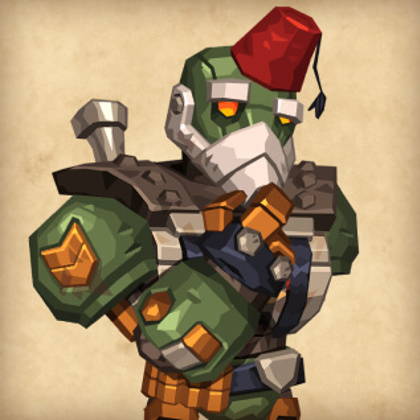
Hailing from the harsh reality of the outer parts of the core system, Cornelius’s philosophical nature is almost as impenetrable as his reinforced frame.
Skill 1 – Abs of Steel
Becomes invulnerable to all sources of damage until the start of his next turn. Taunts all enemies until the start of his next turn. Ends his turn when used. 1 Charge.
Skill 2 – Body Butter
Upgrades Abs of Steel. Free action. +1 Charge. 3 turn cooldown.
Notes
Cornelius is useful to have as a panic button. The taunt basically gives you a turn of breathing room in the event that the rest of your team is caught out of position, as enemies will hopelessly try to attack/move to attack him no matter what they were doing prior.
He can work well as most jobs since the benefits of his skill are similar no matter where he’s located on the battlefield.
Crew Pt. 2
Tristan Torque
Turned his ample free time & penchant for single minded focus into pure awesome. Dedication, exhilaration, expectations! This cool bot’s got it all! Everyone can see that, right?
Skill 1 – Always Prepared
Healing-type utility items become free actions. Recovers 1 HP when using Healing-type utility items to heal an ally.
Skill 2 – Believe It!
All attacks will consume a maximum of 1 AP.
Notes
Tristan has a less strict “order-of-operations” to his turns than other characters. This is because he can shoot, THEN move, rather than being forced to do the opposite. He is able to rapidly reposition and adjust to the changing battlefield in ways that other characters can’t. He can also just plant his feet and shoot twice every turn.
He is well suited for just about any job, as being able to shoot twice affords him consistently high damage.
Barbara “Crowbar” Crow
Not everyone can handle this wild ride. Their loss! If you want to get rich on this rough sea, got to keep your eyes on the prize, and this bird knows it’s all about the Gallons!
Skill 1 – Hollow Frame
Barbara can jump higher than usual.
Skill 2 – Bad Vibes
On-Hit: Deals 4 true damage to enemies within 2 tiles of the primary target (range affected by Aura stat).
Notes
Barbara is well suited for multiple jobs. Flanker, Brawler and Sniper all appreciate her greater vertical mobility, allowing her to retreat or flank the enemy in surprising ways. While Engineer can enhance the radius of her passive AoE attacks.
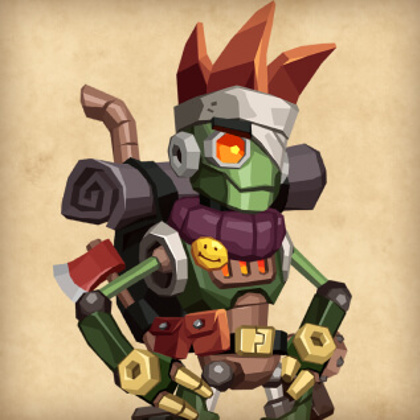
Rosa “Chimney” Rivet
Loves having a good laugh almost as much as she loves throwing her big fists around. A lively addition to any crew who doesn’t mind a little good natured roughhousing.
Skill 1 – Tit for Tat
Automatically deals 2 damage to anyone who attacks her (procs once per attack, not “per hit”).
Skill 2 – Double Down
Attacks will fire/shoot twice for the remainder of her turn. 5 turn cooldown.
Notes
Chimney is most comfortable on the frontlines, and can work well as a Brawler, Reaper, Boomer or even Flanker. It is recommended to increase her armor through any means you can, so that the returns from her Tit for Tat are maximized.
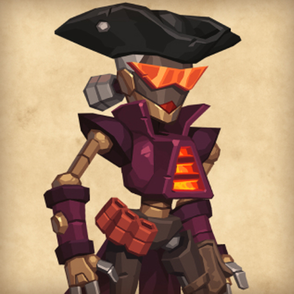
Beacon Potts
This timid marksbot may not think very highly of themselves, but they’ve got a crack aim and knows how to move under the radar.
Skill 1 – Scram
Instantly teleports to a visible unoccupied tile of your choice. 1 AP cost. 5 turn cooldown.
Skill 2 – Sneakstrike
Upgrades Scram. Free action. Grants invisibility for one turn.
Notes
Having access to a teleport is of great boon for classes that need to get in or out of position quickly. Beacon is well suited to being a Sniper or Brawler, as both classes appreciate the mobility that a teleport affords. He is also well suited to playing in a supportive, “healer” role with a class of your choice, as he can reach allies quicker than any other.
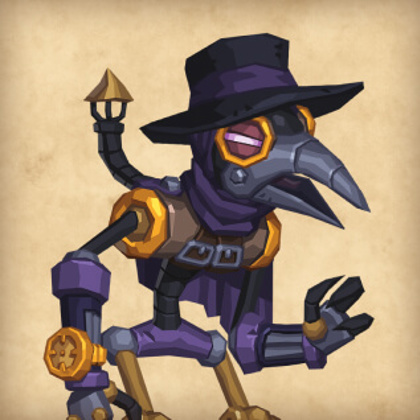
Sola Fathom
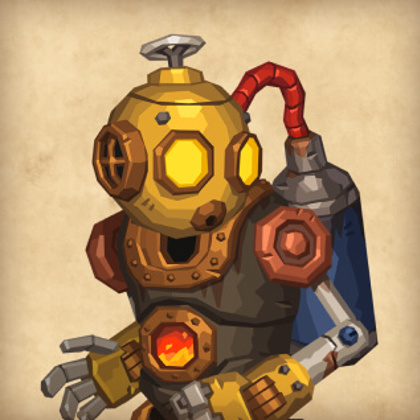
From the strange and crushing depths, Sola has surfaced with urgent tidings. It can be hard to understand the meaning of her words but she is sure to be a capable crew addition.
Skill 1 – Eldritch Beam
A piercing projectile with a very long laser sight. 5 damage. 1 AP cost. 10 turn cooldown. Cooldown is reduced by 1 turn for any kill Sola gets.
Skill 2 – Secrets of the Deep
Upgrades Eldritch Beam. +5 damage. Free action. Heals Sola for 1 HP for every target it kills.
Notes
Contrary to her starting job, Engineer, Sola is more suited for jobs that can quickly rack up multiple kills per turn, such as Boomers and Reapers. Her ability also supplements the lack of precision these two jobs suffer from.
On Cross-Classing
Every character can freely switch between the six jobs the game has available. To do so, simply equip them with the weapon type that corresponds to the job in question.
While a job is equipped, a character will gain access to all of the skills of that job at no additional cost.
When you switch to a new job, you will lose access to most of the skills within your previous one. The only exceptions are the common skills such as maximum HP increases and cog capacity boosts.
Every other skill will require a cost in “cogs” to equip ranging from 1 to 3.
Every character has a baseline amount of cogs to distribute amongst skills, and they gain more by levelling up jobs, when you buy certain upgrades, or from equipping extra cogs as utility items.
Every job also has unique “level 0” skills that are available from the onset for them, and cannot be cross-classed by any means (for example, Flanker is the only job that can use Wheel ‘n Deal).
In general, the more jobs a character levels up, the stronger they’ll be. So start cross-classing as soon as you can!
(And if you don’t switch often, then don’t worry! When a class is maxed out, all the EXP they earn goes into an overflow buffer that will be used to level up the next non-maxed job they complete a mission with!)
Brawler
Brawler is the game’s designated melee class. Their signature weapon is the Hammer. A hefty weapon that can destroy cover in one hit, and also grants access to the Charge ability that allows them to attack after sprinting for extra damage every-so-often. They are also naturally more resilient than other jobs, being the only one with innate armor.
Their damage output is reliable (no need to aim), so they’re good at confirming kills. Their damage output per-hit is on the higher end too, so they’re not bad at punching through armored targets. This does mean however that they may often err on the side of “overkilling” things (if you use a 9 damage hit to kill something with 2 HP left, there is 7 damage left over that could’ve been used on a healthier target).
Their weakness is that they’re not too flexible engagement-wise, as they are reliant on their fairly weak sidearm for dispatching flying enemies or those otherwise out of reach. This isn’t much of an issue early on, but is something to consider in the late game when environments become more cluttered (you can’t melee attack enemies if there’s not an empty space next to them, and spending a turn destroying cover with a melee attack is risky) and flying enemies are more common.
Chimney and Cornelius start as this class.
Upgrades:
| Level | Name | Type | Effect | Cost | Upgrade |
|---|---|---|---|---|---|
| 0 | Adrenaline | Passive | On-Kill (Melee): +1 HP | N/A | N/A |
| 0 | Trusty Sidearm | Active | Built-in auxiliary sidearm. Weapon. 3 damage. 2-turn cooldown. | N/A | +1 Damage (4 total) |
| 0 | Brawler Toughness | Passive | +1 Armor | N/A | N/A |
| 1 | Hard Shell | Passive | +1 Armor on the first attack that hits you each turn. | 2 | +1 Armor (+2 total) |
| 1 | Guts | Passive | Survive a lethal instance of damage with 1HP remaining. | 1 | N/A |
| 2 | Payback | Passive | +1 damage to your next attack after taking damage. Does not stack with itself. | 2 | Recovers 1 HP on kill while active |
| 2 | Blast Shield | Passive | Incoming indirect explosive damage is capped at 1 HP per hit. | 1 | N/A |
| 3 | Free Sidearm | Passive | Auxiliary sidearm-type weapons do not cost AP to use. | 1 | N/A |
| 3 | Cog Capacity | Passive | +1 Cog Capacity | 0 | N/A |
| 4 | Shifty | Passive | On Kill: Gain a free move for up to half your Move stat. | 3 | N/A |
| 5 | Second Wind | Passive | On Kill: Recover 1 HP | 2 | N/A |
| 5 | Thick Plating | Passive | +1 HP | 0 | N/A |
Boomer
The Boomer is the game’s explosives-expert class. Their forte is attacking enemies over a wide area with exploding armaments. Most comfortable at medium to long range.
Their primary weapon type is the Rocket Launcher; a straight-firing explosive weapon that does reduced damage on indirect hits.
There are also a few Grenade Launchers dotted around the game, which fire in an arc and bounce off walls. They do full damage on indirect hits.
Their strength is, as you would expect, attacking multiple enemies at once. However they can also use their AoE attacks to hit enemies through walls, which can be very convenient at times and compensates for their generally lacklustre ability when it comes to ricocheting shots.
Beware however, as their explosives can deal both self damage and friendly fire. They can be difficult to use when the battle lines are muddled because of this.
Dame starts as this class.
Upgrades:
| Level | Name | Type | Effect | Cost | Upgrade |
|---|---|---|---|---|---|
| 0 | Hidden Explosives | Active | Instantly destroy a chosen piece of cover and deal small damage to all nearby targets. 2 Damage. 2 Charges. Map-wide range. | N/A | +1 Damage, +1 Charge |
| 1 | Slot Machine | Passive | +1 Utility Item slot | 1 | -1 Cost (0 total) |
| 2 | Boom Boom | Passive | Increase the AoE of utility grenades by 50%. Utility grenades no longer deal damage to allies. | 1 | N/A |
| 2 | Fortify | Passive | Adjacent cover will survive one instance of lethal damage during the enemy’s turn. | 1 | N/A |
| 2 | Thick Plating | Passive | +1 HP | 0 | N/A |
| 3 | Mines | Passive | Once per turn, deal 3 damage to the first enemy to move within 1 tile of you. Range is affected by Aura stat. | 1 | N/A |
| 3 | Cog Capacity | Passive | +1 Cog Capacity | 0 | N/A |
| 3 | Thick Plating | Passive | +1 HP | 0 | N/A |
| 4 | Squeeze | Passive | +1 Charge for all utility items. | 3 | N/A |
| 5 | Loose Cannon | Active | For one turn, your Primary weapon will fire twice. Inflicts Unloaded on the user. 6 turn cooldown. | 3 | -1 turn cooldown (5 total), no longer inflicts Unloaded |
| 5 | Thick Plating | Passive | +1 HP | 0 | N/A |
Engineer
If any class in this game could be considered a support, Engineer would fit the bill. They make use of various AoE skills, both passive and active, to bolster their team’s performance.
Their signature weapon is the Handgun. A medium-range weapon that shoots twice, but has the unique ability to aim between each shot. Making them easy to handle at most ranges. Some variants even shoot three times instead of two.
Engineers will inflict the “Broken” status on any target they damage, which increases all further incoming damage they take. Because of this, you’ll generally want them to attack before the rest of your team to soften up the enemy.
Tristan and Sola start as this class.
Interactions:
- Loose Cannon / Double Down: Each trigger pull fires two bullets, so in effect a full attack will have you shooting 22 times (or 23 for triple shot variants).
- Hunter’s Mark: Grants another set of attacks upon killing the marked target. So in effect, you will be shooting 14 times (or even 16 for triple shot variants).
Upgrades:
| Level | Name | Type | Effect | Cost | Upgrade |
|---|---|---|---|---|---|
| 0 | Break | Passive | On-Hit: Inflict the “Broken” status effect. Broken enemies take +1 damage from all sources for one turn. | N/A | +1 to Broken damage (+2 total) |
| 1 | Build Cover | Active | Create a piece of durable low cover within two tiles of you. 2 Charges. Free action. | 2 | N/A |
| 1 | Greased Up | Passive | When opening a door to a hostile room (yellow light), you and allies within two tiles will gain +2 Move for the remainder of the turn. Range is affected by the Aura stat. | 1 | +1 Damage bonus (+2 Move, +1 Damage total) |
| 1 | Cog Capacity | Passive | +1 Cog Capacity | 0 | N/A |
| 2 | Amped Up | Passive | Allies within 1 tile of you gain +1 damage to their attacks. You gain this buff upon granting it as well. Range is affected by the Aura stat. | 3 | +1 Damage bonus (+2 total) |
| 2 | Wide Aura | Passive | +1 Aura | 1 | N/A |
| 2 | Cog Capacity | Passive | +1 Cog Capacity | 0 | N/A |
| 3 | Maintenance Protocol | Passive | Heals you and all allies within 1 tile for 4 HP each. Range is affected by Aura stat. 1 AP cost. | 2 | N/A |
| 3 | Cog Capacity | Passive | +1 Cog Capacity | 0 | N/A |
| 4 | Reactivate | Active | +1 AP (max: 2) to a chosen ally. 2 Charges. 1 AP cost. | 2 | N/A |
| 5 | Feel The Burn | Passive | +1 Melee Damage. +1 Shot Damage. On-Hit (Weapon/Melee): Inflicts the Burn status effect for 3 turns (-2 HP at the end of the turn). | 2 | N/A |
| 5 | Thick Plating | Passive | +1 Max HP | 0 | N/A |
Sniper
Snipers are long-range specialists, able to reliably hit long range ricochet shots with precision, easily bypassing cover in ways other classes may struggle with.
Their signature weapon is the Sniper Rifle. A single-shot high-damage projectile weapon with an innately longer laser sight than other weapon types. This weapon becomes Unloaded after shooting, and requires 1 AP to reload.
Much like Brawlers, they’re good at punching through armor, but have a tendency to “overkill” things.
When they can plant their feet and fire at will, they’re at their strongest. But their damage output drops off a fair bit if they’re constantly having to relocate. Suffice to say, try to keep them still and take advantage of their longer laser sight to feel out more esoteric shots.
Daisy and Beacon start as this class.
Upgrades:
| Level | Name | Type | Effect | Cost | Upgrade |
|---|---|---|---|---|---|
| 0 | Power Shot | Passive | +1 Damage to your primary weapon for the remainder of your turn. | N/A | +1 Damage (+2 total) |
| 1 | Perfect Aim | Active | Your attacks have a full laser sight and near zero sway for the remainder of your turn. 3 turn cooldown. | 1 | N/A |
| 1 | Reticle Eyes | Passive | +1 Aim | 1 | N/A |
| 2 | Focus | Passive | +1 damage to all attacks if you have not moved this turn. | 3 | +1 Damage (+2 total) |
| 3 | Surgical Strike | Passive | +50% Critical Hit chance | 2 | N/A |
| 3 | Hot Reload | Passive | Reloads the equipped weapon automatically at the end of the turn if you do not move. | 0 | N/A |
| 3 | Cog Capacity | Passive | +1 Cog Capacity | 0 | N/A |
| 4 | Smoke Bomb | Active | Grants invisibility (untargetable by enemies) to you and all allies within 1 tile. Range affected by Aura stat. 1 charge. | 2 | N/A |
| 4 | Reticle Eyes | Passive | +1 Cog Capacity | 1 | N/A |
| 5 | Hunter’s Mark | Active | Every turn, mark one random enemy. If the marked enemy is killed by your primary weapon, gain a free attack. | 3 | Marked enemies take +2 damage from your primary weapon |
| 5 | Thick Plating | Passive | +1 HP | 0 | N/A |
Reaper
Reaper is a short-medium range class who you will generally want to move last out of your team. This is because they gain an extra attack in any turn where they land a killing shot, allowing them to rapidly finish off foes.
Their primary weapon type is the SMG. A projectile weapon that fires multiple shots in a burst-fire pattern. This burst fire makes the weapon unreliable at longer distances due to the recoil, and it is not uncommon for only a few shots of a burst to actually hit their mark.
There is a secondary weapon type as well – the Crossbow – which does more damage, but fires in an arc and whose shots do not bounce off walls.
In general, they’re good at finishing off soft targets, but lose out when dealing with heavily armored foes.
The reasoning for this is MATH. Let us posit that we have a foe who reduces all incoming damage sources by 1 point.
If we shoot them with a 6 damage bullet, we will do 5 damage in total. (6 – 1) = 5
If we shoot them with three 2 damage bullets, we will do 3 damage. ((2-1)*3) = 3
Reaper’s weaknesses are threefold: Long-range attacks are unreliable, they have difficulty punching through armor by themselves, and their damage output is fairly insubstantial if they aren’t landing killing blows on enemies.
Wesley starts off as this class.
Upgrades:
| Level | Name | Type | Effect | Cost | Upgrade |
|---|---|---|---|---|---|
| 0 | Kill Shot | Passive | On-Kill: Gain another attack (must be taken immediately). Procs once per turn. | N/A | N/A |
| 0 | Close to Death | Passive | -1 HP | N/A | N/A |
| 1 | Warcry | Passive | +1 damage to all attacks for you and allies within 1 tile. 5 turn cooldown. Range is affected by Aura stat. | 2 | +1 damage (+2 total) |
| 1 | Crit Damage | Passive | +1 damage for critical hits | 1 | N/A |
| 2 | Rage | Passive | Your attacks deal +1 damage when you’re missing at least three health. | 2 | Rage stacks. +1 damage for every 3 health missing |
| 3 | Momentum | Passive | On-Kill: Gain +1 Move. Stacks up to three times. Lose all stacks upon ending a turn without killing. | 2 | N/A |
| 3 | Crit Damage | Passive | +1 damage for critical hits | 1 | N/A |
| 3 | Cog Capacity | Active | +1 Cog capacity | 0 | N/A |
| 4 | Harvest | Passive | For one turn, gain another attack when your primary weapon gets at least one kill. 1 charge. | 3 | +1 charge (2 total) |
| 5 | Grim Reaper | Active | Instantly kill any non-airborne, non-boss enemy and teleport to their location. 10 turn cooldown. | 3 | N/A |
| 5 | Thick Plating | Passive | +1 HP | 0 | N/A |
Flanker

Flanker is a short range class with high mobility. Adept at getting behind enemy lines to shoot them where they’re most vulnerable. They are the only class who can unconditionally act after sprinting, using their unique class ability: Wheel ‘n Deal.
They’re also good at collecting loot scattered across the ground.
Their signature weapon is the shotgun. A projectile weapon that fires multiple bullets in a spread pattern. Naturally this makes their damage rather low at longer distances as less pellets will hit their mark, so get them close!
Much like Brawler, they really need to close the gap in order to do damage. But they’re not as durable as the Brawler, so there’s a tad more risk involved when they do so. Like Reaper too, they struggle with armor initially due to the nature of their weapon (damage spread across multiple pellets), but they eventually gain a skill to help circumvent this.
Crowbar and Poe start as this class.
Note: Normally, the action taken during Wheel ‘n Deal must an attack/utility item. However, if a free item is used, the AP can then be used for movement. Allowing Flanker to move up to 3x their Move stat instead of the usual two. It is unknown if this is a bug or not.
Upgrades:
| Level | Name | Type | Effect | Cost | Upgrade |
|---|---|---|---|---|---|
| 0 | Kill Shot | Active | +1 primary weapon damage. If you end your turn with a movement, gain +1 AP. | N/A | N/A |
| 0 | Cash Flow | Passive | Can pick up loot from 1 tile away. Range is affected by Aura stat. | N/A | N/A |
| 0 | Flanker Speed | Passive | +1 Move | N/A | N/A |
| 1 | Backbiter | Passive | +1 damage for attacks that hit the rear of enemies. | 3 | Rear attacks ignore armor |
| 1 | Flanker Speed | Passive | +1 Move | 1 | N/A |
| 2 | Cool | Passive | All cooldowns are reduced by 1. | 2 | N/A |
| 2 | Sidestep | Passive | Teleport to an unoccupied space within 3 tiles. Range affected by Aura. 4 turn cooldown. | 1 | +1 base range. -1 turn cooldown |
| 3 | Payroll | Passive | +1 AP (max: 2) when picking up loot. Procs once per turn. | 2 | N/A |
| 3 | Cog Capacity | Passive | +1 Cog capacity | 0 | +1 charge (2 total) |
| 4 | Light Step | Passive | Immune to harmful floor effects. | 2 | N/A |
| 4 | Flanker Speed | Passive | +1 Move | 1 | N/A |
| 5 | Penetrator | Active | For the remainder of your turn, attacks pierce through enemies. | 3 | N/A |
| 5 | Thick Plating | Passive | +1 HP | 0 | N/A |